# Start the auto control by AI
Source: https://docs.phospho.ai/ai-training/ai-control-start
post /ai-control/start
Start the auto control by AI.
# Stop the auto control by AI
Source: https://docs.phospho.ai/ai-training/ai-control-stop
post /ai-control/stop
Stop the auto control by AI.
# Cancel Training
Source: https://docs.phospho.ai/ai-training/cancel-training
post /training/cancel
Cancel a training job
# Start training a model
Source: https://docs.phospho.ai/ai-training/start-training
post /training/start
Start training an ACT or gr00t model on the specified dataset. This will upload a trained model to the Hugging Face Hub using the main branch of the specified dataset.
# Manipulate LeRobot datasets
Source: https://docs.phospho.ai/basic-usage/dataset-operations
How to repair, merge, split and delete LeRobot datasets
You just recorded a LeRobot dataset with your robot. Maybe you also downloaded a dataset from the HuggingFace hub. With phospho, you can:
* repair corrupted datasets
* merge two datasets into one
* split a dataset into multiple datasets (e.g. training/validation/test sets)
* delete episodes from a dataset
## Prerequisites
You need to install the phosphobot software on your computer. If you haven't done it yet, follow the [installation guide](/installation).
```bash macOS
curl -fsSL https://raw.githubusercontent.com/phospho-app/phosphobot/main/install.sh | bash
```
```bash Linux
curl -fsSL https://raw.githubusercontent.com/phospho-app/phosphobot/main/install.sh | sudo bash
```
```powershell Windows
powershell -ExecutionPolicy ByPass -Command "irm https://raw.githubusercontent.com/phospho-app/phosphobot/main/install.ps1 | iex"
```
```bash uv (Linux and macOS)
# Install uv: https://docs.astral.sh/uv/
curl -LsSf https://astral.sh/uv/install.sh | sh
# Run phosphobot
uvx phosphobot@latest run
```
```powershell uv (Windows)
# Install uv: https://docs.astral.sh/uv/
powershell -ExecutionPolicy ByPass -c "irm https://astral.sh/uv/install.ps1 | iex"
# Run phosphobot
uvx phosphobot@latest run
```
For any of this operations, go to the dashboard and click on the `Browse Datasets` tab. Then move to the `lerobot_v2.1` folder.
You will see all your local datasets. To download a dataset from the HuggingFace hub, click on the `Add from hub` button. It will be downloaded and added to your local datasets.
## Repair a dataset
Select a dataset and click on the `Repair Selected Dataset` button. This will check that your dataset is valid and fix common LeRobot issues.
## Merge two datasets
Select two datasets and click on the `Merge Selected Datasets` button. This will merge the two datasets into a single dataset.
For now, you can only merge two local datasets at a time. If you need to merge more, you can do it recursively.
## Split a dataset
Select a dataset and click on the `Split Selected Dataset` button. This will split the dataset into two datasets.
## Delete a dataset
Select a dataset and click on the `Delete Selected Dataset` button. This will delete the dataset from your local datasets.
## Upload the dataset back to HuggingFace
Click the 3 dots on the right of the dataset and select `Push to Hugging Face Hub`. This will upload the dataset to your HuggingFace account.
## Visualize your dataset
Once your dataset is uploaded to HuggingFace, you can view it using the [LeRobot Dataset Visualizer](https://huggingface.co/spaces/lerobot/visualize_dataset). This will also check that your dataset is valid.
The dataset visualizer only works with the `AVC1` video codec. If you used
another codec, you may see black screens in the video preview. Preview
directly the videos files in a video player by opening your recording locally:
`~/phosphobot/recordings/lerobot_v2/DATASET_NAME/video`.
Looking good? You're ready to train your AI model!
# What's next
How to train an AI model from a dataset you recorded
# Record a robotics dataset
Source: https://docs.phospho.ai/basic-usage/dataset-recording
How to record a robotics dataset with your robot?
The easiest way to record datasets is to use the phospho Meta Quest app to control your robot arm.
Recorded datasets are saved in the `lerobot_v2` format from **[LeRobot](https://huggingface.co/lerobot)** and uploaded to your HuggingFace account.
Alternatively, you can implement your own dataset recording logic on top of the phospshobot API. Use the [Start Recording Episode](/recording/start-recording-episode) and [Stop Recording Episode](/recording/stop-recording-episode) endpoints to start and stop recording episodes. You can also read the [joints positions](/control/read-joints).
## Prerequisites
1. You need a robot arm such as the SO-100, the SO-101, or [other compatible hardware](https://github.com/phospho-app/phosphobot). Get the [phosphot starter pack here](https://robots.phospho.ai).
2. Install [the phosphobot software](/installation)
```bash macOS
curl -fsSL https://raw.githubusercontent.com/phospho-app/phosphobot/main/install.sh | bash
```
```bash Linux
curl -fsSL https://raw.githubusercontent.com/phospho-app/phosphobot/main/install.sh | sudo bash
```
```powershell Windows
powershell -ExecutionPolicy ByPass -Command "irm https://raw.githubusercontent.com/phospho-app/phosphobot/main/install.ps1 | iex"
```
```bash uv (Linux and macOS)
# Install uv: https://docs.astral.sh/uv/
curl -LsSf https://astral.sh/uv/install.sh | sh
# Run phosphobot
uvx phosphobot@latest run
```
```powershell uv (Windows)
# Install uv: https://docs.astral.sh/uv/
powershell -ExecutionPolicy ByPass -c "irm https://astral.sh/uv/install.ps1 | iex"
# Run phosphobot
uvx phosphobot@latest run
```
3. Connect your cameras to the computer. Start the phosphobot server.
```bash
phosphobot run
```
4. Complete the [quickstart](/so-100/quickstart) and check that you can [control your robot](/basic-usage/teleop).
5. You have the **[phosphobot teleoperation app](/examples/teleop)** is installed on your **Meta Quest 2, Pro, 3 or 3s**
Unlock access to VR Control, advanced AI training, and more.
Get the phospho teleoperation app on the Meta Store for Meta Quest 2, Pro, 3, and 3s.
If you bought our [phospho starter pack](https://robots.phospho.ai/starter-pack), you should have received a link to get the phospho teleoperation Meta Quest app. Please [reach out](mailto:contact@phospho.ai) if not.
# 1. Set up your Hugging Face token
To sync datasets, you need a Hugging Face token with write access. Follow these steps to generate one:
1. Log in to your Hugging Face account. You can create [one here for free](https://huggingface.co)
2. Go to **Profile** and click **Access Tokens** in the sidebar.
3. Select the **Write** option to grant write access to your account. This is necessary for creating new datasets and uploading files. Name your token and click **Create token**.
4. **Copy the token** and **save it** in a secure place. You will need it later.
5. Make sure the phosphobot server is running. Open a browser and access `localhost` or `phosphobot.local` if you're using the control module. Then go to the Admin Configuration.
6. **Paste the Hugging Face token**, and **save it**.
## 2. Set your dataset name and parameters
Go to the *Admin Configuration* page of your phospshobot dashboard. You can adjust settings. The most important are:
* **Dataset Name**: The name of the dataset you want to record.
* **Task**: A text description of the task you're about to record. For example: *"Pick up the lego brick and put it in the box"*. This helps you remember what you recorded and is used by some AI models to understand the task.
* **Camera**: The cameras you want to record. By default, all cameras are recorded. You can select the cameras to record in the Admin Configuration.
* **Video Codec**: The video codec used to record the videos. The default is `AVC1`, which is the most efficient codec. If you're having compatibility issues due to unavailable codecs (eg on Linux), switch to `mp4v` which is more compatible.
## 3. How to record a dataset using the phosphobot teleoperation Meta Quest app?
The phospho teleoperation app works with a [Meta Quest](https://www.meta.com/fr/quest/quest-3/?srsltid=AfmBOorMLUmJKFQr35ssCi1DDqSNgpHk0sLHqo_tHG8kgclCYbMToAPa). Compatible models: Pro, 2, 3, 3s.
1. In the Meta Quest, open the phospho teleop application. Wait a moment, then you should see a row displaying **phosphobot** or your computer name. Click the **Connect** button using the `Trigger Button`.
Make sure you're connected to the same WiFi as the phosphobot server or the control moduleIf you don't see the server, check the IP address and port of the server in the phosphobot dashboard and enter it manually.
2. After connecting, you'll see the list of connected cameras and recording options.
* Move the windows with the `Grip button` to organize your space.
* Enable preview to see the camera feed. Check the **camera angles** and adjust their positions if needed.
We recommend **disabling** the camera preview to save bandwidth.
3. Press `A` once to start teleoperation and begin moving your controller.
* The robot will naturally follow the movement of your controller. Press the `Trigger button` to close the gripper.
* Press `A` again to stop the teleoperation. The robot will stop.
4. Press `B` to start recording. You can leave the default settings for your first attempt.
* Press `B` again to stop the recording.
* Press `Y` (left controller) to discard the recording.
5. Continue teleoperating and stop the recording by pressing `B` when you're done.
6. The recording is automatically saved in **LeRobot v2** format and **uploaded to your HuggingFace account.**
## 4. Check your dataset
Datasets are saved on the computer running the phosphobot server at `~/phosphobot/recordings/DATASET_NAME` folder in the phosphobot directory. Explore the recordings in the phosphobot dashboard using the *Dataset Browser*.
If you added your Hugging Face token in the dashboard, the recorded datasets are **automatically uploaded to your HuggingFace account.**
Go to your [Hugging Face profile](https://huggingface.co) to see the uploaded datasets.
## 5. Visualize your dataset
Once your dataset is uploaded to HuggingFace, you can view it using the [LeRobot Dataset Visualizer](https://huggingface.co/spaces/lerobot/visualize_dataset).
The dataset visualizer only works with the `AVC1` video codec. If you used another codec, you may see black screens in the video preview.
Preview directly the videos files in a video player by opening your recording locally: `~/phosphobot/recordings/lerobot_v2/DATASET_NAME/video`.
Looking good? You're ready to train your AI model!
# What's next
How to train an AI model from a dataset you recorded
# Control robot with AI models
Source: https://docs.phospho.ai/basic-usage/inference
How to make an AI model control your robot?
You just [trained an AI model](/basic-usage/training) and now you want to use it to control your robot. Let's see how you can do that.
Disclaimer: Letting an AI control your robot carries risk. Clear the area from
pets, people and objects. You are the only one **responsible** for any damage
caused to your robot or its surroundings.
## Control your robot with AI from the phosphobot dashboard
If you trained your model using phosphobot, you can control your robot directly from the phosphobot dashboard.
You can fine tune the model in a single click from the dashboard. [Go here to
learn how.](/basic-usage/training)
1. **Connect your robots and your cameras** to your computer. **Run the phosphobot server** and go to the phosphobot dashboard in your browser: [http://localhost](http://localhost)
```bash
phosphobot run
```
2. Create a phospho account or log in by clicking on the **Sign in** button in the top right corner.
3. *(If not already done)* Add your Hugging Face token in the **Admin Settings** tab with **Write authorization**. [Read the full guide here](/basic-usage/dataset-recording#1-set-up-your-hugging-face-token).
4. In the **AI Training and Control** section, enter the instruction you want to give the robot and click on **Go to AI Control**. Accept the disclaimer. You'll be redirected to the AI Control page.
5. In the **Model ID**, enter the name of your model on Hugging Face (example: `phospho-app/YOUR_DATASET_NAME-A_RANDOM_ID`). Double check the camera angles so that they match the ones you used to record the dataset.
6. Click on **Start AI Control**. Please wait: the first time, starting a GPU instance and loading the model can take up to 60 seconds. Then the robot will start moving.
You can pause, resume, and stop the AI control at any time by clicking on the control buttons.
If your model supports it, you can edit the **Instruction** field to change the instruction and run it again to see how the robot reacts.
Join the Discord to ask questions and share your demos!
## How to control your robot with an AI model from a python script?
If you're using a different model or want more fine-grained control, you can use the `phosphobot` python module to control your robot with an AI model.
### 1. Setup an inference server
First, you need to setup an inference server. This server runs on a beefy machine with a GPU that can run the AI model. It can be your own machine, a cloud server, or a dedicated server.
If you choose a remote location, chose the closest location to minimize
latency.
To setup the inference server, follow the instructions in the link below:
How to setup the inference server?
### 2. Call your inference server from a python script
Open a terminal and run the [phosphobot server.](/installation)
```bash
phosphobot run
```
Then, create a new python file called `inference.py`. Inside, copy the content of an example script below.
### Example script for ACT
```python
# pip install --upgrade phosphobot
PHOSPHOBOT_API_URL = "http://localhost:80"
allcameras = AllCameras()
time.sleep(1) # Camera warmup
# Connect to ACT server
model = ACT()
while True:
# Capture multi-camera frames (adjust camera IDs and size as needed)
images = [allcameras.get_rgb_frame(0, resize=(240, 320))]
# Get current robot state
state = httpx.post(f"{PHOSPHOBOT_API_URL}/joints/read").json()
# Generate actions
actions = model(
{"state": np.array(state["angles"]), "images": np.array(images)}
)
# Execute actions at 30Hz
for action in actions:
httpx.post(
f"{PHOSPHOBOT_API_URL}/joints/write", json={"angles": action[0].tolist()}
)
time.sleep(1 / 30)
```
### Example script for Pi0.5
```python
#pip install --upgrade phosphobot
from phosphobot.camera import AllCameras
import httpx
from phosphobot.am import Pi0
import time
import numpy as np
# Connect to the phosphobot server
PHOSPHOBOT_API_URL = "http://localhost:80"
# Get a camera frame
allcameras = AllCameras()
# Need to wait for the cameras to initialize
time.sleep(1)
# Instantiate the model
model = Pi0(server_url="YOUR_SERVER_URL")
while True:
# Get the frames from the cameras
# We will use this model: PLB/pi0-so100-orangelegobrick-wristcam
# It requires 2 cameras (a context cam and a wrist cam)
images = [
allcameras.get_rgb_frame(camera_id=0, resize=(240, 320)),
allcameras.get_rgb_frame(camera_id=1, resize=(240, 320)),
]
# Get the robot state
state = httpx.post(f"{PHOSPHOBOT_API_URL}/joints/read").json()
inputs = {
"state": np.array(state["angles_rad"]),
"images": np.array(images),
"prompt": "Pick up the orange brick",
}
# Go through the model
actions = model(inputs)
for action in actions:
# Send the new joint postion to the robot
httpx.post(
f"{PHOSPHOBOT_API_URL}/joints/write", json={"angles": action.tolist()}
)
# Wait to respect frequency control (30 Hz)
time.sleep(1 / 30)
```
### Example script for gr00t-n1
You need to install the `torch` and `zmq` libraries.
```bash
pip install torch zmq
```
You also need to run a GPU with the gr00t model and inference server. [Use this repo](https://github.com/phospho-app/Isaac-GR00T) to run the server.
```python
# pip install --upgrade phosphobot
# /// script
# requires-python = ">=3.10"
# dependencies = [
# "cv2",
# "phosphobot",
# "torch",
# "zmq",
# ]
# ///
import time
import cv2
import numpy as np
from phosphobot.am import Gr00tN1
import httpx
from phosphobot.camera import AllCameras
host = "YOUR_SERVER_IP" # Change this to your server IP (this is the IP of the machine running the Gr00tN1 server using a GPU)
port = 5555
# Change this with your task description
TASK_DESCRIPTION = (
"Pick up the green lego brick from the table and put it in the black container."
)
# Connect to the phosphobot server, this is different from the server IP above
PHOSPHOBOT_API_URL = "http://localhost:80"
allcameras = AllCameras()
time.sleep(1) # Wait for the cameras to initialize
while True:
images = [
allcameras.get_rgb_frame(camera_id=0, resize=(320, 240)),
allcameras.get_rgb_frame(camera_id=1, resize=(320, 240)),
]
for i in range(0, len(images)):
image = images[i]
if image is None:
print(f"Camera {i} is not available.")
continue
image = cv2.cvtColor(image, cv2.COLOR_RGB2BGR)
# Add a batch dimension (from (240, 320, 3) to (1, 240, 320, 3))
converted_array = np.expand_dims(image, axis=0)
converted_array = converted_array.astype(np.uint8)
images[i] = converted_array
# Create the model, you might need to change the action keys based on your model, these can be found in the experiment_cfg/metadata.json file of your Gr00tN1 model
model = Gr00tN1(server_url=host, server_port=port)
response = httpx.post(f"{PHOSPHOBOT_API_URL}/joints/read").json()
state = response["angles_rad"]
# Take a look at the experiment_cfg/metadata.json file in your Gr00t model and check the names of the images, states, and observations
# You may need to adapt the obs JSON to match these names
# The following JSON should work for one arm and 2 video cameras
obs = {
"video.image_cam_0": images[0],
"video.image_cam_1": images[1],
"state.arm": state[0:6].reshape(1, 6),
"annotation.human.action.task_description": [TASK_DESCRIPTION],
}
action = model.sample_actions(obs)
for i in range(0, action.shape[0]):
httpx.post(
f"{PHOSPHOBOT_API_URL}/joints/write", json={"angles": action[i].tolist()}
)
# Wait to respect frequency control (30 Hz)
time.sleep(1 / 30)
```
### Other models
You can implement the `ActionModel` class with your own logic [here](https://github.com/phospho-app/phosphobot/blob/main/phosphobot/am/models.py).
For more information, check out the implementation [here](https://github.com/phospho-app/phosphobot/blob/main/phosphobot/am/models.py).
To run the script, install the phosphobot python module. Then, run the script.
```bash
pip install phosphobot
python your_script.py
```
## What's next?
Join the Discord to ask questions, get help from others and get updates (we
ship almost daily)
Learn more about Robotics AI models
# Control your robot arm
Source: https://docs.phospho.ai/basic-usage/teleop
How to remote control a robot arm with a keyboard, in VR, with an API or a leader arm?
phosphobot lets you control the SO-100 or SO-101 robot arm with:
* your keyboard
* a game controller
* the HTTP API
* the Meta Quest app
* a leader arm or another follower arm
* by playing back a recording
* with AI
You can also control other kind of robots and [write your own controllers.](https://github.com/phospho-app/phosphobot/tree/main/phosphobot)
If you don't have a robot arm, you can get hardware [here](https://robots.phospho.ai/).
## Prerequisites
To control your robot, you need to install [phosphobot](/installation). Make sure the robot was [calibrated with phosphobot](/so-100/quickstart). No robot? Get one [here](https://robots.phospho.ai/?utm_source=docs).
```bash macOS
curl -fsSL https://raw.githubusercontent.com/phospho-app/phosphobot/main/install.sh | bash
```
```bash Linux
curl -fsSL https://raw.githubusercontent.com/phospho-app/phosphobot/main/install.sh | sudo bash
```
```powershell Windows
powershell -ExecutionPolicy ByPass -Command "irm https://raw.githubusercontent.com/phospho-app/phosphobot/main/install.ps1 | iex"
```
```bash uv (Linux and macOS)
# Install uv: https://docs.astral.sh/uv/
curl -LsSf https://astral.sh/uv/install.sh | sh
# Run phosphobot
uvx phosphobot@latest run
```
```powershell uv (Windows)
# Install uv: https://docs.astral.sh/uv/
powershell -ExecutionPolicy ByPass -c "irm https://astral.sh/uv/install.ps1 | iex"
# Run phosphobot
uvx phosphobot@latest run
```
## Control with a keyboard
Use `phosphobot` to control your SO-100, SO-101, or any supported robot arm with your keyboard, using the **arrow keys** to move the robot arm in the desired direction.
Go to `localhost` in your web browser to access the phosphobot dashboard. Go to **Keyboard Control**. Click on the **Start robot** button to start controlling the robot arm with your keyboard. Click on the **Stop robot** button to stop controlling the robot arm with your keyboard.
## Control with a game controller
You can control your robot arm using standard game controllers (Xbox, PlayStation, or similar) for more intuitive and ergonomic control.
1. **Connect your controller** to your computer via USB or Bluetooth.
2. Go to `localhost` in your web browser to access the phosphobot dashboard. Navigate to the **Control** page and select the **Gamepad control** tab.
3. **Press any button** on your controller to activate it. The dashboard will detect your controller automatically.
4. The robot will **start moving automatically** once the gamepad is detected.
**Control mapping:**
* **Left stick**: Rotate (X-axis) and move up/down (Y-axis)
* **Right stick**: Strafe left/right (X-axis) and move forward/backward (Y-axis)
* **D-Pad or face buttons (ABXY)**: Wrist pitch and roll control
* **L1/R1 bumpers**: Toggle gripper open/close
* **L2/R2 triggers**: Analog gripper control (0-100%)
* **Start/Menu**: Move arm to sleep position
The gamepad control feature requires a browser with Gamepad API support (Chrome/Edge 21+, Firefox 29+, Safari 10.1+).
## Control in Virtual Reality
Control your robot arm in virtual reality with the Meta Quest app. This app lets you control your robot arm in VR, using the Meta Quest controllers.
Unlock access to VR Control, advanced AI training, and more.
Get the phospho teleoperation app on the Meta Store for Meta Quest 2, Pro, 3, and 3s.
If you bought our [phospho starter pack](https://robots.phospho.ai/starter-pack), you should have received a link to get the phospho teleoperation Meta Quest app. Please [reach out](mailto:contact@phospho.ai) if not.The phospho teleoperation app works with a [Meta Quest](https://www.meta.com/fr/quest/quest-3/?srsltid=AfmBOorMLUmJKFQr35ssCi1DDqSNgpHk0sLHqo_tHG8kgclCYbMToAPa). Compatible models: Pro, 2, 3, 3s.
1. In the Meta Quest, open the phospho teleop application. Wait a moment, then you should see a row displaying **phosphobot** or your computer name. Click the **Connect** button using the `Trigger Button`.
Make sure you're connected to the same WiFi as the phosphobot server or the control moduleIf you don't see the server, check the IP address and port of the server in the phosphobot dashboard and enter it manually.
2. After connecting, you'll see the list of connected cameras and recording options.
* Move the windows with the `Grip button` to organize your space.
* Enable preview to see the camera feed. Check the **camera angles** and adjust their positions if needed.
We recommend **disabling** the camera preview to save bandwidth.
3. Press `A` once to start teleoperation and begin moving your controller.
* The robot will naturally follow the movement of your controller. Press the `Trigger button` to close the gripper.
* Press `A` again to stop the teleoperation. The robot will stop.
4. Press `B` to start recording. You can leave the default settings for your first attempt.
* Press `B` again to stop the recording.
* Press `Y` (left controller) to discard the recording.
5. Continue teleoperating and stop the recording by pressing `B` when you're done.
6. The recording is automatically saved in **LeRobot v2** format and **uploaded to your HuggingFace account.**
## Control with a leader arm
phosphobot supports one or multiple leader arms. A leader arm is a robot arm that you can use to control another robot arm, called the follower arm. The leader arm is used to control the follower arm in real time, allowing you to control the follower arm as if you were physically present.
1. Plug the leader arm.
2. Calibrate the leader arm the same way you calibrated the robot arm.
3. Go to the phosphobot dashboard, in the **Control** page and click on the **Leader Arm** section.
You have more than one pair leader/follower arms, using the + button to add more
### Does the leader arm need to be calibrated?
Yes, the leader arm needs to be calibrated the same way you calibrated the robot arm. The calibration is done in the **Calibration** page of the phosphobot dashboard.
### Can you do bimanual teleoperation with two leader arms? Can I control two robot arms with two leader arms?
Yes, you can control two robot arms with two leader arms. You need to plug both leader arms and calibrate them the same way you calibrated the robot arms. Then, go to the **Control** page of the phosphobot dashboard and click on the **Leader Arm** section. You can add multiple leader arms by clicking on the + button.
### Is the leader arm mandatory?
No, the leader arm is optional. You can control the robot arm with the keyboard, the game controller, the HTTP API, or the Meta Quest app without a leader arm. The leader arm is just an additional way to control the robot arm.
## Control with the HTTP API
Once your phosphobot server is running, you can send your first command to the robot arm.
Make sure the robot is well fixed and the area around is clear before sending
any command.
1. Go to the interactive API docs on the phosphobot dashboard: [localhost/docs](http://localhost/docs). On the control module, the address [phosphobot.local/docs](http://phosphobot.local/docs). This page lets you send commands to the robot arm.
2. Trigger the `/move/init` endpoint to initialize the robot (click `Try it out` and then press `Execute`).
3. Your robot arm moves to the default position. *It's alive!* 🎉
4. Now, you can call the `/move/absolute` endpoint to move the robot to a specific position. The distances are in centimeters, and the angles in degrees.
## Control by playing back a recording
You can [record episodes](./dataset-recording.mdx) and then play them back to control the robot arm using [the recording feature](../recording/play-recording).
## Control with AI
You can [train an AI model](./training) and then run [AI control.](./inference) Basically, the AI model will predict the next position of the robot based on the previous position and what the cameras sees. This is a whole [area of research.](../learn/policies)
## What's next?
How to record a dataset with your robot
# Train a robotics AI model
Source: https://docs.phospho.ai/basic-usage/training
How to train a robotics AI model with a dataset?
To train an AI model for your robot, you need a robotics dataset. For that, you need to have first [recorded a dataset](/basic-usage/dataset-recording).
Don't have a dataset? Use one of ours: `phospho-ai/so100-tictactoe`
## Train GR00T-N1-2B in one click from the phosphobot dashboard
You can fine-tune [Nvidia GR00T-N1-2B](https://huggingface.co/nvidia/GR00T-N1-2B) on your dataset right from the phosphobot dashboard. This is the easiest way to train a AI robotics model.
1. Launch the phosphobot server and go to the phosphobot dashboard in your browser: [http://localhost](http://localhost)
```bash
phosphobot run
```
2. Create a phospho account or log in by clicking on the **Sign in** button in the top right corner.
3. *(If not already done)* Add your Hugging Face token in the **Admin Settings** tab with **Write authorization**. This will sync your datasets to Hugging Face. Then, record a dataset using teleoperation. [Read the full guide here](/basic-usage/dataset-recording#1-set-up-your-hugging-face-token).
Garbage in, garbage out. Our tests show that training works with about 30
episodes. It's better for the task to be specific. Have good lighting and
similar setup.
4. In the **AI Training and Control** section, enter the the name of your dataset on Hugging Face (example: `PLB/simple-lego-pickup-mono-2`).
5. Hit the **Train AI Model** button. Your model starts training. Training can take up to 3 hours. Follow the training using the button **View trained models**.
Your trained model is uploaded to HuggingFace [on the phospho-app account](https://huggingface.co/phospho-app). Its name is something like `phospho-app/YOUR_DATASET_NAME-A_RANDOM_ID`.
Next up, you can start controlling your robot with the trained model.
You can add you Weights & Biases token to track your training metrics. Go to the **Admin Settings** tab and add your WandB token (get your token [here](https://wandb.ai/authorize)).
You can also tweak the training parameters. To do so, you must have your phosphobot server running and being logged in in your dashboard.
Then, use the [/training/start-training](/ai-training/start-training) endpoint to pass more training parameters.
Let a trained AI model control your robot
Join the Discord for support and updates (we ship almost daily)
## How to train the ACT (Action Chunking Transformer) model with LeRobot?
The ACT model is a transformer-based model that learns to chunk actions in a sequence. It is trained on a dataset of action sequences and their corresponding chunked actions.
LeRobot is a research-oriented library by Hugging Face that provides a simple interface to train AI models. It is still a work in progress, but it is already very powerful.
Follow [our guide](/learn/ai-models#train-an-act-model-locally-with-lerobot) to train the ACT model on your dataset.
Train your ACT model with LeRobot
## How to train Pi0.5 (Pi-Zero point five) model with the SO-100 robot arm?
[Pi0.5](https://www.physicalintelligence.company/blog/pi05) is a powerful VLA (Vision Language Action model) by Physical Intelligence. They released an open weight model that can be trained on your own datasets.
This VLA promises **open world generalization** and requires lots of data to properly train, think datasets of several hours.
You can still **use phosphobot to fine-tune the Pi0.5 model on your own dataset**.
We will use the phosphobot cloud for this.
Just head over to the **AI training** tab on phosphobot. It should look a little something like this.
In the top left, enter your **dataset name**, it should be on Hugging Face. For example: `LegrandFrederic/Marker_pickup_piper`.
Then, select the **Pi0.5 model** from the dropdown menu in the upper right.
Change the training parameters such as the image keys to match your dataset. If your dataset only contains one camera, you should set the image keys to `["image.name.in.the.dataset"]`, most likely `["observation.images.main"]` if you recorded it with phosphobot.
Pro tips:
* Set your wandb token in the admin panel to track your training metrics.
* Use a dataset with at least 15 minutes of data.
* Make sure to set a prompt when recording your dataset.
Finally, hit the **Train AI Model** button. Your model starts training. Training can take several hours depending on your dataset size. Follow the training using the button **View trained models**.
# Next steps
Test the model you just trained on your robot. See the [Use AI models](/basic-usage/inference) page for more information.
Let a trained AI model control your robot
# Refresh Camera List
Source: https://docs.phospho.ai/camera/cameras-refresh
post /cameras/refresh
Refresh the list of available cameras. This operation can take a few seconds as it disconnects and reconnects to all cameras. It is useful when cameras are added or removed while the application is running.
# Get All Camera Frames
Source: https://docs.phospho.ai/camera/frames
get /frames
Capture frames from all available cameras. Returns a dictionary with camera IDs as keys and base64 encoded JPG images as values. If a camera is not available or fails to capture, its value will be None.
# Video Feed For Camera
Source: https://docs.phospho.ai/camera/video-feed-for-camera
get /video/{camera_id}
Stream video feed of the specified camera. If no camera id is provided, the default camera is used. Specify a target size and quality using query parameters.
# Calibrate Robot
Source: https://docs.phospho.ai/control/calibration-sequence
post /calibrate
Start the calibration sequence for the robot.
# Read End-Effector Position
Source: https://docs.phospho.ai/control/end-effector-state
post /end-effector/read
Retrieve the position, orientation, and open status of the robot's end effector. Only available for manipulators.
# Move to Absolute Position
Source: https://docs.phospho.ai/control/move-absolute-position
post /move/absolute
Move the robot to an absolute position specified by the end-effector (in centimeters and degrees). Make sure to call `/move/init` before using this endpoint.
# Initialize Robot
Source: https://docs.phospho.ai/control/move-init
post /move/init
Initialize the robot to its initial position before starting the teleoperation.
# Use the leader arm to control the follower arm
Source: https://docs.phospho.ai/control/move-leader-start
post /move/leader/start
Use the leader arm to control the follower arm.
# Stop the leader-follower control
Source: https://docs.phospho.ai/control/move-leader-stop
post /move/leader/stop
Stop the leader-follower control.
# Move to Relative Position
Source: https://docs.phospho.ai/control/move-relative-position
post /move/relative
Move the robot to a relative position based on received delta values (in centimeters and degrees).
# Teleoperation Control
Source: https://docs.phospho.ai/control/move-teleoperation
post /move/teleop
# Teleoperation Control (WebSocket)
Source: https://docs.phospho.ai/control/move-teleoperation-ws
High frequency control of the robot arm via WebSocket connection for real-time updates and commands.
```
ws://localhost/move/teleop/ws
```
```json
{
"nb_actions_received": 5,
"is_object_gripped": false,
"is_object_gripped_source": "left" // or "right"
}
```
## Overview
This WebSocket endpoint allows real-time teleoperation of a robot arm. The connection enables high-frequency command and status updates to ensure precise control and immediate feedback.
## Data Flow
**Incoming Data**: The client sends JSON-formatted control data for the robot's movement.\
**Outgoing Data**: The server sends JSON-formatted status updates, including the number of actions received and the current gripped status of the object.
## Control Data
The client sends control data in JSON format, which includes the following fields:
```json
{
"x": 0.5,
"y": 1.2,
"z": -0.7,
"rx": 45.0,
"ry": 30.0,
"rz": 90.0,
"open": 1,
"source": "left" // or "right"
}
```
See the [Teleoperation control endpoint](/control/move-teleoperation) endpoint for more details on each field.
## Status Updates
Status updates are sent back to the client every second or when there is a change in the gripped status of the object.
```json
{
"nb_actions_received": 5,
"is_object_gripped": false,
"is_object_gripped_source": "left"
}
```
## Error Handling
If the received data cannot be decoded as JSON, an error message is sent back to the client:
```json
{
"error": "JSON decode error: "
}
```
# Read Joint Positions
Source: https://docs.phospho.ai/control/read-joints
post /joints/read
Read the current positions of the robot's joints in radians and motor units.
# Read Temperature
Source: https://docs.phospho.ai/control/read-temperature
post /temperature/read
Read the current Temperature and maximum Temperature of the robot's motors.
# Read Torque
Source: https://docs.phospho.ai/control/read-torques
post /torque/read
Read the current torque of the robot's joints.
# Toggle Torque
Source: https://docs.phospho.ai/control/turn-torque
post /torque/toggle
Enable or disable the torque of the robot.
# Write Joint Positions
Source: https://docs.phospho.ai/control/write-joints
post /joints/write
Move the robot's joints to the specified angles.
# Write the Maximum Temperature for Joints
Source: https://docs.phospho.ai/control/write-temperature
post /temperature/write
Set the robot's maximum temperature for motors..
# Simple controls
Source: https://docs.phospho.ai/examples/control
How to control the robot arm with API calls.
[phosphobot](../installation.mdx) provides a simple API to control the robot arm. You can use it to move the robot arm, open or close the gripper, and more.
All code examples can be found in our open source repo [here](https://github.com/phospho-app/phosphobot).
## Square movement
This implementation uses the /move/relative endpoint to move the robot in a square.
We simply indicate where we want to move the robot relative to its current position.
```python square.py
import time
import requests
# Configurations
PI_IP: str = "127.0.0.1"
PI_PORT: int = 80
NUMBER_OF_SQUARES: int = 100
# Function to call the API
def call_to_api(endpoint: str, data: dict = {}):
response = requests.post(f"http://{PI_IP}:{PI_PORT}/move/{endpoint}", json=data)
return response.json()
# Example code to move the robot in a square of 4 cm x 4 cm
# 1 - Initialize the robot
call_to_api("init")
print("Initializing robot")
time.sleep(2)
# We move it to the top left corner of the square
call_to_api(
"relative", {"x": 0, "y": -3, "z": 0.03, "rx": 0, "ry": 0, "rz": 0, "open": 0}
)
print("Moving to top left corner")
time.sleep(0.2)
# With the move relative endpoint, we can move relative to its current position
# 2 - We make the robot follow a 3 cm x 3 cm square
for _ in range(NUMBER_OF_SQUARES):
# Move to the top right corner
call_to_api(
"relative", {"x": 0, "y": 3, "z": 0, "rx": 0, "ry": 0, "rz": 0, "open": 0}
)
print("Moving to top right corner")
time.sleep(0.2)
# Move to the bottom right corner
call_to_api(
"relative", {"x": 0, "y": 0, "z": -3, "rx": 0, "ry": 0, "rz": 0, "open": 0}
)
print("Moving to bottom right corner")
time.sleep(0.2)
# Move to the bottom left corner
call_to_api(
"relative", {"x": 0, "y": -3, "z": 0, "rx": 0, "ry": 0, "rz": 0, "open": 0}
)
print("Moving to bottom left corner")
time.sleep(0.2)
# Move to the top left corner
call_to_api(
"relative", {"x": 0, "y": 0, "z": 3, "rx": 0, "ry": 0, "rz": 0, "open": 0}
)
print("Moving to top left corner")
time.sleep(0.2)
```
## Circle movement
### Slow
Since it's harder to control the robot's position using relative movements to create a circle, we use the absolute movement instead.
We calculate the position of the robot in the circle using the sin and cos functions to create a circular motion.
```python circle_slow.py
import math
import time
import requests
# Configurations
PI_IP: str = "127.0.0.1"
PI_PORT: int = 80
NUMBER_OF_STEPS: int = 10
NUMBER_OF_CIRCLES: int = 15
# Function to call the API
def call_to_api(endpoint: str, data: dict = {}):
response = requests.post(f"http://{PI_IP}:{PI_PORT}/move/{endpoint}", json=data)
return response.json()
# Example code to move the robot in a circle
# 1 - Initialize the robot
call_to_api("init")
print("Initializing robot")
time.sleep(2)
# With the move absolute endpoint, we can move the robot in an absolute position
# 2 - We move the robot in a circle with a diameter of 4 cm
for _ in range(NUMBER_OF_CIRCLES):
for step in range(NUMBER_OF_STEPS):
position_y: float = 4 * math.sin(2 * math.pi * step / NUMBER_OF_STEPS)
position_z: float = 4 * math.cos(2 * math.pi * step / NUMBER_OF_STEPS)
call_to_api(
"absolute",
{
"x": 0,
"y": position_y,
"z": position_z,
"rx": 0,
"ry": 0,
"rz": 0,
"open": 0,
},
)
print(f"Step {step} - x: 0, y: {position_y}, z: {position_z}")
time.sleep(0.03)
```
### Fast
To quicken the robots movements, we lower the number of steps in the circle.
We also increase the sleep time between each step to avoid the robot moving too fast.
```python circle_fast.py
import math
import time
import requests
# Configurations
PI_IP: str = "127.0.0.1"
PI_PORT: int = 80
NUMBER_OF_STEPS: int = 10
NUMBER_OF_CIRCLES: int = 15
# Function to call the API
def call_to_api(endpoint: str, data: dict = {}):
response = requests.post(f"http://{PI_IP}:{PI_PORT}/move/{endpoint}", json=data)
return response.json()
# Example code to move the robot in a circle
# 1 - Initialize the robot
call_to_api("init")
print("Initializing robot")
time.sleep(2)
# With the move absolute endpoint, we can move the robot in an absolute position
# 2 - We move the robot in a circle with a diameter of 4 cm
for _ in range(NUMBER_OF_CIRCLES):
for step in range(NUMBER_OF_STEPS):
position_y: float = 4 * math.sin(2 * math.pi * step / NUMBER_OF_STEPS)
position_z: float = 4 * math.cos(2 * math.pi * step / NUMBER_OF_STEPS)
call_to_api(
"absolute",
{
"x": 0,
"y": position_y,
"z": position_z,
"rx": 0,
"ry": 0,
"rz": 0,
"open": 0,
},
)
print(f"Step {step} - x: 0, y: {position_y}, z: {position_z}")
time.sleep(0.2)
```
# MCP Robotics: Controlling Robots with LLMs using phosphobot MCP
Source: https://docs.phospho.ai/examples/mcp-for-robotics
Connect a Large Language Model to a robot using the Model Context Protocol (MCP) and phosphobot.
This guide provides the essential code and instructions to get started with **MCP for robotics**. Using [phosphobot](../installation) and the **Model Context Protocol (MCP)**, you can connect a Large Language Model (LLM) like Claude to a robot, enabling it to access camera feeds and trigger actions through a standardized interface.
* 🔗 **GitHub Repository**: [phospho-mcp-server](https://github.com/phospho-app/phospho-mcp-server)
* 🔌 **Core Protocol**: [Model Context Protocol](https://github.com/modelcontextprotocol/python-sdk)
* 🤖 **Key Tools**: [Claude](https://claude.ai/download) and [phosphobot](https://github.com/phospho-app/phosphobot)
## What is the Model Context Protocol (MCP)?
The **Model Context Protocol (MCP)** is an open standard that connects Large Language Models to real-world tools and data sources.
Think of it **like an USB-C port for AI**, a universal translator between an AI and any application.
MCP allows an LLM to "plug into" different systems, giving it the power to see, reason, and, most importantly, act. For **MCP robotics**, this means giving an AI the hands and eyes to interact with the physical world.
### What are the key concepts of MCP?
* **Tools** are real Python functions that the model can call to perform actions.
* Example: pickup\_object("banana") to move a robot arm.
* **Resources** are read-only data sources, accessible via URIs.
* Example: file://home/user/notes.txt to expose the content of a local text file.
* **Host / Client / Server architecture**
* Host = the LLM applications that start the connection (e.g. Claude)
* Client = the MCP protocol that conects tools to the LLM
* Server = your app exposing tools/resources (e.g. the phosphobot MCP server)
* **Lifespan** lets you run startup/shutdown code (e.g., to launch a robot process), and share context across tools.
### Why MCP for Robotics?
Before MCP, connecting an AI to a robot required custom, complex integrations for each specific model and robot. **MCP robotics** changes this by creating a universal standard.
* **Standardized Control**: Any MCP-compatible LLM can control any MCP-enabled robot.
* **Simplified Integration**: It removes the need for fragmented, one-off solutions, creating a "plug-and-play" ecosystem for AI and robotics. \[14]
* **Real-World Interaction**: It bridges the gap between AI's reasoning capabilities and a robot's physical actions, enabling tasks like object manipulation based on visual input.
With **robots MCP**, developers can build powerful applications where an AI can perceive its environment and execute physical tasks.
## How phosphobot Implements MCP Robotics
The **phosphobot MCP** integration is a practical example of this protocol in action. The basic demo exposes two primary capabilities to the LLM:
* **Camera Stream**: A tool that retrieves the current frame from a webcam, giving the LLM vision.
* **Replay Tool**: A tool that triggers a pre-recorded robot action, like picking up an object.
The **phosphobot MCP server** manages these tools and the communication with the robot's local API.
## Getting Started with phosphobot MCP
Follow these steps to set up your **MCP robotics** environment.
### Prerequisites
* [Claude for Desktop](https://support.anthropic.com/en/articles/10065433-installing-claude-for-desktop) is installed.
* Python and `git` are installed on your system.
* You are comfortable using a command-line interface.
### Step 1: Install and Run phosphobot
**[phosphobot](https://docs.phospho.ai)** is an open-source platform that allows you to control robots, record data, and train robotics AI models.
First, [install phosphobot](../installation) with the command for your OS:
```bash macOS
curl -fsSL https://raw.githubusercontent.com/phospho-app/phosphobot/main/install.sh | bash
```
```bash Linux
curl -fsSL https://raw.githubusercontent.com/phospho-app/phosphobot/main/install.sh | sudo bash
```
```powershell Windows
powershell -ExecutionPolicy ByPass -Command "irm https://raw.githubusercontent.com/phospho-app/phosphobot/main/install.ps1 | iex"
```
```bash uv (Linux and macOS)
# Install uv: https://docs.astral.sh/uv/
curl -LsSf https://astral.sh/uv/install.sh | sh
# Run phosphobot
uvx phosphobot@latest run
```
```powershell uv (Windows)
# Install uv: https://docs.astral.sh/uv/
powershell -ExecutionPolicy ByPass -c "irm https://astral.sh/uv/install.ps1 | iex"
# Run phosphobot
uvx phosphobot@latest run
```
Next, run the phosphobot server, which will listen for commands from the MCP server.
```bash
phosphobot run
```
### Step 2: Install the phosphobot MCP Server
This server exposes the robot's controls to Claude. We recommend installing it with **uv**.
1. **Install uv**, a fast Python package installer:
```bash macOS and Linux
curl -LsSf https://astral.sh/uv/install.sh | sh
```
```powershell Windows
powershell -ExecutionPolicy ByPass -c "irm https://astral.sh/uv/install.ps1 | iex"
```
2. **Clone the repository and install the server**:
```bash
# Clone the phospho MCP server repository
git clone https://github.com/phospho-app/phospho-mcp-server.git
# Navigate to the correct directory
cd phospho-mcp-server/phospho-mcp-server
# Install and run the MCP server
uv run mcp install server.py
```
This command starts the `phospho` MCP server and registers its tools with Claude. When you open the Claude desktop app, you will see the server and its tools available for use.
## How It Works: Technical Overview
The **phosphobot MCP server** communicates with the local phosphobot instance via its REST API (defaulting to `http://localhost:80`).
* `GET /frames`: Fetches the latest camera image.
* `POST /recording/play`: Executes a pre-recorded robot action.
The `PhosphoClient` class manages this communication. If you run phosphobot on a port other than 80, you must update the base URL in the `tools/phosphobot.py` file.
## Testing Your MCP Robotics Setup
You can test the server with the MCP inspector by running:
```bash
uv run mcp dev server.py
```
### Example 1: Using the Robot's Camera
Ask Claude a question that requires vision:
> “What do you see on my desk?”
Claude will use the `get_camera_frame` tool to answer.
### Example 2: Controlling the Robot's Actions
Give Claude a command:
> “Pick up the banana”
Claude will use the `pickup_object` tool to perform the action.
## Available Tools
### `pickup_object`
Triggers a pre-recorded robotic action.
```python
@mcp.tool()
def pickup_object(name: Literal["banana", "black circle", "green cross"]) -> str:
"""Launches a replay episode to simulate picking up a named object."""
...
```
### `get_camera_frame`
Captures a JPEG image from the phosphobot camera.
```python
@mcp.tool()
def get_camera_frame() -> Image:
"""Captures a JPEG image from phosphobot's camera via the /frames endpoint."""
...
```
## FAQ
**Q: What is `phosphobot`?**
A: `phosphobot` is an open-source platform for **robotics** that helps you control robots, collect data, and train AI models for robotic tasks.
**Q: What is `phosphobot mcp`?**
A: `phosphobot mcp` refers to the integration of the phosphobot platform with the Model Context Protocol. It allows an LLM like Claude to control a robot managed by phosphobot by using standardized tools for actions and camera feeds.
**Q: Can I use this with a physical robot?**
A: Yes. `phosphobot` is designed to control physical robots, allowing you to bridge the gap between AI and hardware.
**Q: Can it only use pre-recorded actions?**
A: No, while the demo uses pre-recorded actions for simplicity, you can extend the `phosphobot MCP server` to include real-time control commands or trigger any AI model trained with phosphobot (eg: ACT, gr00t).
## Additional Resources
* [Model Context Protocol (MCP) Official GitHub](https://github.com/modelcontextprotocol/python-sdk)
* [phosphobot Official Documentation](https://docs.phospho.ai/installation)
# VR Control with a Meta Quest
Source: https://docs.phospho.ai/examples/teleop
How to control your robot arm using a Meta Quest 2, Pro, 3, 3s over a local WiFi network
Control your robot arm using a Meta Quest 2, Pro, 3, or 3s. VR control makes bimanual control more intuitive and lets you collect data faster.
Unlock access to VR Control, advanced AI training, and more.
Get the phospho teleoperation app on the Meta Store for Meta Quest 2, Pro, 3, and 3s.
If you bought our [phospho starter pack](https://robots.phospho.ai/starter-pack), you should have received a link to get the phospho teleoperation Meta Quest app. Please [reach out](mailto:contact@phospho.ai) if not.
## Prerequisites
1. You need a robot arm such as the SO-100, the SO-101, or [other compatible hardware](https://github.com/phospho-app/phosphobot). Get the [phosphot starter pack here](https://robots.phospho.ai).
2. Install [the phosphobot software](/installation) on your computer.
```bash macOS
curl -fsSL https://raw.githubusercontent.com/phospho-app/phosphobot/main/install.sh | bash
```
```bash Linux
curl -fsSL https://raw.githubusercontent.com/phospho-app/phosphobot/main/install.sh | sudo bash
```
```powershell Windows
powershell -ExecutionPolicy ByPass -Command "irm https://raw.githubusercontent.com/phospho-app/phosphobot/main/install.ps1 | iex"
```
```bash uv (Linux and macOS)
# Install uv: https://docs.astral.sh/uv/
curl -LsSf https://astral.sh/uv/install.sh | sh
# Run phosphobot
uvx phosphobot@latest run
```
```powershell uv (Windows)
# Install uv: https://docs.astral.sh/uv/
powershell -ExecutionPolicy ByPass -c "irm https://astral.sh/uv/install.ps1 | iex"
# Run phosphobot
uvx phosphobot@latest run
```
3. Connect robots to your computer. Start the phosphobot server.
```bash
phosphobot run
```
4. Complete the [quickstart](/so-100/quickstart) and check that you can [control your robot](/basic-usage/teleop).
5. The **[phosphobot teleoperation app](/examples/teleop)** is installed on your **Meta Quest 2, Pro, 3 or 3s**. >
Unlock access to VR Control, advanced AI training, and more.
Get the phospho teleoperation app on the Meta Store for Meta Quest 2, Pro, 3, and 3s.
If you bought our [phospho starter pack](https://robots.phospho.ai/starter-pack), you should have received a link to get the phospho teleoperation Meta Quest app. Please [reach out](mailto:contact@phospho.ai) if not.
## How to control your robot arm with the Meta Quest app? Step by step instructions
The phospho teleoperation app works with a [Meta Quest](https://www.meta.com/fr/quest/quest-3/?srsltid=AfmBOorMLUmJKFQr35ssCi1DDqSNgpHk0sLHqo_tHG8kgclCYbMToAPa). Compatible models: Pro, 2, 3, 3s.
1. In the Meta Quest, open the phospho teleop application. Wait a moment, then you should see a row displaying **phosphobot** or your computer name. Click the **Connect** button using the `Trigger Button`.
Make sure you're connected to the same WiFi as the phosphobot server or the control moduleIf you don't see the server, check the IP address and port of the server in the phosphobot dashboard and enter it manually.
2. After connecting, you'll see the list of connected cameras and recording options.
* Move the windows with the `Grip button` to organize your space.
* Enable preview to see the camera feed. Check the **camera angles** and adjust their positions if needed.
We recommend **disabling** the camera preview to save bandwidth.
3. Press `A` once to start teleoperation and begin moving your controller.
* The robot will naturally follow the movement of your controller. Press the `Trigger button` to close the gripper.
* Press `A` again to stop the teleoperation. The robot will stop.
4. Press `B` to start recording. You can leave the default settings for your first attempt.
* Press `B` again to stop the recording.
* Press `Y` (left controller) to discard the recording.
5. Continue teleoperating and stop the recording by pressing `B` when you're done.
6. The recording is automatically saved in **LeRobot v2** format and **uploaded to your HuggingFace account.**
## Examples of VR control
The phospho Meta Quest app lets you operate the robot arm in real time. With the built-in stereo camera system, you can see the robot's environment in 3D, allowing you to interact as if you were physically present.
## What's next?
Use your **recorded datasets** to **train AI models**.
Follow this guide to teleoperate the robot arm and train your first AI model.
# VR Control from anywhere in the world
Source: https://docs.phospho.ai/examples/teleop-from-anywhere
How to control your robot arm from anywhere in the world using ngrok and a Meta Quest 2, Pro, 3 or 3s
Control your robot arm from anywhere in the world using ngrok and a Meta Quest 2, Pro, 3 or 3s. This lets you collect datasets with manipulators in different locations.
## Prerequisites
1. You need a robot arm such as the SO-100, the SO-101, or [other compatible hardware](https://github.com/phospho-app/phosphobot). Get the [phosphot starter pack here](https://robots.phospho.ai).
2. Install [the phosphobot software](/installation) on your computer.
```bash macOS
curl -fsSL https://raw.githubusercontent.com/phospho-app/phosphobot/main/install.sh | bash
```
```bash Linux
curl -fsSL https://raw.githubusercontent.com/phospho-app/phosphobot/main/install.sh | sudo bash
```
```powershell Windows
powershell -ExecutionPolicy ByPass -Command "irm https://raw.githubusercontent.com/phospho-app/phosphobot/main/install.ps1 | iex"
```
```bash uv (Linux and macOS)
# Install uv: https://docs.astral.sh/uv/
curl -LsSf https://astral.sh/uv/install.sh | sh
# Run phosphobot
uvx phosphobot@latest run
```
```powershell uv (Windows)
# Install uv: https://docs.astral.sh/uv/
powershell -ExecutionPolicy ByPass -c "irm https://astral.sh/uv/install.ps1 | iex"
# Run phosphobot
uvx phosphobot@latest run
```
3. Connect robots to your computer. Start the phosphobot server.
```bash
phosphobot run
```
4. Complete the [quickstart](/so-100/quickstart) and check that you can [control your robot](/basic-usage/teleop).
5. The **[phosphobot teleoperation app](/examples/teleop)** is installed on your **Meta Quest 2, Pro, 3 or 3s**. >
Unlock access to VR Control, advanced AI training, and more.
Get the phospho teleoperation app on the Meta Store for Meta Quest 2, Pro, 3, and 3s.
If you bought our [phospho starter pack](https://robots.phospho.ai/starter-pack), you should have received a link to get the phospho teleoperation Meta Quest app. Please [reach out](mailto:contact@phospho.ai) if not.
6. An **ngrok account**. [Sign up here](https://ngrok.com/) (*or use an alternative like Cloudflare Tunnel*).
7. The **ngrok CLI** installed on your device. [Download it here](https://ngrok.com/download)
## 1. Authenticate ngrok
To use ngrok, you need to authenticate your account. Open a terminal and run the following command:
```bash
ngrok authtoken YOUR_AUTH_TOKEN
```
Replace `YOUR_AUTH_TOKEN` with the token provided in your **ngrok dashboard**.
## 2. Create an ngrok Tunnel for your control module
1. Ensure your phosphobot server is running and connected to the internet. If you're using the control module, turn it on.
2. SSH into your phosphobot. By default, the password is `password123`
```bash
ssh phosphobot@phosphobot.local
```
3. Run the following command to create a tunnel:
```bash
ngrok http 80
```
*This command tells ngrok to forward traffic from the internet to your local server running on port 80.*
4. Once the tunnel is active, ngrok will display a forwarding URL in the terminal, such as:
```
Forwarding https://abc123.ngrok.io -> http://localhost:80
```
This URL is publicly accessible from anywhere in the world and will remain active while the ngrok tunnel is running. Turn off the server to stop the tunnel.
## 3. Access Your Teleoperation App Remotely
1. Copy the ngrok `https://` URL displayed in your terminal (e.g., `https://abc123.ngrok.io`).
2. Share this URL with users who need remote access to your teleoperation app.
3. Open the URL in a browser to access the **Admin panel**.
4. In the Meta Quest app, go to `Settings` and enter the **ngrok URL** to connect.
Ensure your local server remains running while the ngrok tunnel is active. Closing the server will break the connection.
## 4. Secure Your Tunnel
By default, ngrok tunnels are public, meaning anyone with the URL can control your robot and access datasets.
**To secure your tunnel**:
1. **Add basic authentication**
Run the following command to require a username and password to access the tunnel:
```bash
ngrok http 80 --auth "username:password"
```
Replace `username` and `password` with your desired credentials.
2. Alternatively, you can **restrict access to specific IP addresses**.
* Go to the **ngrok dashboard**
* Use the **IP restrictions feature** in the dashboard.
## 5. Monitor Traffic (Optional)
Ngrok provides a web interface for inspecting traffic and requests. To access it:
1. Open your browser and go to `http://localhost:4040`.
2. Here, you can view **detailed logs** of incoming requests and responses.
## What's Next?
Now that your teleoperation app is accessible remotely, you can:
* Share the ngrok URL with collaborators for real-time teleoperation.
* Record datasets remotely and upload them to your Hugging Face account.
* Train AI models using the data collected from remote sessions.
Learn how to use your recorded datasets to train your first AI model.
# Computer vision
Source: https://docs.phospho.ai/examples/vision
How to leverage vision models for robotics.
The dev kit comes with a stereoscopic camera, ideal for 3D vision and AI workflows.
All code examples can be found in our open source repo [here](https://github.com/phospho-app/phosphobot).
## Wave back
Using OpenCV we can detect a wave gesture and make the robot wave back in just a couple lines of code.
#
```python wave.py
import cv2
import sys
import time
import signal
import requests
import mediapipe as mp # type: ignore
# Configurations
PI_IP: str = "127.0.0.1"
PI_PORT: int = 8080
# Initialize MediaPipe Hand tracking
mp_hands = mp.solutions.hands
hands = mp_hands.Hands(
static_image_mode=False, max_num_hands=1, min_detection_confidence=0.7
)
# Handle Ctrl+C to exit the program gracefully
def signal_handler(sig, frame):
print("\nExiting gracefully...")
cap.release()
cv2.destroyAllWindows()
hands.close()
sys.exit(0)
signal.signal(signal.SIGINT, signal_handler)
# Function to call the API
def call_to_api(endpoint: str, data: dict = {}):
response = requests.post(f"http://{PI_IP}:{PI_PORT}/move/{endpoint}", json=data)
return response.json()
def wave_motion():
points = 5
for _ in range(2):
for i in range(points):
call_to_api(
"absolute",
{
"x": 0,
"y": 2 * (-1) ** i,
"z": 0,
"rx": -90,
"ry": 0,
"rz": 0,
"open": i % 2 == 0,
},
)
time.sleep(0.2)
call_to_api("init")
cap = cv2.VideoCapture(0)
last_wave_time: float = 0
WAVE_COOLDOWN: float = 3
try:
while True:
success, image = cap.read()
if not success:
continue
results = hands.process(cv2.cvtColor(image, cv2.COLOR_BGR2RGB))
current_time = time.time()
if (
results.multi_hand_landmarks
and current_time - last_wave_time > WAVE_COOLDOWN
):
wave_motion()
last_wave_time = current_time
cv2.imshow("Hand Detection", image)
cv2.waitKey(1)
except KeyboardInterrupt:
print("\nExiting gracefully...")
finally:
cap.release()
cv2.destroyAllWindows()
hands.close()
```
## Hand tracking
This is a simple implementation of hand tracking using the MediaPipe library. The robot moves based on the hand position and closure.
#
```python hand_tracking.py
import sys
import cv2
import time
import signal
import requests
import numpy as np
import mediapipe as mp # type: ignore
# Configurations
PI_IP: str = "127.0.0.1"
PI_PORT: int = 8080
# Initialize MediaPipe Hand tracking
mp_hands = mp.solutions.hands
hands = mp_hands.Hands(
static_image_mode=False,
max_num_hands=1,
min_detection_confidence=0.7,
min_tracking_confidence=0.7,
)
mp_draw = mp.solutions.drawing_utils
# Handle Ctrl+C to exit the program gracefully
def signal_handler(sig, frame):
print("\nExiting gracefully...")
cap.release()
cv2.destroyAllWindows()
hands.close()
sys.exit(0)
signal.signal(signal.SIGINT, signal_handler)
# Function to call the API
def call_to_api(endpoint: str, data: dict = {}):
response = requests.post(f"http://{PI_IP}:{PI_PORT}/move/{endpoint}", json=data)
return response.json()
def calculate_hand_closure(hand_landmarks):
"""
Calculate if the hand is closed based on thumb and index finger distance
Returns a value between 0 (open) and 1 (closed)
"""
thumb_tip = hand_landmarks.landmark[4]
index_tip = hand_landmarks.landmark[8]
distance = np.sqrt(
(thumb_tip.x - index_tip.x) ** 2
+ (thumb_tip.y - index_tip.y) ** 2
+ (thumb_tip.z - index_tip.z) ** 2
)
# Normalize distance (these values might need adjustment based on the hand size)
normalized = np.clip(1.0 - (distance * 5), 0, 1)
return normalized
# 1 - Initialize the robot
call_to_api("init")
print("Initializing robot")
time.sleep(2)
# Initialize webcam
cap = cv2.VideoCapture(0)
# Get camera frame dimensions
frame_width: float = int(cap.get(cv2.CAP_PROP_FRAME_WIDTH))
frame_height: float = int(cap.get(cv2.CAP_PROP_FRAME_HEIGHT))
# Define the workspace boundaries (in meters)
WORKSPACE_Y = 0.4
WORKSPACE_Z = 0.2
def map_to_robot_coordinates(hand_x, hand_y):
"""
Map normalized hand coordinates to robot workspace coordinates
We match the hand x coordinate to the robot y coordinate
And the hand y coordinate to the robot z coordinate
"""
robot_y = ((0.5 - hand_x) * 2) * (WORKSPACE_Y / 2) * 100
robot_z = ((0.5 - hand_y) * 2) * (WORKSPACE_Z / 2) * 100
return robot_y, robot_z
# Previous position for smoothing, this helps make the robot movements less jerky
prev_pos = {"y": 0, "z": 0}
smoothing_factor = 0.5
try:
while cap.isOpened():
success, image = cap.read()
if not success:
print("Failed to capture frame")
continue
image = cv2.flip(image, 1) # The front camera is inverted
rgb_image = cv2.cvtColor(image, cv2.COLOR_BGR2RGB) # Convert to RGB image
results = hands.process(rgb_image)
if results.multi_hand_landmarks:
for hand_landmarks in results.multi_hand_landmarks:
mp_draw.draw_landmarks(image, hand_landmarks, mp_hands.HAND_CONNECTIONS)
palm = hand_landmarks.landmark[0]
hand_closed = calculate_hand_closure(hand_landmarks)
robot_y, robot_z = map_to_robot_coordinates(palm.x, palm.y)
robot_y = prev_pos["y"] * smoothing_factor + robot_y * (
1 - smoothing_factor
)
robot_z = prev_pos["z"] * smoothing_factor + robot_z * (
1 - smoothing_factor
)
prev_pos = {"y": robot_y, "z": robot_z}
call_to_api(
"absolute",
{
"x": -5,
"y": robot_y,
"z": robot_z,
"rx": 0,
"ry": 0,
"rz": 0,
"open": 1 - hand_closed,
},
)
cv2.putText(
image,
f"Position: (y:{robot_y:.3f}, z:{robot_z:.3f})",
(10, 30),
cv2.FONT_HERSHEY_SIMPLEX,
1,
(0, 255, 0),
2,
)
cv2.putText(
image,
f"Grip: {'Closed' if hand_closed > 0.5 else 'Open'}",
(10, 70),
cv2.FONT_HERSHEY_SIMPLEX,
1,
(0, 255, 0),
2,
)
cv2.imshow("Hand Tracking", image)
cv2.waitKey(1)
except KeyboardInterrupt:
print("\nExiting gracefully...")
finally:
cap.release()
cv2.destroyAllWindows()
hands.close()
```
## Rock paper scissors
Create fun interactions with your robot with this simple implementation of a Rock Paper Scissors game.
#
```python rock_paper_scissors.py
import cv2
import time
import random
import requests
import numpy as np
import mediapipe as mp # type: ignore
# Robot API Configuration
PI_IP = "127.0.0.1"
PI_PORT = 8080
class RockPaperScissorsGame:
def __init__(self):
self.mp_hands = mp.solutions.hands
self.hands = self.mp_hands.Hands(
static_image_mode=False,
max_num_hands=1,
min_detection_confidence=0.7,
min_tracking_confidence=0.7,
)
self.cap = cv2.VideoCapture(0)
self.gestures = {
"rock": self.make_rock_gesture,
"paper": self.make_paper_gesture,
"scissors": self.make_scissors_gesture,
}
def call_to_api(self, endpoint: str, data: dict = {}):
response = requests.post(f"http://{PI_IP}:{PI_PORT}/move/{endpoint}", json=data)
return response.json()
def detect_gesture(self, hand_landmarks):
# Get relevant finger landmarks
thumb_tip = hand_landmarks.landmark[4]
index_tip = hand_landmarks.landmark[8]
middle_tip = hand_landmarks.landmark[12]
ring_tip = hand_landmarks.landmark[16]
pinky_tip = hand_landmarks.landmark[20]
# Get wrist position for reference
wrist = hand_landmarks.landmark[0]
# Calculate distances from wrist
fingers_extended = []
for tip in [thumb_tip, index_tip, middle_tip, ring_tip, pinky_tip]:
distance = np.sqrt((tip.x - wrist.x) ** 2 + (tip.y - wrist.y) ** 2)
fingers_extended.append(distance > 0.2) # Threshold for extended fingers
# Determine gesture
if not any(fingers_extended[1:]): # All fingers closed
return "rock"
elif all(fingers_extended): # All fingers open
return "paper"
elif (
fingers_extended[1]
and fingers_extended[2]
and not fingers_extended[3]
and not fingers_extended[4]
): # Only index and middle extended
return "scissors"
return None
def make_rock_gesture(self):
# Move to closed fist position
self.call_to_api(
"absolute",
{"x": 0, "y": 0, "z": 5, "rx": 0, "ry": 0, "rz": 0, "open": 0},
)
def make_paper_gesture(self):
# Move to open hand position
self.call_to_api(
"absolute",
{"x": 0, "y": 0, "z": 5, "rx": 0, "ry": 0, "rz": 0, "open": 1},
)
def make_scissors_gesture(self):
# Move to scissors position
self.call_to_api(
"absolute",
{"x": 0, "y": 0, "z": 5, "rx": 0, "ry": -45, "rz": 0, "open": 0.5},
)
def move_up_down(self, times=3):
for step in range(times + 1):
self.call_to_api(
"absolute",
{"x": 0, "y": 0, "z": 4, "rx": 0, "ry": 0, "rz": 0, "open": 0},
)
time.sleep(0.25)
self.call_to_api(
"absolute",
{"x": 0, "y": 0, "z": -4, "rx": 0, "ry": 0, "rz": 0, "open": 0},
)
time.sleep(0.25)
print(times - step)
def determine_winner(self, player_gesture, robot_gesture):
if player_gesture == robot_gesture:
return "Tie!"
winners = {"rock": "scissors", "paper": "rock", "scissors": "paper"}
return (
"Player wins!"
if winners[player_gesture] == robot_gesture
else "Robot wins!"
)
def play_game(self):
print("Initializing robot...")
self.call_to_api("init")
time.sleep(1)
print("Robot performing countdown...")
self.move_up_down(times=3)
ret, frame = self.cap.read()
if not ret:
print("Failed to capture image.")
return
rgb_frame = cv2.cvtColor(frame, cv2.COLOR_BGR2RGB)
results = self.hands.process(rgb_frame)
if results.multi_hand_landmarks:
player_gesture = self.detect_gesture(results.multi_hand_landmarks[0])
if player_gesture:
robot_gesture = random.choice(["rock", "paper", "scissors"])
print(f"\nPlayer chose: {player_gesture}")
print(f"Robot chose: {robot_gesture}")
self.gestures[robot_gesture]() # Robot makes its gesture
result = self.determine_winner(player_gesture, robot_gesture)
print(result)
time.sleep(2)
else:
print("Gesture not detected. Please try again.")
else:
print("No hand detected. Please try again.")
self.cap.release()
cv2.destroyAllWindows()
if __name__ == "__main__":
game = RockPaperScissorsGame()
game.play_game()
```
# Frequently Asked Questions
Source: https://docs.phospho.ai/faq
Answers to common questions about phosphobot
## Does phospho collect telemetry?
Phospho uses telemetry to report anonymous usage and error information. As an open-source software, this type of information is important to improve and understand how the product is used. This is done using [PostHog](https://github.com/PostHog/posthog) and [Sentry](https://sentry.io/).
## Why do we collect telemetry?
Anonymous telemetry information enables us to continuously improve the product and detect recurring problems to better serve all users. We collect aggregated information about general usage and errors. We do NOT collect any information on users' data records, datasets, or metadata information. None of the data is shared with third parties. We want to be super transparent about this and you can find the exact data we collect by inspecting the code in the repo.
## How to disable telemetry?
You can opt-out by adding the flag `--no-telemetry` to the `uv run phosphobot run` command in the `Makefile`.
# Install phosphobot
Source: https://docs.phospho.ai/installation
Control your robot arm in seconds with phosphobot on any computer
## Install phosphobot
The quickest way to get started is to use the install script and a compiled version. In a terminal, run the following command:
```bash macOS
curl -fsSL https://raw.githubusercontent.com/phospho-app/phosphobot/main/install.sh | bash
```
```bash Linux
curl -fsSL https://raw.githubusercontent.com/phospho-app/phosphobot/main/install.sh | sudo bash
```
```powershell Windows
powershell -ExecutionPolicy ByPass -Command "irm https://raw.githubusercontent.com/phospho-app/phosphobot/main/install.ps1 | iex"
```
```bash uv (Linux and macOS)
# Install uv: https://docs.astral.sh/uv/
curl -LsSf https://astral.sh/uv/install.sh | sh
# Run phosphobot
uvx phosphobot@latest run
```
```powershell uv (Windows)
# Install uv: https://docs.astral.sh/uv/
powershell -ExecutionPolicy ByPass -c "irm https://astral.sh/uv/install.ps1 | iex"
# Run phosphobot
uvx phosphobot@latest run
```
Then, run the phosphobot server:
```bash
phosphobot run
```
It can take up to 15 seconds for the server to start.
On the same computer, open a web browser and navigate to `localhost`. You should now see the **phosphobot dashboard**.
Discover how to control your robot arm from the dashboard and from the Meta Quest app.
## Using uv (pip)
phosphobot is also available as a [Python package.](https://pypi.org/project/phosphobot/) We recommend using [uv](https://docs.astral.sh/uv/getting-started/installation/) to install it.
1. Install uv by running the following command in your terminal:
```bash macOS and Linux
curl -LsSf https://astral.sh/uv/install.sh | sh
```
```powershell Windows
powershell -ExecutionPolicy ByPass -c "irm https://astral.sh/uv/install.ps1 | iex"
```
2. Run phosphobot with uv by running the following command in your terminal:
```bash
uvx phosphobot@latest run
```
Using the `@latest` tag ensures you always run the latest version of phosphobot.
If you want to run a specific version, [you can specify it:](https://docs.astral.sh/uv/guides/tools/#requesting-specific-versions)
```bash
uvx phosphobot>=0.30 run
```
Check the [uv doc](https://docs.astral.sh/uv/guides/tools/#upgrading-tools) on how to manually handle updates.
### Troubleshooting
Depending on your system, you may encouter errors related to **pybullet** compilation. If so, please refer [to this guide](https://github.com/phospho-app/phosphobot/tree/main/phosphobot#troubleshooting-pybullet-wont-build-on-windows) that list some common issues and how to fix them..
## MacOS (brew)
On MacOS, use [Homebrew](https://brew.sh/) to install phosphobot:
```bash
brew tap phospho-app/phosphobot
brew install phosphobot
```
To **update phosphobot**, run the following command:
```bash
brew update && brew upgrade phosphobot
```
You can also [directly download the binaries here.](https://github.com/phospho-app/homebrew-phosphobot/releases/latest)
## Linux (apt)
On Linux, we use apt to distribute phosphobot and you need additional packages. That's why you need to run the install script with sudo:
```bash
curl -fsSL https://raw.githubusercontent.com/phospho-app/phosphobot/main/install.sh | sudo bash
```
To **update phosphobot**, run the following command:
```bash
sudo apt update && sudo apt install --only-upgrade phosphobot
```
## Raspberry Pi (apt)
phosphobot on Raspberry Pi has advanced features to make it easier to use (led ticking, bluetooth connection, WiFi hotspot, extra dependencies already installed).
*If you already have a setup Raspberry Pi, you can skip this part*
Download and install the [Raspberry Pi imager](https://www.raspberrypi.com/software/) on your main computer.
Insert an **SD card** into your main computer.
Run the Raspberry Pi imager.
* Select your Raspberry Pi model (the version in the dev kit is Raspberry Pi 5).
* Select the Raspberry Pi OS (64 bit)?
* Select your SD card?
Then, click **Next** on the bottom right.
When the window pops up asking for OS customisation, select **Edit Settings**.
In general settings :
* Set hostname to `phosphobot`?
* Set username and password to `phosphobot` and `password123` (example).
* Configure wireless LAN: add your Wifi network name, password, and country. Be careful: tHiS iS cAsE sEnSiTiVe!
In the Services settings, make sure SSH is enabled.
Then hit Save and hit Yes to use the OS customization settings. Write the image to the SD card.
When writing is finished, take out the SD card from your computer.
Insert the microSD into the Raspberry Pi when it's turned off.
**1. SSH into the Raspberry Pi**
SSH (Secure Shell) allows you to access the Raspberry Pi remotely from your main computer through the terminal.
Turn on the Raspberry Pi by plugging it to a power source. Wait for it to boot (look for the LED pattern)
Then, open a terminal and SSH into your Raspberry Pi. If you've followed the previous part, this means running on your computer this command :
```bash
ssh phosphobot@phosphobot.local
```
*If you didn't follow the previous part, the [username@hostname.local](mailto:username@hostname.local) and password may be different.*
When asked about the authenticity of host phosphobot.local, type `yes` to accept.
And when asked for password, enter `password123` .
**2. Install the software**
When you've successfully SSH in the Raspberry Pi, run this to install the teleoperation server :
```bash
curl -fsSL https://raw.githubusercontent.com/phospho-app/phosphobot/main/install.sh | sudo bash
```
**Your Raspberry Pi should be connected to the internet.**
* When prompted `btberrywifi install location`, **leave blank**.
* When prompted `bluetooth password`, **leave blank**
* When prompted `Enter your country code`, specify your country code (eg: US, FR…)
After that, the installation script will download install dependencies. It can take a few minutes depending on your connection speed.
**3. Once the installation is complete, reboot your Raspberry Pi.**
```bash
sudo reboot
```
Every time the control module is powered on, it will check for updates and install them automatically. They will be available the next time you power it on.
## Windows
### Windows (Install script)
1. To **install** or **update** phosphobot, run the following command in PowerShell:
```powershell
powershell -ExecutionPolicy Bypass -Command "irm https://raw.githubusercontent.com/phospho-app/phosphobot/main/install.ps1 | iex"
```
2. To start the phosphobot server, run the following command in PowerShell.
```powershell
phosphobot run
```
3. When the "Windows protected your PC" warning appears, click **"More info"**, then click **"Run anyway"**.
The warning only appears on first run. Subsequent launches work normally.
### Windows (manual)
You can also [directly download the binaries here.](https://github.com/phospho-app/homebrew-phosphobot/releases/latest). After downloading, run phosphobot this way:
```powershell
C:\path\to\phosphobot.exe run
```
Change `C:\path\to\` to the path where you downloaded phosphobot. To make this easier, we recommand you to rename the file to `phosphobot.exe` and move it to your Desktop.
Then, you can **create a shortcut** to launch `C:\Users\\Desktop\phosphobot.exe run` from anywhere.
### Windows (WSL)
You can use the Windows Subsystem for Linux (WSL) to run phosphobot.
1. Please refer to [this guide](https://learn.microsoft.com/en-us/windows/wsl/install) to install WSL on your Windows machine.
2. Use [usbipd](https://github.com/dorssel/usbipd-win) to pass the robot arms and the cameras to WSL.
3. Carry on with the [Linux installation instructions](#linux-apt).
## Install from source
phosphobot is open source and you can install it from source to contribute to the project or fix compatibility issues.
You can find the instructions in the [GitHub repository right here](https://github.com/phospho-app/phosphobot/tree/main/phosphobot)
## Support
Join the Discord to ask questions, get help from others and get updates
# Train robotics AI models
Source: https://docs.phospho.ai/learn/ai-models
A guide to training AI models that control robots
The phospho starter pack makes it easy to train robotics AI models by integrating with **LeRobot** from Hugging Face.
In this guide, we'll show you how to train the ACT (Action Chunking Transformer) model using the phospho starter pack and LeRobot by Hugging Face.
## What is LeRobot?

LeRobot is a platform designed to make real-world robotics more accessible for everyone. It provides pre-trained models, datasets, and tools in PyTorch.
It focuses on state-of-the-art approaches in **imitation learning** and **reinforcement learning**.
With LeRobot, you get access to:
* Pretrained models for robotics applications
* Human-collected demonstration datasets
* Simulated environments to test and refine AI models
Useful links:
* [LeRobot on GitHub](https://github.com/huggingface/lerobot)
* [LeRobot on Hugging Face](https://huggingface.co/lerobot)
* [AI models for robotics](https://huggingface.co/models?pipeline_tag=robotics\&sort=trending)
## Step by step guide
In this guide, we will use the phospho starter pack to record a dataset and upload it to Hugging Face.
## Prerequisites
1. You need an assembled **SO-100** robot arm and **cameras**. Get the [phosphot starter pack here](https://robots.phospho.ai).
2. Install [the phosphobot software](/installation)
```bash macOS
curl -fsSL https://raw.githubusercontent.com/phospho-app/phosphobot/main/install.sh | bash
```
```bash Linux
curl -fsSL https://raw.githubusercontent.com/phospho-app/phosphobot/main/install.sh | sudo bash
```
```powershell Windows
powershell -ExecutionPolicy ByPass -Command "irm https://raw.githubusercontent.com/phospho-app/phosphobot/main/install.ps1 | iex"
```
```bash uv (Linux and macOS)
# Install uv: https://docs.astral.sh/uv/
curl -LsSf https://astral.sh/uv/install.sh | sh
# Run phosphobot
uvx phosphobot@latest run
```
```powershell uv (Windows)
# Install uv: https://docs.astral.sh/uv/
powershell -ExecutionPolicy ByPass -c "irm https://astral.sh/uv/install.ps1 | iex"
# Run phosphobot
uvx phosphobot@latest run
```
3. **Connect your cameras to the computer.** Start the phosphobot server.
```bash
phosphobot run
```
4. Complete the [quickstart](/so-100/quickstart) and check that you can [control your robot](/basic-usage/teleop).
5. You have the **[phosphobot teleoperation app](/examples/teleop)** is installed on your **Meta Quest 2, Pro, 3 or 3s**
Unlock access to VR Control, advanced AI training, and more.
Get the phospho teleoperation app on the Meta Store for Meta Quest 2, Pro, 3, and 3s.
If you bought our [phospho starter pack](https://robots.phospho.ai/starter-pack), you should have received a link to get the phospho teleoperation Meta Quest app. Please [reach out](mailto:contact@phospho.ai) if not.
6. You have a **device to train your model**. We recommend using a **GPU** for faster training.
## 1. Set up your Hugging Face token
To sync datasets, you need a Hugging Face token with write access. Follow these steps to generate one:
1. Log in to your Hugging Face account. You can create [one here for free](https://huggingface.co)
2. Go to **Profile** and click **Access Tokens** in the sidebar.
3. Select the **Write** option to grant write access to your account. This is necessary for creating new datasets and uploading files. Name your token and click **Create token**.
4. **Copy the token** and **save it** in a secure place. You will need it later.
5. Make sure the phosphobot server is running. Open a browser and access `localhost` or `phosphobot.local` if you're using the control module. Then go to the Admin Configuration.
6. **Paste the Hugging Face token**, and **save it**.
## 2. Set your dataset name and parameters
Go to the *Admin Configuration* page of your phospshobot dashboard. You can adjust settings. The most important are:
* **Dataset Name**: The name of the dataset you want to record.
* **Task**: A text description of the task you're about to record. For example: *"Pick up the lego brick and put it in the box"*. This helps you remember what you recorded and is used by some AI models to understand the task.
* **Camera**: The cameras you want to record. By default, all cameras are recorded. You can select the cameras to record in the Admin Configuration.
* **Video Codec**: The video codec used to record the videos. The default is `AVC1`, which is the most efficient codec. If you're having compatibility issues due to unavailable codecs (eg on Linux), switch to `mp4v` which is more compatible.
## 3. Control the robot in the Meta Quest app
The easiest way to record a dataset is to use the Meta Quest app.
Unlock access to VR Control, advanced AI training, and more.
Get the phospho teleoperation app on the Meta Store for Meta Quest 2, Pro, 3, and 3s.
If you bought our [phospho starter pack](https://robots.phospho.ai/starter-pack), you should have received a link to get the phospho teleoperation Meta Quest app. Please [reach out](mailto:contact@phospho.ai) if not.The phospho teleoperation app works with a [Meta Quest](https://www.meta.com/fr/quest/quest-3/?srsltid=AfmBOorMLUmJKFQr35ssCi1DDqSNgpHk0sLHqo_tHG8kgclCYbMToAPa). Compatible models: Pro, 2, 3, 3s.
1. In the Meta Quest, open the phospho teleop application. Wait a moment, then you should see a row displaying **phosphobot** or your computer name. Click the **Connect** button using the `Trigger Button`.
Make sure you're connected to the same WiFi as the phosphobot server or the control moduleIf you don't see the server, check the IP address and port of the server in the phosphobot dashboard and enter it manually.
2. After connecting, you'll see the list of connected cameras and recording options.
* Move the windows with the `Grip button` to organize your space.
* Enable preview to see the camera feed. Check the **camera angles** and adjust their positions if needed.
We recommend **disabling** the camera preview to save bandwidth.
3. Press `A` once to start teleoperation and begin moving your controller.
* The robot will naturally follow the movement of your controller. Press the `Trigger button` to close the gripper.
* Press `A` again to stop the teleoperation. The robot will stop.
4. Press `B` to start recording. You can leave the default settings for your first attempt.
* Press `B` again to stop the recording.
* Press `Y` (left controller) to discard the recording.
5. Continue teleoperating and stop the recording by pressing `B` when you're done.
6. The recording is automatically saved in **LeRobot v2** format and **uploaded to your HuggingFace account.**
Go to the **Dataset tab** in the phosphobot dashboard to see the recorded dataset. Use the button Preview to preview them using [LeRobot Dataset Visualizer](https://huggingface.co/spaces/lerobot/visualize_dataset).
The dataset visualizer only works with `AVC1` video codec. If you used another
codec, you may see black screens in the video preview. Preview directly the
videos files in a video player by opening your recording locally:
`~/phosphobot/recordings/`.
## 4. Train your first model
### Train GR00T-N1-2B, Pi0.5, ACT, BB\_ACT in one click with phosphobot cloud
To train a model, you can use the phosphobot cloud. This is the quickest way to train a model.
1. Enter the name of your dataset on Hugging Face (example: `PLB/simple-lego-pickup-mono-2`) in the **AI Training and Control** section.
2. Select the parameters you want to change or leave the default ones.
3. Click on **Train AI Model**. Your model starts training. Training can take up to 3 hours. Follow the training using the button **View trained models**. Your model is uploaded to HuggingFace [on the phospho-app account](https://huggingface.co/phospho-app).
4. To control your robot with the trained model, go to the **Control your robot** section and enter the name of your model.
Learn how to train a model with phosphobot cloud
Learn about controlling your robot with GR00T-N1-2B and phosphobot cloud
### Train an ACT model locally with LeRobot
You need a GPU with at least 16GB of memory to train the model.
This guide will show you how to train the ACT model locally using **LeRobot** for your SO-100 robot.
1. Install [uv](https://docs.astral.sh/uv/), the modern Python package manager.
```bash
# On macOS and Linux
curl -LsSf https://astral.sh/uv/install.sh | sh
```
2. Set up training environment.
```bash
mkdir my_model
cd my_model
uv init
uv add phosphobot git+https://github.com/phospho-app/lerobot
git clone https://github.com/phospho-app/lerobot
```
3. (MacOS only) Set environment variables for torch compatibility:
```bash
export DYLD_LIBRARY_PATH="/opt/homebrew/lib:/usr/local/lib:$DYLD_LIBRARY_PATH"
```
4. (Optional) Add the [Weight & Biases](https://wandb.ai) integration for training metrics tracking:
```bash
wandb login
```
5. Run training script - Adjust parameters based on your hardware:
```bash
uv run lerobot/lerobot/scripts/train.py \
--dataset.repo_id=LegrandFrederic/Orange-brick-in-black-box \ # Replace with /
--policy.type=act \ # Choose from act, diffusion, tdmpc, or vqbet
--output_dir=outputs/train/phoshobot_test \
--job_name=phosphobot_test \
--policy.device=mps \ # Use 'cuda' for NVIDIA GPUs or 'cpu' if no GPU
--wandb.enable=true # Optional
```
Trained models will be saved in `lerobot/outputs/train/`.
6. (Optional) Upload the model to Hugging Face. Login to HuggingFace CLI:
```bash
huggingface-cli login
# Enter your write token from https://huggingface.co/settings/tokens
```
HuggingFace model hub is a wrapper of [Github LFS](https://docs.github.com/en/repositories/working-with-files/managing-large-files/about-git-large-file-storage). Push the model to Hugging Face:
```bash
# From your training output directory
cd lerobot/outputs/train/phosphobot_test
# Initialize and push to Hub (replace and )
huggingface-cli repo-create / --type model
git lfs install
git add .
git commit -m "Add trained ACT model"
git push
```
## 5. Control your robot with the ACT model
1. Launch ACT inference server (Run on GPU machine):
```bash
# Download inference server script
curl -o server.py https://raw.githubusercontent.com/phospho-app/phosphobot/main/inference/ACT/server.py
```
```bash
# Start server
uv run server.py --model_id LegrandFrederic/Orange-brick-in-black-box # Replace with
```
2. Make sure the phosphobot server is running to control your robot:
```bash
# Install it this way
curl -fsSL https://raw.githubusercontent.com/phospho-app/phosphobot/main/install.sh | bash
# Start it this way
phosphobot run
```
3. Create inference client script (Copy the content into `my_model/client.py`):
```python
# /// script
# requires-python = ">=3.10"
# dependencies = [
# "phosphobot",
# ]
#
# ///
# /// script
# requires-python = ">=3.10"
# dependencies = [
# "phosphobot",
# ]
#
# ///
from phosphobot.camera import AllCameras
import httpx
from phosphobot.am import ACT
import time
import numpy as np
# Initialize hardware interfaces
PHOSPHOBOT_API_URL = "http://localhost:80"
allcameras = AllCameras()
time.sleep(1) # Camera warmup
# Connect to ACT server
model = ACT()
while True:
# Capture multi-camera frames (adjust camera IDs and size as needed)
images = [allcameras.get_rgb_frame(0, resize=(240, 320))]
# Get current robot state
state = httpx.post(f"{PHOSPHOBOT_API_URL}/joints/read").json()
# Generate actions
actions = model(
{"state": np.array(state["angles_rad"]), "images": np.array(images)}
)
# Execute actions at 30Hz
for action in actions:
httpx.post(
f"{PHOSPHOBOT_API_URL}/joints/write", json={"angles": action.tolist()}
)
time.sleep(1 / 30)
```
4. Run the inference script:
```bash
uv run client.py
```
Stop the script by pressing `Ctrl + C`.
## What's next?
Next, you can use the trained model to control your robot. Head to our [guide](/basic-usage/inference) to get started!
Learn more about Robotics AI models
Join the Discord to ask questions, get help from others and get updates (we
ship almost daily)
# Cameras
Source: https://docs.phospho.ai/learn/cameras
What are the different cameras used for robotics ?
## Cameras in Robotics
Cameras are the eyes of your robot.
Robots may rely on one or more camera to make decisions. The images, along with additional information such as joint positions, are fed into the model during both training and inference.
There exist different types of cameras and phosphobot supports most of them.
### How to connect your camera to phosphobot?
phosphobot uses the powerful [OpenCV](https://opencv.org/) library to detect cameras automatically. This open source library supports most of the generic cameras available. phosphobot ships with its own binary of OpenCV, so you don't need to install it separately.
Placement of cameras matter. In robotics datasets, there are two main types of camera setups:
1. **Context cameras**: These cameras are placed to capture the environment and objects around the robot. These context cameras can be placed on the robot (e.g. on the head, on the body) or in the environment (e.g. on the walls, on the ceiling).
2. **Wrist cameras**: These cameras are placed on the wrists (hands) of the robot. They help with fine-grained manipulation tasks, so that the robot can see if it's holding an object correctly. The [phosphobot starter pack](https://robots.phospho.ai) comes with two wrist cameras, one for each arm.
Adding more cameras usually helps to improve AI accuracy. However, it requires more compute at inference time (slower models) and makes the real-life setup more cumbersome. Usually, one context camera and two wrist cameras are a good trade-off.
### What are stereo cameras?
Stereo Cameras are made of two lenses that capture two images of the same scene from slightly different angles.
The shift between the two images is used to calculate the depth of the scene. The greater the shift, the closer the object is to the camera.
Learn how to compute a depth map from stereo images
In deep learning models, however, you usually feed directly the two images to the model. The model learns to extract the depth information by itself.
### What are depth cameras? (Realsense Cameras)
Depth cameras are a type of camera that can directly return a depth map in addition to the color image. A depth map is a 2D image where each pixel represents the distance between the camera and the object in the scene.
This is an example of a depth image:
Intel RealSense cameras are a popular choice for depth cameras. They are more complex than standard cameras. They have multiple sensors (infrared, multiple color sensors, etc.) and a **processor** used to combine them to compute the depth map.
This means they are pricier than standard cameras and tend to be more difficult to set up.
Learn more about Intel RealSense cameras
phosphobot software supports Intel RealSense cameras using the [Intel Realsense SDK 2.0](https://github.com/IntelRealSense/librealsense/tree/master).
### What are more specific cameras used in robotics?
More specific use cases require more specific cameras. For example:
* **[Thermal cameras](https://en.wikipedia.org/wiki/Thermography)** are used to detect heat. They are useful to detect living beings in the dark or to detect overheating components.
* **[Night vision cameras](https://en.wikipedia.org/wiki/Night-vision_device)** are used to capture images in the dark. They are useful for surveillance or for night-time navigation.
* **[Lidar cameras](https://en.wikipedia.org/wiki/Lidar)** are used to capture 3D point clouds of the environment. They are useful for autonomous vehicles or for mapping tasks.
* **[360 cameras](https://en.wikipedia.org/wiki/Omnidirectional_\(360-degree\)_camera)** are used to capture a full 360° view of the environment. They are useful for navigation tasks or for telepresence robots.
* **[Multi-spectral cameras](https://en.wikipedia.org/wiki/Multispectral_imaging)** are used to capture images in multiple wavelengths. They are useful for agriculture or for medical imaging.
The eyes you give to your robot will depend on the tasks you want it to perform.
## Dataset Recording
When [recording a dataset](/basic-usage/dataset-recording) with phosphobot, the images are saved in a mp4 video file using OpenCV. The number of FPS (frames per second), the mp4 codec as well as the video resolution can be configured for recording in the Admin Configuration.
By default, all available cameras are recorded. But you can disable some of them in the Admin Configuration. This is helpful if you don't want to record your laptop camera or if Apple's iPhone camera records inside your pocket.
Anybody can contribute to add new types of cameras to the phospho starter packs by creating a new camera class inheriting from `BaseCamera`.
Join the community and add support for more cameras for the phospho starter packs.
## Troubleshooting Cameras
Every camera vendor has its own SDK and drivers. This can lead to compatibility issues. Here are some tips:
1. On MacOS, you may have the error `failed to set power state` when connecting a Realsense camer. [This is a known issue](https://github.com/phospho-app/phosphobot/issues/171). The solution is to run `phosphobot` with `sudo` to avoid permission issues.
```
sudo phosphobot run
```
2. On Nvidia Jetpack 6 (Nvidia jetson), [pyrealsense2 doesn't work out of the box.](https://github.com/phospho-app/phosphobot/issues/206). You need to recompile the pyrealsense2 library from source.
3. Use **virtual cameras** to avoid compatibility issues. Virtual cameras let you record your computer screen or a specific window. This is helpful as a workaround when your camera is not detected by phosphobot.
Check OBS Studio guide to create virtual cameras
4. Ask for help on the [phospho Discord](https://docs.phospho.ai/welcome), along with your camera model, your operating system (MacOS, Linux, Windows...) and what you have tried so far. We'll get this working together!
# Gravity Compensation
Source: https://docs.phospho.ai/learn/gravity-compensation
Understanding Gravity Compensation in Robotics
## Introduction
Gravity compensation is a fundamental technique in robotics that **allows a robot arm to be freely moved by hand** while maintaining its position when released. This page will explain how you can create a simple gravity compensation algorithm for the SO-100 robot arm.
You can enable gravity compensation in phosphobot by going to **Leader arm control** and clicking on the **Enable gravity compensation** button.
### How Gravity Compensation Works
At its core, **gravity compensation counteracts the effect of gravity on a robot's joints**. Without compensation, a robot arm would fall due to gravity when the motors are not actively holding position. *With proper compensation, you can move the robot by hand, and it will stay in place when released.*
Gravity compensation enables intuitive physical interaction with robots without requiring motor power to maintain position.
### The Physics Behind It
The implementation uses the principle of inverse dynamics to calculate the torques needed to counteract gravity. Let's break down the key components:
#### Inverse Dynamics
Inverse dynamics calculates the joint torques ($\tau$) required to achieve a desired motion, given the current positions, velocities, and accelerations of the joints. In our case, we use it to find the gravity torques ($\tau_g$).
The equation for **inverse dynamics** can be expressed as:
$$
\tau=M(q)\ddot{q} + C(q,\dot{q})\dot{q} + G(q)\tau
$$
Where:
* **$ M(q)$** is the mass matrix
* **$C(q,\dot{q})$** represents Coriolis and centrifugal forces
* **$G(q)$** is the gravity vector
* **$q, \dot{q}, \ddot{q}$** are joint positions, velocities, and accelerations respectively
We want to solve for a specific case where the robot is at rest.
When we set velocities and accelerations to zero, we get just the gravity term:
τg=G(q)\tau\_g = G(q)τg=G(q)
#### Virtual Displacement Method
Our robot is an SO-100 with STS3215 motors, which don't natively support torque control. Instead, they use position control.
To achieve **gravity compensation**, we need to simulate the effect of torque control using position control.
Instead of directly applying the calculated torques (which would require torque control), we create small virtual displacements in the direction that would counteract gravity.
For each joint, we calculate a **desired position** that's slightly offset from the current position:
$$
θ_{des}=θ_{current}+\alpha \cdot \tau_g\theta_{des}
$$
Where:
* **$θ_{des}$** is the desired joint position
* **$θ_{current}$** is the current joint position
* **$\alpha$** is a scaling factor that determines how much the joint should move
* **$\tau_g$** is the gravity torque for that joint
## Implementation Details
Let's examine key aspects needed to implement gravity compensation for the SO-100 robot arm.
### PID Gains Adjustment
To make the robot arm more compliant during gravity compensation, we adjust the PID gains of the motors. The default gains are optimized for position control, but we need **different gains** for gravity compensation.
These will depend on the motors you have, 6V or 12V.
Play around with the values to find the best settings for your robot.
These are lower than the default gains, making the robot **more responsive to external forces** while still maintaining enough stiffness to hold position against gravity.
### The Control Loop
The main gravity compensation loop needs to run at a high frequency to provide smooth motion. You should aim for at least 50 Hz to 100 Hz.
Here's a simplified version of the loop:
1. Read **current** joint positions
2. **Update** the robot state in the physics simulator (Mujoco, Genesis, PyBullet, etc.)
3. **Calculate gravity torques** using inverse dynamics
4. Compute desired positions with the **virtual displacement formula**
5. Send the new positions to the motors
6. Repeat
**Physics Simulators:**
* Mujoco
* Genesis
* PyBullet
Learn more about PyBullet for robot simulation
### The Alpha Parameter
The alpha parameter is crucial for tuning the gravity compensation:
This array controls *how much each joint responds to the calculated gravity torques*:
* **Higher** values make the joint more responsive but potentially less stable
* **Lower** values make the joint more stable but potentially less responsive
Zero values mean **no compensation** for that joint
The values are tuned for each joint based on its mass properties and mechanical characteristics.
### Mathematical Analysis
The virtual displacement method can be understood as a **form of impedance control**. In traditional impedance control, the relationship between force and position is:
$$
F= K(x_{des} - x) + B\dot{x}F
$$
Where:
* **$x_{des}$** is the desired position
* **$x$** is the current position
* **$K$** is stiffness
* **$B$** is damping
Our approach inverts this relationship:
$$
x_{des}=x+K^{-1}Fx_{des}
$$
In our case:
* F is the **gravity force**
* $K^{-1}$ is represented by the $\alpha$ parameter.
Learn more about Inverse Dynamics in robotics
# Enjoy, and Happy Coding!
# How to train a good AI model
Source: https://docs.phospho.ai/learn/improve-robotics-ai-model
Best practices for recording a dataset for imitation learning in robotics
It can be frustrating when your AI robotics model doesn't perform as expected after hours of training. Imitation learning models are powerful mimics, but **they don't understand the intent** behind an action; **they only learn to replicate the patterns they see.** This means that if a model is failing, the root cause often isn't a bug in the model itself, but rather an issue in the data it was trained on or the way it was trained.
The principle of **"garbage in, garbage out"** is especially true here. A model trained on ambiguous, inconsistent, or noisy data will produce ambiguous, inconsistent, or noisy behavior. This guide will walk you through the most critical areas to focus on, starting with the foundation of any good model: the dataset.
We'll share with you the tips and tricks we've collected during our experiments and research to give you the best chance of success.
## Improving Your Dataset Collection
The quality and structure of your demonstration data will have the single biggest impact on your model's performance. Think of data collection as teaching by example—the clearer your examples, the better your student will learn.
### Control the Environment
A consistent and controlled environment is essential for collecting reliable data. Your goal is to eliminate random variables that could confuse the model. Keep the robot's operating area free of unnecessary changes, like people walking by or other machinery moving in the background. Most importantly, ensure the lighting is even and stable across all recordings. Shadows and glare can obscure objects or change their appearance, so use diffused lamps or ring lights to maintain uniformity and avoid relying on natural light, which varies throughout the day.
### Optimize Your Camera Setup
Cameras are the eyes of your robot, and their configuration directly impacts what the model can "see" and learn. For best results, try to match the camera arrangement used to pre-train your foundation model. For instance, a model like [pi-zero by Physical Intelligence](https://physical-intelligence.github.io/pi-zero/) was trained with wrist cameras on each arm and a first-person view (FPV) camera. Positioning these cameras to clearly capture the robot's gripper, the target object, and the overall workspace is crucial. Before recording, ask yourself: “Could I control the robot effectively using only these camera views?” If the answer is no, your model will struggle too.
### Demonstrate Clear Actions
How the robot approaches and interacts with objects forms the core of the learned task. Plan the robot's movements so the target object is visible to the cameras—especially the wrist cameras—for as long as possible. Avoid having the gripper block the view of the object during the final approach. Instead, angle the arm to keep both the gripper and the target in sight. This clarity helps the model build a strong connection between its movements and the outcome. Strive for a consistent and repeatable strategy for each task, as this helps the model learn a reliable pattern of behavior.
### Build a Diverse and Balanced Dataset
A model that only sees one way to do a task will be brittle. A diverse dataset teaches the model to generalize across different but related scenarios. Introduce intentional variations by changing the starting position of the target object (e.g., left, right, center) or by using objects of different shapes, sizes, and colors. This defines the "learning space" where your model can operate successfully.
However, it's important to balance diversity with consistency. Avoid recording "outlier" episodes that are radically different from the rest, as they can mislead the model and teach it incorrect or unsafe behaviors. For example, if you're traning a model to pick up a cup, don't include episodes where the robot **fails** to pick it up, or episodes where it **pushes** the cup instead of grasping it. These outliers can confuse the model and lead to poor performance.
### Collect the Right Amount of Data
While quality is key, quantity also matters. A good starting point for a single task is **40-50 high-quality episodes**. An "episode" is one complete execution of the task, from start to finish.
For more complex tasks or when fine-tuning large models, **you may need more.**
For example, when fine-tuning a model like **GR00T N1.5**, a common recommendation is to record longer episodes (30-40 seconds each) for a total of **20 to 30 minutes of recorded data**. You can see a great [reference dataset for a table cleanup task](https://huggingface.co/spaces/lerobot/visualize_dataset?path=%2Fyouliangtan%2Fso100-table-cleanup%2Fepisode_0) to understand the quality and structure to aim for.
Recording data can get boring for humans. Try to make it fun using **VR control**, making breaks, and rewarding yourself for reaching milestones. Pick an exciting demo that you find meaningful and a demo that you'll enjoy sharing on social media. This will help you stay motivated and engaged throughout the process.
Unlock access to VR Control, advanced AI training, and more.
Get the phospho teleoperation app on the Meta Store for Meta Quest 2, Pro, 3, and 3s.
If you bought our [phospho starter pack](https://robots.phospho.ai/starter-pack), you should have received a link to get the phospho teleoperation Meta Quest app. Please [reach out](mailto:contact@phospho.ai) if not.
## Final Sanity Checks Before Scaling
Robotics datasets are time-consuming to create and difficult to edit. Before you invest heavily in collecting hundreds of episodes, it's wise to perform a few checks to ensure your time is well spent.
First, record just a handful of episodes and use a tool like the [LeRobot Visualize Dataset space](https://huggingface.co/spaces/lerobot/visualize_dataset) to confirm the data was saved correctly and loads without errors. Then, run a full, small-scale cycle: collect a small dataset (e.g., 10 episodes), train a model for a few epochs, and test its ability to perform the task. Once a model is trained, a great test is to see if it can at least replay one of the training episodes perfectly. If this mini-pipeline works, you can scale up your data collection with confidence.
## Beyond the Dataset: Hyperparameter Tuning
If your dataset is solid but the model still struggles, the issue may lie in the training configuration. Hyperparameters are the settings that control the learning process itself. While default values are often a good start, tuning them can lead to significant performance gains.
Each model have different hyperparameters, but the idea is always the same: tinker with the settings to find the best configuration for your specific task. Here are some common hyperparameters to consider:
### Learning Rate
The learning rate determines how much the model adjusts its internal parameters after each batch of data. Think of it as the size of the steps it takes towards a solution. If the learning rate is too high, the model might "overshoot" the optimal solution and become unstable. If it's too low, training can be incredibly slow, or the model might get stuck in a suboptimal state. A common strategy is to start with a default value (e.g., 1e-4) and adjust it by factors of 10 (e.g., 1e-3 or 1e-5) to see how it affects performance.
### Number of Epochs or Steps
An epoch is one full pass through the entire training dataset. The number of epochs determines how many times the model gets to see the data. Too few epochs can lead to *underfitting*, where the model hasn't learned the patterns in the data. Too many epochs can cause *overfitting*, where the model memorizes the training data perfectly but fails to generalize to new, unseen situations.
**Start training with a small number of epochs (eg: 1 or 2),** and then progressively scale up.
To train your models for longer, consider using [phospho pro](https://app.phospho.ai) to unlock longer training times.
# What's next?
AI robotics is the most complex and exciting field in robotics research. Keep in mind that many of the demos you see online are usually carefully staged, edited, and cherry-picked to show the best results. Sometimes, they are even pre-recorded. They are also the result of countless hours of work, trial and error, and iteration. So don't be discouraged if your first attempts don't go as planned! Keep improving and sharing your progress with the community.
Record datasets
Train your first AI model
Join the Discord to ask questions, get help from others, and get updates.
# Kinematics
Source: https://docs.phospho.ai/learn/kinematics
How to move a robot arm to a specific position.
A robot consists of **actuators**, motors that move to a specific position when given a command.
But how do we determine the exact commands needed to move the robot to a specific position in a 3D space?
## Forward kinematics
*Forward kinematics is the process of calculating the position and orientation of the end effector based on the given joint angles of the robot*.
It can be represented as a function f that takes the joint angles q as input and returns the position of the end effector x,y, and z as well as its orientation, $\phi , \theta$ and $\psi$.
$$
\mathbf{x} = \mathbf{f}(\mathbf{q}) =
\begin{bmatrix}
x \\
y \\
z \\
\phi \\
\theta \\
\psi
\end{bmatrix}
=
\begin{bmatrix}
f_1(q_1, q_2, \dots, q_n) \\
f_2(q_1, q_2, \dots, q_n) \\
f_3(q_1, q_2, \dots, q_n) \\
f_4(q_1, q_2, \dots, q_n) \\
f_5(q_1, q_2, \dots, q_n) \\
f_6(q_1, q_2, \dots, q_n)
\end{bmatrix}
$$
For a simple one-joint robot, forward kinematics is straightforward and can be solved using trigonometry
For robots with multiple joints, we can use the [Denavit-Hartenberg convention](https://en.wikipedia.org/wiki/Denavit%E2%80%93Hartenberg_parameters), a systematic way of representing link transformations. This allows us to determine the end effector’s position and orientation in a 3D coordinate system.
## Inverse kinematics
*Inverse kinematics is the process of determining the joint angles required to place the end effector at a desired position and orientation.*
It can be thought of as the **inverse of forward kinematics**:
$$
\mathbf{q} = \mathbf{f}^{-1}(\mathbf{x})
$$
Inverse kinematics is essential for controlling the robot arm. It allows us to move the robot arm to a specific position and orientation in 3D space.
It is a more complex process, as it involves solving a system of equations to determine the joint angles of the robot.
* There may be **multiple solutions** (different joint configurations that reach the same end effector position).
* Some positions may be **unreachable** due to mechanical constraints.
* It often requires solving **nonlinear equations**, which may not have a direct solution.
To address these challenges, inverse kinematics is commonly solved as an **optimization problem**, minimizing the difference between the desired and actual end effector positions.
Learn more about Inverse Kinematics
## Moving a robot
Since we control the actuators themselves, we can move the robot arm to a specific position by sending the joint angles to the actuators. This involves:
1. **Reading the current joint angles** from the motors.
2. **Solving the inverse kinematics problem** iteratively to converge towards the desired joint angles.
3. **Sending these joint angles to the actuators** to move the robot to the desired position.
The [phosphobot SDK](https://github.com/phospho-app/phosphobot) gives you **two different movement commands**:
* [move/absolute](/control/move-absolute-position): Move the robot arm to a specific position and orientation in 3D space.
* [move/relative](/control/move-relative-position): Move the robot arm by a specific distance and rotation in 3D space.
## Simulation
Simulations allow you to test movement models in **virtual environments** before applying them to a physical robot.
They **replicate real-world physics** while remaining computationally efficient.
Simulations are particularly useful for testing **inverse kinematics**, enabling safe and rapid iteration on motion planning before deploying on actual hardware.
Note that **no simulation prevents the need for real-world testing.** Real world properties like materials, sensor noise, human interaction, and more can't be fully replicated. Simulations themselves can have bugs or inaccuracies that affect results.
Simulations are here to help you iterate faster, expand your mathematical toolkit, and reduce the risk of damaging hardware.
## Trade-offs when choosing a simulation backend
* Simple tools are easy to use, but don't offer the same level of realism. They are also less extensible.
* More realistic simulations need more computing power, which can be slow or expensive. They are usually more difficult to setup and can be overkill for simple tasks.
* Open-source options are flexible and community-driven, while proprietary ones might be more polished but costly and hardware-specific.
The right choice depends on your needs and resources.
## PyBullet
PyBullet is an open-source physics engine released in 2015. It is maintained by the community, but its maintenance status is currently inactive, with no new versions released in the past year.
### Requirements
PyBullet uses URDF (Unified Robot Description Format) files to define robot structures.
It's lightweight and runs on most modern computers without specialized hardware.
### Features
PyBullet offers a balance between realism and computational efficiency, suitable for real-time simulations and educational purposes.
Despite being old, Pybullet is easy to set up, with extensive documentation and community support.
**Pros:** Easy to use, good community support, open source.
**Cons:** Lack advanced features, inactive maintenance.
Learn more about PyBullet
## Gazebo
Gazebo is a well-established open-source robotics simulator that has been widely used in academia and industry since its initial release in 2004. It is maintained by Open Robotics and has a strong community of contributors.
### Requirements
Gazebo uses SDF (Simulation Description Format) files to define robot models and environments. It supports a wide range of operating systems, including Linux, macOS, and Windows, and can run on standard hardware without the need for specialized equipment.
### Features
Gazebo provides a robust simulation environment with realistic physics, sensor models, and a variety of plugins for customization. It is particularly well-suited for testing robotic algorithms in complex environments.
Gazebo is known for its ease of integration with [ROS](https://www.ros.org), making it a popular choice for robotics research and development.
**Pros:** Strong community support, extensive documentation, ROS integration, open source.
**Cons:** Can be resource-intensive, may require additional setup for advanced features.
Learn more about Gazebo
## MuJoCo
MuJoCo (Multi-Joint dynamics with Contact) is a powerful physics engine designed for simulating complex robotic systems. Initially released in 2012, it is now maintained by Google DeepMind and has become a staple in robotics research and development.
### Requirements
Required Files: MuJoCo uses XML files, specifically the MJCF (MuJoCo XML) format, to define robot models and environments. This format allows for detailed specification of the physical properties and dynamics of the simulated entities.
Hardware Requirements: MuJoCo is optimized for performance and can run efficiently on standard hardware. However, it really shines by running on GPUs and TPUs, making it suitable for data-intensive tasks like reinforcement learning.
### Features
MuJoCo is best for contact dynamics and complex interactions.
Mujoco is straightforward to set up, with comprehensive docs. The recent open-source release has made it more accessible to researchers and developers.
**Pros:** High fidelity, performance, flexibility, community, open source.
**Cons:** complexity, hardware requirements, specialized use.
Learn more about MuJoCo
## NVIDIA Isaac
Release and Maintenance: NVIDIA Isaac was released in 2018 and is maintained by NVIDIA, with the latest update in January 2025.
### Requirements
Required Files: It uses USD (Universal Scene Description) files for defining environments and robots.
Hardware Requirements: NVIDIA Isaac is optimized for NVIDIA GPUs, leveraging their power for high-performance simulations.
### Features
Nvidia Isaac provides a highly realistic simulation environment. It's great for autonomous systems.
Setting up NVIDIA Isaac can be complex, requiring specific hardware and software configurations.
**Pros:** High realism, optimized for NVIDIA hardware, strong support for AI applications.
**Cons:** Requires NVIDIA hardware, complex setup, closed source.
Learn more about Nvidia Isaac Sim
## Genesis
Genesis is a physics simulation platform designed for general-purpose robotics, embodied AI, and physical AI applications. Developed by a consortium of researchers, it was released in December 2024 and is maintained by the Genesis-Embodied-AI community.
### Requirements
Genesis supports MJCF (.xml), URDF, and 3D model formats like .obj and .stl.
The framework leverages GPU-accelerated parallel computation, making it highly efficient on modern GPUs. The current version is mostly compatible with Linux and Nvidia GPUs (CUDA), while support for other platforms is under development.
### Features
Genesis excels in simulating a wide range of physical phenomena, including rigid body dynamics, fluid mechanics, and soft robotics. It aims to let you train AI models and test robotic systems in complex environments.
Genesis is designed to be user-friendly with a Pythonic interface, making it accessible to both beginners and experienced developers.
**Pros:** high speed, wide range of physicals models, open source.
**Cons:** requires powerful hardware, most features still under development.
Learn more about Genesis
# LeRobot Dataset Format
Source: https://docs.phospho.ai/learn/lerobot-dataset
Learn about the LeRobot dataset format: its structure, versions, how to use it, and common tips.
# What is the LeRobot Dataset Format?
The LeRobot Dataset format is a standard way to organize and store robot learning data, making it easy to use with tools like PyTorch and Hugging Face. You can load a dataset from the Hugging Face Hub or a local folder with a simple command like `dataset = LeRobotDataset("lerobot/aloha_static_coffee")`. Once loaded, you can access individual data frames (like `dataset[0]`) which provide observations and actions as PyTorch tensors, ready for your model.
A special feature of `LeRobotDataset` is `delta_timestamps`. Instead of just getting one frame, you can get multiple frames based on their time relationship to the frame you asked for. For example, `delta_timestamps = {"observation.image": [-1, -0.5, -0.2, 0]}` will give you the current frame and three previous frames (from 1 second, 0.5 seconds, and 0.2 seconds before). This is great for giving your model a sense of history. You can see more in the [1\_load\_lerobot\_dataset.py example](https://github.com/huggingface/lerobot/blob/main/examples/1_load_lerobot_dataset.py).
The format is designed to be flexible for different types of robot data, whether from simulations or real robots, focusing on camera images and robot states, but extendable to other sensor data.
## How is a LeRobot Dataset Organized on Disk?
A LeRobot Dataset is organized on disk into specific folders for data (Parquet files), videos (MP4 files), and metadata (JSON/JSONL files). Here's a typical structure for a `v2.1` dataset:
```
/
├── data/
│ └── chunk-000/
│ ├── episode_000000.parquet
│ ├── episode_000001.parquet
│ └── ...
├── videos/
│ └── chunk-000/
│ ├── observation.images.main/ (or your_camera_key_1)
│ │ ├── episode_000000.mp4
│ │ └── ...
│ ├── observation.images.secondary_0/ (or your_camera_key_2)
│ │ ├── episode_000000.mp4
│ │ └── ...
│ └── ...
├── meta/
│ ├── info.json
│ ├── episodes.jsonl
│ ├── tasks.jsonl
│ ├── episodes_stats.jsonl (for v2.1) or stats.json (for v2.0)
│ └── README.md (often, for Hugging Face Hub)
└── README.md (top-level, for Hugging Face Hub)
```
## How to Manipulate and Edit LeRobot Datasets?
The common operations for manipulating and editing LeRobot datasets include:
* **Repairing:** Fixing inconsistencies in metadata files (e.g., `episodes.jsonl`, `info.json`) or re-indexing episodes if files are added/removed manually.
* **Merging:** Combining two or more LeRobot datasets into a single, larger dataset. This requires careful handling of episode indices, frame indices, task mappings, and recalculating or merging statistics.
* **Splitting:** Dividing a dataset into multiple smaller datasets (e.g., a training set and a test set). This also involves re-indexing and adjusting metadata and statistics for each new split.
In this video, PLB demonstrates how you can use `phosphobot` to perform common dataset operations.
You can also use [python scripts](https://github.com/phospho-app/phosphobot/tree/main/scripts/datasets). Make sure to use well tested scripts and to version your datasets.
## How to Visualize a LeRobotDataset?
You can visualize a LeRobotDataset using the HuggingFace Visualize Dataset space, which leverages `rerun.io` to display camera streams, robot states, and actions. This is a convenient way to inspect your data, check for anomalies, or simply understand the recorded behaviors.
## What are the columns in a LeRobot Dataset?
The core data in a LeRobot dataset consists of Parquet files containing trajectory information (like robot states and actions) and MP4 video files for camera observations.
1. **Parquet Files (`data/chunk-000/episode_xxxxxx.parquet`):**
* These files store the step-by-step data for each robot episode.
* When loaded, this becomes part of a Hugging Face `Dataset` object (often named `hf_dataset` in the `LeRobotDataset` object).
* **Common features you'll find inside:**
* `observation.state` (list of numbers): Robot's state, like joint angles or end-effector position.
* `action` (list of numbers): The action taken, like target joint angles.
* `timestamp` (number): Time in seconds from the start of the episode.
* `episode_index` (integer): ID for the episode.
* `frame_index` (integer): ID for the frame *within* its episode (starts at 0 for each episode).
* `index` (integer): A unique ID for the frame across the *entire* dataset.
* `next.done` (true/false, optional): True if this is the last frame of an episode.
* `task_index` (integer, optional): Links to a task in `tasks.jsonl`.
2. **Video Files (`videos/chunk-000/camera_key/episode_xxxxxx.mp4`):**
* Camera images are stored as MP4 videos to save space.
* Each MP4 file is usually one camera's view for one full episode.
* The `hf_dataset` (when loaded) will point to these video frames using a `VideoFrame` object for each camera observation (e.g., `observation.images.cam_high`):
* `VideoFrame = {'path': 'path/to/video.mp4', 'timestamp': time_in_video_seconds}`.
* The system uses this to grab the correct image from the video.
## What Information is Stored in the LeRobot Metadata Files?
LeRobot metadata files, found in the `meta/` directory, store crucial information about the dataset's structure, content, statistics, and individual episodes.
1. **`info.json`:** Contains general information about the whole dataset.
* `codebase_version` (text): "v2.0" or "v2.1". Tells you how to read other metadata, especially stats.
* `robot_type` (text): What kind of robot was used.
* `fps` (number): The intended frames-per-second of the data.
* `total_episodes` (integer): How many episodes are in the dataset.
* `total_frames` (integer): Total number of frames across all episodes.
* `total_tasks` (integer): Number of different tasks defined.
* `total_videos` (integer): Total number of video files.
* `splits` (dictionary): Info on data splits, like `{"train": "0:N"}` means episodes 0 to N-1 are for training.
* `features` (dictionary): Very important! This describes every piece of data: its type, shape, and sometimes names.
* Example for `observation.state`: `{"dtype": "float32", "shape": [7], "names": ["joint1", ...]}`
* Example for a camera `observation.images.main`:
```json
"observation.images.main": {
"dtype": "video",
"shape": [224, 224, 3], // height, width, channels
"names": ["height", "width", "channel"],
"info": { // Details about the video itself
"video.fps": 10,
"video.codec": "mp4v",
// ... other video details
}
}
```
* `camera_keys` (list of text, implied by `features`): Names for camera data, like `observation.images.main`.
2. **`episodes.jsonl`:** A file where each line is a JSON object describing one episode.
* `episode_index` (integer): The episode's ID.
* `tasks` (list of text): List of task descriptions (e.g., "pick up the red block") for this episode.
* `length` (integer): Number of frames in this episode.
3. **`tasks.jsonl`:** A file where each line is a JSON object linking task IDs to descriptions.
* `task_index` (integer): The ID used in the Parquet files.
* `task` (text): The actual task description.
4. **`episodes_stats.jsonl` (for v2.1):** Each line is a JSON object with statistics for one episode.
* `episode_index` (integer): The episode ID.
* `stats` (dictionary): Contains stats (`{'max': ..., 'min': ..., 'mean': ..., 'std': ...}`) for each feature (like `observation.state`, `action`) *within that specific episode*.
* For images, stats (mean, std) are usually per-channel.
5. **`stats.json` (for v2.0):** A single JSON file with statistics for the entire dataset combined.
* Similar structure to the `stats` object in `episodes_stats.jsonl`, but for all data.
## What are the Key Concepts and Important Fields in a LeRobot Dataset?
Key concepts in a LeRobot dataset include different types of indices (episode, frame, global), timestamps, and specific fields like `action` and `observation.state` which have precise meanings.
* **Indices:**
* `episode_index`: Identifies an episode (e.g., 0, 1, 2...).
* `frame_index`: Identifies a frame *within* an episode (e.g., 0, 1, ... up to `length-1`). It resets for each new episode.
* `index`: A global, unique ID for a frame across the *entire dataset*. For example, if episode 0 has 100 frames (index 0-99), and episode 1 has 50 frames, episode 1's frames would have global indices 100-149.
* **Timestamps:**
* `timestamp` (in Parquet files): Time in seconds from the start of the current episode for that frame.
* `VideoFrame.timestamp` (for video features): Time in seconds *within the MP4 video file* where that specific frame is.
* `fps` (in `info.json`): The intended frame rate. Ideally, `timestamp` should be close to `frame_index / fps`.
* **`action` field:** In robot learning, the `action` recorded at frame `t` is usually the action that *caused* the observation at frame `t+1`. For instance, if actions are target joint positions, `action[t]` might be the joint positions observed at `observation.state[t+1]`.
* **`observation.state` vs. `joints_position`:** The Python code example you saw might use `joints_position` for joint angles and `state` for something else (like end-effector pose). LeRobot examples often use `observation.state` more broadly for the robot's proprioceptive data (like joint positions). Always check the dataset's `info.json -> features` to know exactly what `observation.state` means for that specific dataset.
## What are Common Pitfalls and Best Practices for Working with LeRobot Datasets?
Common pitfalls when working with LeRobot datasets include version incompatibilities and memory issues, while best practices involve using version 2.1, understanding feature definitions, and ensuring data consistency.
1. **Hugging Face Hub:**
* LeRobot tools often use the `main` branch on the Hub, but some datasets have their latest data on the `v2.1` branch. Make sure the training script references your correct dataset branch.
* You'll need a Hugging Face token with write access to upload or change datasets on the Hub.
2. **Local Cache:** Datasets from the Hub usually download to `~/.cache/huggingface/lerobot`. You can change this with the `root` argument when loading. Cache can lead to issue: sometimes, if you change a dataset on the Hub, your local cache might not update automatically. If this is the case, **delete the local cache folder** for that dataset to force a fresh download.
3. **Version Choice:** **Strongly prefer `v2.1`**. It uses `episodes_stats.jsonl` (per-episode stats), making it easier to manage and modify datasets (delete, merge, split, shuffle). `v2.0` (with a single `stats.json`) is harder to keep correct if you change the dataset.
4. **`delta_timestamps` and History:** This is great for temporal context but be aware that asking for a long history (many previous frames) means loading more data for each sample, which uses more memory and can be slower.
5. **Feature Naming:** Use the dot-notation like `observation.images.camera_name` or `observation.state`. This is what LeRobot expects.
6. **Data Consistency:**
* Try to keep feature shapes (like the number of elements in `observation.state` or image sizes) the same, at least within an episode, and ideally across the whole dataset. If they vary, your code will need to handle it.
* `fps` should be consistent. If it varies, `delta_timestamps` might not give you the time intervals you expect.
7. **Video Encoding:** Videos are usually MP4, and only the **avc1** codec is visible in the LeRobot dataset viewer. LeRobot uses torchvision to decode video. Details like codec are listed in `info.json`.
8. **Generating Statistics:** If you make your own dataset, make sure the stats (`stats.json` or `episodes_stats.jsonl`) are correct. They are important for normalizing data during training. The `phosphobot` code has tools for this.
9. **`episode_data_index`:** The `LeRobotDataset` calculates this automatically when loaded. It helps quickly map global frame numbers to episode-specific frames, especially with `delta_timestamps`.
10. **Memory for Videos frames:** Loading many high-resolution videos (from `delta_timestamps`) can use a lot of memory. Choose video sizes that fit your needs and hardware. If you run into "Cuda out of memory" errors, lower the resolution of the videos.
11. **Action Definition:** Know exactly what `action` means in your dataset (e.g., target joint positions, joint velocities?). This is vital for training a policy.
12. **Adding Custom Data:** You can add your own observation or action types. Just make sure they can be turned into tensors and describe them in `info.json`.
## LeRobot Dataset Versions
LeRobot datasets have different versions (v1, v2, v2.1), with `v2.1` being the recommended version for most use cases. The version is specified in the `info.json` file under the `codebase_version` field.
### What are the Differences Between LeRobot v2.0 and v2.1 Dataset Versions?
The main differences between LeRobot `v2.0` and `v2.1` dataset versions lie in how they store statistics and support dataset modifications, with `v2.1` being the recommended, more flexible version.
* **`lerobot_v2.0` (Older):**
* Uses one file, `meta/stats.json`, to store statistics (like mean, min, max) for the entire dataset.
* Modifying the dataset (like deleting an episode) is not well-supported with this version because updating these global statistics is tricky.
* **`lerobot_v2.1` (Recommended):**
* Uses `meta/episodes_stats.jsonl` instead of `stats.json`.
* This file stores statistics *for each episode separately*. Each line in the file is for one episode and its stats.
* This makes it much easier to manage the dataset, like deleting, merging, or splitting episodes, because stats can be updated or recalculated more easily for the affected parts.
* The `info.json` file will clearly state `codebase_version: "v2.1"`.
* **Recommendation:** Always try to use or convert datasets to `v2.1` for the best experience and support.
Tooling around LeRobot, like the `phosphobot` code, usually handles both versions, but `v2.1` gives you more power.
### What's New in the Upcoming LeRobot v3.0 Dataset Format?
The upcoming LeRobot v3.0 dataset format introduces significant changes aimed at improving scalability, data organization, and efficiency, particularly for handling very large datasets. The primary rationale appears to be a move towards a more sharded and consolidated data structure, where episode data, videos, and metadata are grouped into larger, chunked files rather than per-episode files. This is evident from the conversion script `convert_dataset_v21_to_v30.py` (from [Pull Request #969 on GitHub](https://github.com/huggingface/lerobot/pull/969)), which details the transformation from v2.1 to v3.0.
**Key Changes from v2.1 to v3.0:**
1. **Consolidation of Episode Data and Videos:**
* **Old (v2.1):** Each episode had its own Parquet file (`data/chunk-000/episode_000000.parquet`) and its own video file per camera (`videos/chunk-000/CAMERA/episode_000000.mp4`).
* **New (v3.0):** Multiple episodes' data will be concatenated into larger Parquet files (e.g., `data/chunk-000/file_000.parquet`). Similarly, videos from multiple episodes for a specific camera will be concatenated into larger video files (e.g., `videos/chunk-000/CAMERA/file_000.mp4`).
* The target size for these concatenated files seems to be configurable (e.g., `DEFAULT_DATA_FILE_SIZE_IN_MB`, `DEFAULT_VIDEO_FILE_SIZE_IN_MB`).
2. **Restructuring of Metadata Files:**
* **`episodes.jsonl` (Old v2.1):** A single JSON Lines file where each line detailed an episode (`episode_index`, `tasks`, `length`).
* **`meta/episodes/chunk-000/episodes_000.parquet` (New v3.0):** This information, along with new indexing details (pointing to the specific chunk and file for data and video, and `from/to_timestamp` for video segments), will now be stored in sharded Parquet files. The schema will include columns like `episode_index`, `video_chunk_index`, `video_file_index`, `data_chunk_index`, `data_file_index`, `tasks`, `length`, `dataset_from_index`, `dataset_to_index`, and video timestamp information.
* **`tasks.jsonl` (Old v2.1):** A single JSON Lines file mapping `task_index` to `task` description.
* **`meta/tasks/chunk-000/file_000.parquet` (New v3.0):** Task information will also be stored in sharded Parquet files (e.g., columns `task_index`, `task`).
* **`episodes_stats.jsonl` (Old v2.1):** Per-episode statistics in a JSON Lines file.
* **`meta/episodes_stats/chunk-000/file_000.parquet` (New v3.0):** Per-episode statistics will also move to sharded Parquet files, likely containing `episode_index` and flattened statistics (mean, std, min, max for various features).
3. **Updates to `meta/info.json`:**
* `codebase_version` will be updated to `"v3.0"`.
* Fields like `total_chunks` and `total_videos` (which were aggregates) might be removed or rethought, as chunking is now more explicit.
* New fields like `data_files_size_in_mb` and `video_files_size_in_mb` will specify the target sizes for the concatenated files.
* `data_path` and `video_path` will reflect the new `file_xxx.parquet/mp4` naming scheme.
* FPS information will be added to features in `info["features"]` if not already present in video-specific info.
4. **Removal of `stats.json`:** The script explicitly mentions removing the deprecated `stats.json` (which was already superseded by `episodes_stats.jsonl` in v2.1). Global aggregated stats will now be computed from the sharded per-episode stats.
**Rationale Behind v3.0 Changes:**
* **Scalability for Large Datasets:** The most significant driver appears to be improved handling of massive datasets (like DROID, mentioned in the PR diffs).
* Having fewer, larger files reduces filesystem overhead (e.g., inode limits) and can be more efficient for I/O operations, especially in distributed computing environments (like SLURM, also mentioned).
* Concatenating data into larger chunks makes sharding and parallel processing more manageable.
* **Efficiency:** Reading fewer, larger files can sometimes be faster than reading many small files.
* **Standardization with Parquet for Metadata:** Moving more metadata (episodes, tasks, episode\_stats) into Parquet files brings consistency and allows leveraging the benefits of the Parquet format (columnar storage, compression, schema evolution) for metadata as well.
* **Hub Management:** The script includes steps for updating tags and cleaning up old file structures on the Hugging Face Hub, indicating a more robust versioning and deployment strategy.
In essence, LeRobot v3.0 is evolving to become a more robust and scalable format, better suited for the increasingly large and complex datasets used in robotics research. While it introduces changes to the underlying file structure and metadata organization, the goal is to enhance performance and manageability without sacrificing the core ease of use provided by the `LeRobotDataset` abstraction.
# What’s next?
Next, record your own dataset and use it to train a policy!
Recorde your first dataset
Train your first AI model
Join the Discord to ask questions, get help from others and get updates (we ship almost daily)
For more information about LeRobot, checkout the [LeRobot Github repository](https://github.com/huggingface/lerobot)
# Core Robotics Concepts
Source: https://docs.phospho.ai/learn/overview
The basics to get started in robotics.
In this article, we'll cover some of the core concepts in robotics. We will also cover some concepts of AI and machine learning that are relevant to robotics.
## What are the components of a robot?
Your robot is made up of a few key components:
* **Joints/Actuators**: The motors of the robot that allow the links to move relative to each other.
* **Links**: The rigid plastic parts of the robot that are connected by joints.
* **End effector**: The last part of the robot that interacts with the environment (e.g., a gripper).
* **Sensors**: The robot's eyes and ears. They allow the robot to perceive the world around it.
* **Controller**: The robot's brain. It processes the sensor data and sends commands to the actuators.
The main challenge is coordinating all these components to perform specific tasks.
How do you program a robot to do something? How can it learn to do something new? How can it adapt to changes in its environment? These are all questions robotics researchers are trying to answer.
The most basic way to control a robot is to send it a sequence of commands. For example, you can tell the robot to move its arm to a specific position. This is called **kinematics**.
Learn more about kinematics
## What is a policy in robotics?
A policy defines how the robot makes decisions and takes actions based on its environment. It is a function that maps the current state of the robot to an action. In concrete terms, it tells the robot what to do in a given situation.
For example, a policy for a robot vacuum cleaner might be:
* If the robot detects dirt, move towards it.
* If the robot detects a wall, turn left.
Learn more about policies and AI in robotics
## Vocabulary of AI robotics
The vocabulary of AI robotics can be a bit confusing. Here are some key terms to help you understand the concepts better.
### Imitation learning vs. Reinforcement learning
* **Imitation learning**: A type of training where the robot learns from examples provided by a human or another robot. This is often used to teach the robot how to perform specific tasks.
* **Reinforcement learning**: A type of training where the robot learns by trial and error. It receives rewards for good actions and penalties for bad actions, and it adjusts its policy accordingly.
### Robotics vocabulary
The robotics vocabulary heavily relies on the concepts of reinforcement learning. Here are some key terms:
* **Agent**: The robot itself. It interacts with the environment and learns from its experiences.
* **State**: The current configuration of the robot. This includes the positions of the joints, the orientation of the end effector, and any sensor readings.
* **Action**: The movement or command the robot executes in response to its current state.
* **Reward**: A numerical value assigned based on how well the robot's action achieves its objective. The robot's goal is to maximize this reward over time.
* **Environment**: The world in which the robot operates. This includes the objects in the environment, the robot itself, and any other agents.
* **Policy**: The strategy the robot uses to decide which action to take in a given state. It can be deterministic (always taking the same action in the same state) or stochastic (taking different actions in the same state). [Learn more](/learn/policies)
### Machine learning vocabulary
As policies are often learned from data, the vocabulary of machine learning is also relevant. Here are some key terms:
* **Model**: A mathematical representation of the policy. It takes the current state as input and outputs the action to be taken.
* **Training**: The process of teaching the robot to improve its policy. This is done by providing it with examples of good and bad actions and adjusting its policy based on the rewards it receives.
* **Inference**: The process of using a trained policy to control the robot in real-time. This is done by feeding the robot's current state into the policy and executing the resulting action.
* **Dataset**: A collection of examples used to train the robot's policy. This can include images, sensor readings, natural languages instructions, and actions taken by the robot. [The most common format is LeRobot v2](/learn/lerobot-dataset)
# Policies in AI Robotics
Source: https://docs.phospho.ai/learn/policies
What are the latest AI robotics models?
Recently, AI robotics has seen a surge of interest, thanks to the rise of a new generation of policies: **Vision-Language Action Models** (VLAs).
phosphobot makes it easy to train and deploy VLAs. You can use them to control your robot in a variety of tasks, such as picking up objects and understanding natural language instructions.
In this guide, we'll show you the latest models in AI robotics and give you useful resources to get started with training your own policies.
## What is a policy?
A **policy** is the brain of your robot. It tells the robot what to do in a given situation. Mathematically, it's a function $\pi$ that maps the current **state** $S$ of the robot to an **action** $A$.
$$
\pi: S \rightarrow A
$$
* $S$ the state is usually the position of the robot, the cameras and sensors feed, and the text instructions.
* $A$ the actions depends on the robot. For example, high level instructions ("move left", "move right"), the *6-DOF* (degrees of freedom) cartesian position (x, y, z, rx, ry, rz), the angles of the joints...
* $\pi$ the policy is basically the AI model that controls the robot. It can be as simple as a **hard-coded rule** or as complex as a **deep neural network**.
Recent breakthrough have allowed to leverage the **[transformer](https://en.wikipedia.org/wiki/Transformer_\(deep_learning_architecture\))** architecture and **internet-scale data** to train more advanced policies, that radically differ from old school robotics and reinforcement learning.
The traditional way to control robots is to use **hard-coded rules**.
For example, you could write a program that tells the robot to move left when it sees a red ball. For that, you'd look for red pixels in the camera feed, and send a command to turn motor number 1 by 90 degrees if you see a cluster of red pixels.
This approach is the one used in **industrial robots** and **simple home robots**. It's simple and efficient, but it's not very flexible. You need to write a new program for every new task.
**Reinforcement Learning (RL)** is another approach to train policies (since the 1990s and mainstream since the 2010s). In RL, the robot learns by interacting with the environment and receiving rewards. It's like teaching a child to ride a bike by giving them feedback on their performance.
Usually, the environment is a [simulation.](./kinematics#simulation) Today, it's sucessful for walking robots that need to learn how to balance themselves.
## Vision-Language Action Models (VLAs)
The latest paradigm since 2024 in AI robotics are **[Vision-Language Action Models](https://arxiv.org/abs/2406.09246) (VLAs)**. They leverage **[Large Language Models](https://en.wikipedia.org/wiki/Large_language_model) (LLMs)** to understand and act on human instructions.
* VLA models are particularly well-suited for robotics because **they function as a brain**.
* VLA process both **images** and **text** instructions to predict the next **action**.
* VLA were trained using **internet-scale data**, so they have some **common sense**.
Unlike AI models that generate text (like ChatGPT), these models output actions, such as *move left*.
Essentially, with VLA, you could prompt your robot to "pick up the red ball" and it would do so.
The [phospho starter pack](https://robots.phospho.ai) helps you learn and experiment with VLAs.
## What are the latest architectures in AI robotics?
Since 2024, there have been breakthroughs in AI robotics. Here are some of the latest ideas in AI robotics.
### ACT (Action Chunking Transformer)
[ACT (Action Chunking Transformer)](https://github.com/Shaka-Labs/ACT) (October 2024) is a popular repo that that showcases how to use transformers for robotics. The model is trained to predict the action sequences based on the current state of the robot and cameras' images. ACT is an efficient way to do imitation learning. [Learn more.](https://arxiv.org/abs/2406.09246)
**Imitation Learning** is a popular approach to train AI models for robotics. In imitation learning, the robot learns by mimicking human demonstrations. It's like teaching a child to ride a bike by showing them how it's done.
Usually, the demonstrations are collected by **teleoperating** the robot. The robot learns to mimic the actions of the human operator. It's mainly used for tasks that require human-like dexterity, such as picking up objects.
**How it works**:
* You record episodes of your robot performing a task. (e.g., picking up a lego brick).
* The model learns from this data and enacts a policy based on it. (e.g., it will pick up the lego brick no matter where it is placed).
**Why use ACT?**
* Typically requires \~30 episodes for training
* Can run on an RTX 3000 series GPU in less than 30 minutes.
* This is a great starting point to get your hands dirty with AI in robotics.
* You don't need prompts to train the model.
A few dozens of episodes are enough to train ACT to reproduce human demonstrations.
### OpenVLA
[OpenVLA](https://github.com/openvla/openvla?tab=readme-ov-file#getting-started) (June 2024) is a great repo that showcases a more advanced model designed for **complex robotics tasks**. The architecture of OpenVLA include a [Llama-2-7b](https://huggingface.co/meta-llama/Llama-2-7b) model (July 2023) that receives a prompt describing the task. This gives the model some common sense and allows it to generalize to new tasks.
**Key differences with ACT:**
* Training such a model requires more data and computational power.
* Typically needs \~100 episodes for training
* Training takes a few hours on an NVIDIA A100 GPU.
For more details, check out [Nvidia's blog post](https://www.jetson-ai-lab.com/openvla.html) on OpenVLA and the [arxiV paper](https://arxiv.org/pdf/2406.09246).
### Diffusion Transformers
**Diffusion transformers** are a family of models based on the **[diffusion process](https://en.wikipedia.org/wiki/Diffusion_model)**. Instead of deterministically mapping states to actions, the model **hallucinates** (generates) the **most probable next action** based on **patterns learned from data**. You can also see this as **denoizing** actions. This mechanism is common to many image generation models (e.g., DALL-E, Stable Diffusion, Midjourney...)
**Why consider Diffusion Transformers?**
* The currently **#1 model in robotics** on Hugging Face is a diffusion transformer called [RDT-1b](https://huggingface.co/robotics-diffusion-transformer/rdt-1b) (May 2024)
* Fine tuning the model on your own data is expensive but inference is fast.
## What are the latest models in AI robotics?
Here are some of the latest models that combine ideas from ACT, OpenVLA, and Diffusion Transformers.
### gr00t-n1-2B and gr00t-n1.5-3B by Nvidia
[GR00T-N1 (Generalist Robot 00 Technology)](https://github.com/NVIDIA/Isaac-GR00T) (March 2025) is NVIDIA's foundation model for robots. It's a performant models, trained on lots of data, which is ideal for fine tuning. The model weights [are available on Hugging Face](https://huggingface.co/nvidia/GR00T-N1-2B).
GR00T-N1 combines both [VLA](#openvla) for language understanding and [Diffusion transformers](#diffusion-transformers) for fine grained controls. For details, see their [paper on arxiv](https://arxiv.org/abs/2503.14734)
**Key features:**
* Processes natural language instructions, camera feeds, and sensor data to generate actions.
* Based on denoizing of the action space, kind of like a Diffusion transformer.
* Trained on a massive datasets of human movements, 3D environments, and AI-generated data.
**Why use GR00T-N1?**
* Typically requires \~50 episodes for training.
* Supports prompting and zero-shot learning for tasks not explicitly seen during training.
* Small model size (2B parameters) for efficient fine-tuning and fast inference on Nvidia Jetson devices.
[GR00T N1.5](https://huggingface.co/nvidia/GR00T-N1.5-3B) (June 2025) is an updated version of Nvidia's open foundation model for humanoid robots. It's also open source, but has 3B parameters instead of 2B like gr00t n1. The model weights are available on [Hugging Face](https://huggingface.co/nvidia/GR00T-N1.5-3B).
Key differences with gr00t n1.5 are:
* The VLM is frozen during both pretraining and finetuning.
* The adapter MLP connecting the vision encoder to the LLM is simplified and adds layer normalization to both visual and text token embeddings input to the LLM.
The gr00t-N1.5 model is a promptable model by NVIDIA
### SmolVLA by Hugging Face
[SmolVLA](https://huggingface.co/blog/smolvla) (June 2025) is a small, open-source Vision-Language-Action (VLA) model from Hugging Face designed to be efficient and accessible. It was created as a lightweight, reproducible, and performant alternative to large, proprietary models that often have high computational costs. The model, whose weights are available on [Hugging Face](https://huggingface.co/collections/smol-ai/smolvla-665893a9033433a047029562), was trained entirely on publicly available, community-contributed datasets.
It's a 450M parameters model, trained with 30,000 hours of compute.
**How it works**:
* SmolVLA has a modular architecture with two main parts: a vision-language model (a cut-out SmolVLM) that processes images and text, and an "action expert" that generates the robot's next moves.
* The action expert is a compact transformer that uses a flow matching objective to predict a sequence of future actions in a non-autoregressive way.
* The model needs to be fine-tuned on a specific robot and task. Fine-tuning takes about 8 hours on a single NVIDIA A100 GPU.
SmolVLA is an open-source model by LeRobot
### pi0, pi-0 FAST, and pi0.5 by Physical Intelligence
[pi0](https://github.com/Physical-Intelligence/openpi) (October 2024), also written as **π₀** or pi zero, is a a flow-based diffusion vision-language-action model (VLA) by Physical Intelligence. The weight of pi0 are open sourced [on Hugging Face](https://huggingface.co/blog/pi0). [Learn more.](https://www.physicalintelligence.company/blog/pi0)
[pi0 FAST](https://github.com/Physical-Intelligence/openpi) (February 2025), also written as **π₀-FAST** or pi zero FAST, is an **autoregressive VLA**, based on the FAST action tokenizer. Similar to how LLMs generate text token by token, pi0 FAST generates actions token by token. [Learn more.](https://www.physicalintelligence.company/research/fast)
[pi0.5](https://www.physicalintelligence.company/blog/pi05) (April 2025) is a Vision-Language-Action model by Physical Intelligence that focuses on "open-world generalization." It's designed to enable robots to perform tasks in entirely new environments that they have not seen during training, a significant step toward creating truly general-purpose robots for homes and other unstructured spaces. While the [research](https://www.physicalintelligence.company/download/pi05.pdf) and results are public, the model itself is not open-source.
Head over to phospho cloud to start training pi0.5 on your own dataset.
### RT-2 and AutoRT by Google DeepMind
[**RT-2**](https://github.com/kyegomez/RT-2) (July 2023) is Google DeepMind's twist on VLAs. It's a closed-source model, very similar to OpenVLA. based on the Palm architecture. The model is trained on a large dataset of human demonstrations. [Learn more.](https://arxiv.org/pdf/2307.15818)
[**AutoRT**](https://github.com/kyegomez/AutoRT) (January 2024) is a framework by Google DeepMind, designed for robot fleets and data collection. A LLM is used to generate "to do lists" for robots based on descriptions of the environment. The to do lists tasks are then executed by teleoperators, a scripted pick policy, or RT-2 (Google's VLA). [Learn more.](https://auto-rt.github.io/static/pdf/AutoRT.pdf)
## LeRobot Integration
[LeRobot is a github repo by Hugging Face](https://github.com/huggingface/lerobot/tree/main/lerobot/common/policies) which implements training scripts for various policies in a standardized way. Supported policies include:
* act
* diffusion
* pi0
* tdmpc (September 2022)
* vqbet (October 2023)
## More models
Here is [a list](https://github.com/epoch-research/robotic-manipulation-compute/blob/main/data/Robotics%20Models.csv) compiling more references.
# Train SmolVLA
Source: https://docs.phospho.ai/learn/train-smolvla
How to Train and Run SmolVLA with LeRobot: A Step-by-Step Guide
In this tutorial, we will walk you through the process of fine-tuning a SmolVLA model and deploying it on a real robot arm. We will cover environment setup, training, inference, and common troubleshooting issues.
This tutorial is for LeRobot by Hugging Face, which is different than phosphobot. It's geared towards more advanced users with a good understanding of Python and machine learning concepts. If you're new to robotics or AI, we recommend starting with the [phosphobot documentation](https://docs.phospho.ai/).
**This tutorial may be outdated**
The [LeRobot](https://github.com/huggingface/lerobot) library is under active development, and the codebase changes frequently. While this tutorial is accurate as of June 11, 2025, some steps or code fixes may become obsolete. Always refer to the official LeRobot documentation for the most up-to-date information.
## What is LeRobot by Hugging Face?

LeRobot is a platform designed to make real-world robotics more accessible for everyone. It provides pre-trained models, datasets, and tools in PyTorch.
It focuses on state-of-the-art approaches in **imitation learning** and **reinforcement learning**.
With LeRobot, you get access to:
* Pretrained models for robotics applications
* Human-collected demonstration datasets
* Simulated environments to test and refine AI models
Useful links:
* [LeRobot on GitHub](https://github.com/huggingface/lerobot)
* [LeRobot on Hugging Face](https://huggingface.co/lerobot)
* [AI models for robotics](https://huggingface.co/models?pipeline_tag=robotics\&sort=trending)
### Introduction to SmolVLA
SmolVLA is a 450M parameter, open-source Vision-Language-Action (VLA) model from Hugging Face's LeRobot team. It's designed to run efficiently on consumer hardware by using several clever tricks, such as skipping layers in its Vision-Language Model (VLM) backbone and using asynchronous inference to compute the next action while the current one is still executing.
* [arxiv paper](https://arxiv.org/abs/2506.01844)
* [blog post](https://huggingface.co/blog/smolvla)
* [model card](https://huggingface.co/lerobot/smolvla_base)
### Part 1: Training the SmolVLA Model with LeRobot by Hugging Face
#### 1.1 Environment Setup for LeRobot by Hugging Face
Setting up a clean Python environment is crucial to avoid dependency conflicts. We recommend [using `uv`, a fast and modern Python package manager.](https://docs.astral.sh/uv/getting-started/installation/)
1. **Install `uv`:**
```bash
curl -LsSf https://astral.sh/uv/install.sh | sh
```
2. **Clone the LeRobot Repository:**
```bash
git clone https://github.com/huggingface/lerobot.git
cd lerobot
```
> **💡 Pro Tip:** Before you start, run `git pull` inside the `lerobot` directory to make sure you have the latest version of the library.
3. **Create a Virtual Environment and Install Dependencies:**
This tutorial uses Python 3.10.
```bash
# Create and activate a virtual environment
uv venv
source .venv/bin/activate
# Install SmolVLA and its dependencies
uv pip install -e ".[feetech,smolvla]"
```
#### 1.2 Training on a GPU-enabled Machine with LeRobot by Hugging Face
Training a VLA model is computationally intensive and requires a powerful GPU. This example uses an Azure Virtual Machine with an NVIDIA A100 GPU, but any modern NVIDIA GPU with sufficient VRAM should work.
> **Note on MacBook Pro:** While it's technically possible to train on a MacBook Pro with an M-series chip (using the `mps` device), it is extremely slow and not recommended for serious training runs.
1. **The Training Command:**
We will fine-tune the base SmolVLA model on a "pick and place" dataset from the Hugging Face Hub.
```bash
# We recommend using tmux to run the training session in the background
tmux
# Start the training
uv run lerobot/scripts/train.py \
--policy.path=lerobot/smolvla_base \
--dataset.repo_id=PLB/phospho-playground-mono \
--batch_size=256 \
--steps=30000 \
--wandb.enable=true \
--save_freq=5000 \
--wandb.project=smolvla
```
* `--save_freq`: Saves a model checkpoint every 5000 steps, which is useful for not losing your work.
> **Note on WandB:** As of June 11, 2025, Weights & Biases logging (`wandb`) may have issues in the current version of LeRobot. If you encounter errors, you can disable it by changing the flag to `--wandb.enable=false`.
2. **Fixing config.json** You need to change `n_action_steps` in the `config.json` file. The default value is set to 1, but for inference on SmolVLA, it should be set to 50. This is only used during inference, but it's easier to fix it now rather than later (before uploading the model to the Hugging Face Hub).
* **Locate the config.json file:** It will be in the `lerobot/smolvla_base` directory.
* **Edit the file:** Open it in a text editor and change the line:
```json
"n_action_steps": 1,
```
to
```json
"n_action_steps": 50,
```
> **Note:** If you don't change this, the inference will be very slow, as the model will only predict one action at a time instead of a sequence of actions.
3. **Uploading the Model to the Hub:**
Once training is complete, you'll need to upload your fine-tuned model to the Hugging Face Hub to use it for inference.
* **Login to your Hugging Face account:**
```bash
huggingface-cli login
```
* **Upload your model checkpoint:** The trained model files will be in a directory like `outputs/train/YYYY-MM-DD_HH-MM-SS/`.
```bash
# Replace with your HF username, desired model name, and the actual output path
huggingface-cli upload your-hf-username/your-model-name outputs/train/2025-06-04_18-21-25/checkpoints/last/pretrained_model pretrained_model
```
### Part 2: Training on Google Colab with LeRobot by Hugging Face
Running inference is often done on a different machine. Google Colab is a popular choice, but it comes with its own set of challenges.
1. **Initial Setup on Colab:**
Start by cloning the repository.
```python
# Use --depth 1 for a faster, shallow clone
!git clone --depth 1 https://github.com/huggingface/lerobot.git
%cd lerobot
!pip install -e ".[smolvla]"
```
2. **Fixing the `torchcodec` Error:**
You will likely encounter a `RuntimeError: Could not load libtorchcodec`. This is because the default PyTorch version in Colab is incompatible with the `torchcodec` version required by LeRobot.
**The fix is to downgrade `torchcodec`:**
```python
!pip install torchcodec==0.2.1
```
After running this, you must **restart the Colab runtime** for the change to take effect.
3. **Avoiding Rate Limits:**
Colab instances share IP addresses, which can lead to getting rate-limited by the Hugging Face Hub when downloading large datasets. If you see `HTTP Error 429: Too Many Requests`, you have two options:
* **Wait:** The client will automatically retry with an exponential backoff.
* **Use a Local Dataset:** Download the dataset to your Google Drive, mount the drive in Colab, and point the script to the local path instead of the `repo_id`.
### Part 3: LeRobot training Advanced Troubleshooting & Code Fixes
Here are some other common issues you might face and how to solve them.
#### Issue: `ffmpeg` or `libtorchcodec` Errors on macOS
* **Problem:** On macOS, you might encounter `RuntimeError`s related to `ffmpeg` or shared libraries not being found, even if they are installed. This is often a dynamic library path issue.
* **Fix:** Explicitly set the `DYLD_LIBRARY_PATH` environment variable to include the path where Homebrew installs libraries.
```bash
# Add this to your ~/.zshrc or ~/.bashrc file for a permanent fix
export DYLD_LIBRARY_PATH="/opt/homebrew/lib:/usr/local/lib:$DYLD_LIBRARY_PATH"
```
#### Issue: `ImportError: cannot import name 'GradScaler'`
* **Problem:** This error occurs if your PyTorch version is too old. SmolVLA requires `torch>=2.3.0`.
* **Fix:** Upgrade PyTorch in your `uv` environment.
```bash
uv pip install --upgrade torch
```
### Part 4: Running Inference on a Real SO-100 or SO-101 Robot with LeRobot by Hugging Face
The LeRobot library is integrated with the SO-100 and SO-101 robots, allowing you to run inference directly on these devices. This section will guide you through the hardware setup, calibration, and running the inference script with LeRobot.
You can use the [robots from our dev kit](https://robots.phospho.ai) for this step. However, the LeRobot setup is different and completly independent from phosphobot. Be careful and do not mix the two setups.
#### 2.1 LeRobot Hardware Setup and Calibration
1. **Hardware Connections:**
* Connect both your **leader arm** and **follower arm** to your computer via USB.
* Connect your cameras (context camera and wrist camera).
2. **Finding Robot Ports:**
Run this script to identify the USB ports for each arm.
```bash
uv run lerobot/scripts/find_motors_bus_port.py
```
Note the port paths (e.g., `/dev/tty.usbmodemXXXXXXXX`).
3. **Calibrating the Arms:**
The calibration process saves a file with the min/max range for each joint.
* **Follower Arm:**
```bash
uv run python -m lerobot.calibrate --robot-type=so100_follower --robot-port=/dev/tty.usbmodemXXXXXXXX --robot-id=follower_arm
```
* **Leader Arm:**
```bash
uv run python -m lerobot.calibrate --robot-type=so100_leader --robot-port=/dev/tty.usbmodemYYYYYYYY --robot-id=leader_arm
```
4. **Test Calibration with Teleoperation:**
Before running the AI, verify that the calibration works by teleoperating the robot. This lets you control the follower arm with the leader arm.
```bash
uv run python -m lerobot.teleoperate \
--robot-type=so100_follower \
--robot-port=/dev/tty.usbmodemXXXXXXXX \
--robot-id=follower_arm \
--teleop-type=so100_leader \
--teleop-port=/dev/tty.usbmodemYYYYYYYY \
--teleop-id=leader_arm
```
If the follower arm correctly mimics the movements of the leader arm, your calibration is successful.
5. **Finding Camera Indices:**
Run this script to list all connected cameras and their indices.
```bash
uv run lerobot/scripts/find_cameras.py opencv
```
Identify the indices for your context and wrist cameras.
#### 2.2 Running the LeRobot Inference Script
This is the main command to make the robot move.
```bash
uv run python -m lerobot.record \
--robot-type=so100_follower \
--robot-port=/dev/tty.usbmodemXXXXXXXX \
--robot-cameras="{ 'images0': {'type': 'opencv', 'index_or_path': 1, 'width': 320, 'height': 240, 'fps': 30}, 'images1': {'type': 'opencv', 'index_or_path': 2, 'width': 320, 'height': 240, 'fps': 30}}" \
--robot-id=follower_arm \
--teleop-type=so100_leader \
--teleop-port=/dev/tty.usbmodemYYYYYYYY \
--teleop-id=leader_arm \
--display-data=false \
--dataset-repo-id=your-hf-username/eval_so100 \
--dataset-single-task="Put the green lego brick in the box" \
--policy-path=oulianov/smolvla-lego
```
* `--policy-path`: Note that this time we do not add the `/pretrained_model` subfolder. We will fix this in the code.
### Part 5: LeRobot Troubleshooting and Code Fixes
#### Issue 1: Unit Mismatch (Radians vs. Degrees)
* **Problem:** The SmolVLA model outputs actions in the same units as its training data. Some datasets use radians. For example, the datasets recorder with phosphobot such as `PLB/phospho-playground-mono` uses radians. However, the LeRobot SO-100 driver expects actions in degrees. This will cause the robot to move erratically or barely at all.
* **Fix:** Convert the model's output from radians to degrees.
* **File:** `lerobot/common/policies/smolvla/modeling_smolvla.py`
* **Location:** In the `select_action` method.
* **Code:** Add the following lines just after the `# Unpad actions` section.
```python
# # # START HACK # # #
# Convert from radians to degrees
actions = actions * 180.0 / math.pi
# # # END HACK # # #
```
#### Issue 2: Flimsy Leader Arm Connection
* **Problem:** The leader arm can sometimes have an unstable connection, causing the calibration or teleoperation script to crash if it fails to read a motor position.
* **Fix:** Add a `try-except` block to gracefully handle connection errors.
* **File:** `lerobot/common/robot/motors_bus.py`
* **Location:** In the `record_ranges_of_motion` method.
* **Code:** Wrap the `while True:` loop in a `try-except` block.
```python
# In the record_ranges_of_motion method
while True:
try: # <-- ADD THIS LINE
positions = self.sync_read("Present_Position", motors, normalize=False)
mins = {m: min(mins[m], positions[m]) for m in motors}
maxs = {m: max(maxs[m], positions[m]) for m in motors}
if display_values:
# print motor positions
...
if user_pressed_enter:
break
except Exception as e: # <-- ADD THIS LINE
logger.error(f"Error reading positions: {e}") # <-- ADD THIS LINE
continue # <-- ADD THIS LINE
```
#### Issue 3: `config.json` or `model.safetensors` Not Found
* **Problem:** When running inference, the script may fail with `FileNotFoundError: config.json not found on the HuggingFace Hub` because it doesn't look inside the `pretrained_model` subfolder by default.
* **Fix:** Modify the `from_pretrained` method to include the subfolder when downloading files.
* **File:** `lerobot/common/policies/pretrained.py`
* **Location:** In the `from_pretrained` class method.
* **Code:** Add the `subfolder` argument to both `hf_hub_download` calls.
```python
# In the from_pretrained method
try:
# Download the config file and instantiate the policy.
config_file = hf_hub_download(
repo_id=model_id,
filename=CONFIG_NAME,
revision=revision,
cache_dir=cache_dir,
force_download=force_download,
proxies=proxies,
resume_download=resume_download,
token=token,
local_files_only=local_files_only,
subfolder="pretrained_model", # <-- ADD THIS LINE
)
# ...
# ...
try:
# Download the model file.
model_file = hf_hub_download(
repo_id=model_id,
filename=SAFETENSORS_SINGLE_FILE,
revision=revision,
cache_dir=cache_dir,
force_download=force_download,
proxies=proxies,
resume_download=resume_download,
token=token,
local_files_only=local_files_only,
subfolder="pretrained_model", # <-- ADD THIS LINE
)
```
# Play Recording
Source: https://docs.phospho.ai/recording/play-recording
post /recording/play
Play a recorded episode.
# Start Recording Episode
Source: https://docs.phospho.ai/recording/start-recording-episode
post /recording/start
Asynchronously start recording an episode in the background.
Output format is chosen when stopping the recording.
# Stop Recording Episode
Source: https://docs.phospho.ai/recording/stop-recording-episode
post /recording/stop
Stop the recording of the episode. The data is saved to disk to the user home directory, in the `phosphobot` folder.
# SO-100 quickstart guide
Source: https://docs.phospho.ai/so-100/quickstart
How to set up phosphobot and control your SO-100 robot arm
## Get your SO-100 robot arm
The SO-100 robot arm is a 5-DOF robotic arm with a 1-DOF gripper. It's a popular robot arm for AI robotics, with many users.
The SO-100 robot arm is [open source](https://github.com/TheRobotStudio/SO-ARM100) and can be built using off-the-shelf components and 3D printed parts.
If you're looking to buy SO-100 robot arms already assembled, with cameras and software, you can get a starter pack [on our shop](https://robots.phospho.ai).
## How to build the SO-100 leader arm? Step by step assembly guide
Here is a step-by-step video guide to build the SO-100 robot arm:
* [Parts list](https://github.com/TheRobotStudio/SO-ARM100)
* [Configure the motors](https://github.com/phospho-app/phosphobot/tree/main/scripts/feetech)
## Attach the SO-100 arm
Find a table and fix the SO-100 robot arm using the 2 table clamps in the kit (see image below).
Make sure the arm is securely fastened and won't move. Clear away any clutter that could get in the way of the arm's movement.
## Plug everything together
In this order:
1. Plug the *SO-100 robot arm* into the power supply using the **black** 12V power supply.
2. Plug one end of the **USB-C cable** into the *SO-100 robot arm* and the other into your computer (laptop, raspberry pi, etc).
3. If you have additional cameras, plug them into your computer
Below is an example of a full setup with a SO-100 arm, a stereoscopic camera plugged on a Raspberry Pi.
## Start phosphobot
Once everything is connected and powered on, run the following command in a terminal to install the phosphobot software:
```bash macOS
curl -fsSL https://raw.githubusercontent.com/phospho-app/phosphobot/main/install.sh | bash
```
```bash Linux
curl -fsSL https://raw.githubusercontent.com/phospho-app/phosphobot/main/install.sh | sudo bash
```
```powershell Windows
powershell -ExecutionPolicy ByPass -Command "irm https://raw.githubusercontent.com/phospho-app/phosphobot/main/install.ps1 | iex"
```
```bash uv (Linux and macOS)
# Install uv: https://docs.astral.sh/uv/
curl -LsSf https://astral.sh/uv/install.sh | sh
# Run phosphobot
uvx phosphobot@latest run
```
```powershell uv (Windows)
# Install uv: https://docs.astral.sh/uv/
powershell -ExecutionPolicy ByPass -c "irm https://astral.sh/uv/install.ps1 | iex"
# Run phosphobot
uvx phosphobot@latest run
```
Then, fire up the the server:
```bash
phosphobot run
```
Go to `localhost` in your web browser to access the phosphobot dashboard. Go to **Control** to control your robot using only your keyboard!
## Calibrate the robot
This step is only relevant if you built your own robot arm: the [assembled robots](https://robots.phospho.ai) that we ship are **already calibrated**.
Your SO-100 robot should be automatically detected by the phosphobot software. However, you still need to **calibrate** the robot to make it work properly.
Follow this video guide to calibrate your robot:
Here are detailed written instructions to calibrate your SO-100 robot arm:
1. Go to the page **Calibration** in the dashboard.
2. Make sure to be able to securely catch your robot, as calibration disable torque. This can make your robot fall.
3. Follow the instructions on the screen to calibrate your robot.
**Position 1:** Arm is facing **forward**. Gripper is fully **closed**.
red is x, green is y, blue is z
**Position 2:** Arm is twisted to its **left**. Gripper is fully **open**.
red is x, green is y, blue is z
After moving to position 2, **finish** the calibration sequence by clicking the button.
Your calibration is saved in the `~/phosphobot/calibration` folder of your home directory. You can edit this file in a text editor to further refine the calibration. For example, to tune the PID.
### About LeRobot calibration
If you're using LeRobot framework for training, you'll need to calibrate the robot with LeRobot after this phosphobot calibration.
You need first to calibrate with phosphobot, then with LeRobot. The LeRobot calibration process is compatible with phosphobot, but independent. This only needs to be done once.
# Start controlling the robot
Your robot is now ready to receive commands!
In the dashboard, click the **Control** button to control the robot arm. In the first tab, you can control the robot with the keyboard.
You can also use leader arm control, a gamepad, or a Meta Quest VR headset. [Learn more.](/basic-usage/teleop")
# Next steps
You can now [control your robot](/basic-usage/teleop), [record your first dataset](/basic-usage/dataset-recording) and [train an AI model](/basic-usage/training) to make the robot move by itself.
Teleoperate a real robot
How to record a dataset with your robot
How to train an AI model from a dataset you recorded
# SO-101 Quickstart Guide
Source: https://docs.phospho.ai/so-101/quickstart
How to set up phosphobot and control your SO-101 robot arms
## Get Your SO-101 Robot Arms
The SO-101 is a robot setup consisting of two 6-DOF arms (5 DOF body, 1 DOF gripper). One of the robot arms is the "leader" arm, and the other is the "follower" arm. The operator moves the leader arm, and the follower arm mimics the movements. It's a popular setup for teleoperation and imitation learning in AI robotics.
The SO-101 robot arms are [open source](https://github.com/TheRobotStudio/SO-ARM100), and you can build them using off-the-shelf components and 3D-printed parts.
If you're looking to buy pre-assembled SO-101 robot arms, with cameras and software, you can get a starter pack [on our shop](https://robots.phospho.ai).
### SO-100 vs. SO-101
The differences between the SO-100 and SO-101 are **subtle.** Software compatible with the SO-100 will work with the SO-101, but there are some improvements in the SO-101.
* SO-101 3D printed parts are easier to assemble. The base part no longer requires a small screwdriver, the wrist is easier to 3D print, you can't rotate the wrist more than 360 degrees, and the wires are outside. This makes maintenance easier and assembly faster.
* To assemble the SO-101 leader arm, it is now recommended to keep the gears in the motors. The gears of the leader arm have different gear ratios.
## Assembly Guide for the SO-101
A video tutorial is available to guide you through the assembly of the SO-101 follower arm. The assembly for the leader arm is similar. Note that the leader and follower arms use motors with different gear ratios to ensure the leader is easy to move while still supporting its weight.
* **Parts List & 3D Models:** [https://github.com/TheRobotStudio/SO-ARM100](https://github.com/TheRobotStudio/SO-ARM100)
* **Motor Configuration:** [https://github.com/phospho-app/phosphobot/tree/main/scripts/feetech](https://github.com/phospho-app/phosphobot/tree/main/scripts/feetech)
## Secure the SO-101 Arms
Choose a stable surface and firmly attach both the leader and follower SO-101 robot arms using the provided table clamps. Separate them by about 50cm to ensure they can move freely without colliding.
Ensure both arms are securely fastened to prevent any movement during operation. Keep the surrounding area clear of any obstacles that could impede the arms' movement.
## Connecting the Components
Follow this sequence to connect your setup:
1. Connect both the **leader and follower arms** to their power supplies. Make sure the voltage matches the specifications of the motors (6V or 12V depending on the motors you use).
2. For each arm, plug one end of a **USB-C cable** into the arm's controller and the other end into your computer (e.g., laptop, Raspberry Pi).
3. Connect any additional cameras to your computer.
## Start phosphobot
With all components connected and powered on, open a terminal and run the following command to install the phosphobot software:
```bash macOS
curl -fsSL https://raw.githubusercontent.com/phospho-app/phosphobot/main/install.sh | bash
```
```bash Linux
curl -fsSL https://raw.githubusercontent.com/phospho-app/phosphobot/main/install.sh | sudo bash
```
```powershell Windows
powershell -ExecutionPolicy ByPass -Command "irm https://raw.githubusercontent.com/phospho-app/phosphobot/main/install.ps1 | iex"
```
```bash uv (Linux and macOS)
# Install uv: https://docs.astral.sh/uv/
curl -LsSf https://astral.sh/uv/install.sh | sh
# Run phosphobot
uvx phosphobot@latest run
```
```powershell uv (Windows)
# Install uv: https://docs.astral.sh/uv/
powershell -ExecutionPolicy ByPass -c "irm https://astral.sh/uv/install.ps1 | iex"
# Run phosphobot
uvx phosphobot@latest run
```
Next, start the server:
```bash
phosphobot run
```
Navigate to `localhost` in your web browser to access the phosphobot dashboard, where you can find the **Control** section to operate your robot with the leader arm.
## Calibrating the Robot Arms
If you purchased pre-assembled robots, they should already be calibrated. This step is for those who have built their own arms.
The phosphobot software should automatically detect your SO-101 arms, but **calibration is necessary** for proper functionality. This ensures that the leader and follower arms have the same position values when they are in the same physical configuration. A video guide is available to walk you through the calibration process with phosphobot.
1. You will need to calibrate **each arm separately**.
2. Navigate to the **Calibration** page in the dashboard.
3. Be prepared to securely hold the arm you are calibrating, as the process will disable motor torque, which could cause it to fall.
4. Follow the positions in the video to calibrate each robot arm one by one.
Your calibration settings are saved in the `~/phosphobot/calibration` folder in your home directory, where you can manually edit the file for finer adjustments.
### About LeRobot calibration
If you're using the LeRobot framework for training, you'll need to calibrate the robot with LeRobot after this phosphobot calibration.
You need to first calibrate with phosphobot, then with LeRobot. The LeRobot calibration process is compatible with phosphobot, but independent. This only needs to be done once.
Why is this the case?
This is because LeRobot calibrates a SO-101 by moving the arm to the maximum and minimum positions of each joint. Then, LeRobot saves the min and max limits **inside** the servomotors. The servos can't move outside these limits.
phosphobot, on the other hand, sets the "first calibration position" as the **position zero** of each servo. The min and max limits are **not** updated. Because of this, the LeRobot's min and max limits keep their old values, and the servos can't move outside of these stale ranges.
To solve this, you need to re-calibrate the robot with LeRobot **after calibrating with phosphobot** to ensure that the min and max limits are correct. The calibrations are compatible, but independent.
# Controlling the Robot
Your robot is now ready for operation!
From the dashboard, select **Control** then the **Leader arm** tab to control the follower arm by moving the leader arm. Y
You can also use Keyboard Control to manipulate the robot arm using your keyboard, a gamepad, or a Meta Quest VR headset. [Learn more.](/basic-usage/teleop")
# Next Steps
You are now set to explore more advanced functionalities:
Teleoperate a real robot
How to record a dataset with your robot
How to train an AI model from a dataset you recorded
# Dev kit unboxing (DK1)
Source: https://docs.phospho.ai/unboxings/dk1
Unbox and set up your phospho dev kit.
In this guide, we will unbox and set up the **first version** of the phospho dev kit (DK1).
We no longer sell these dev kits. If you have the DK2, see the [DK2 unboxing guide](/unboxings/dk2).
## What's in the box?
phospho dev kits come with EU power plugs.
* **Robot arm**
* 1x SO-100 robot arm
* 1x 12V power source (for the arm)
* 1x USB-C to USB-C cable
* 1x USB-C to USB adapter
* 2x Table clamps
* **Camera**
* 1x Stereoscopic camera
* 1x USB-C to USB cable
* 1x Camera stand
* **Control module**
* 1x Control module
* 1x Raspberry Pi USB-C power supply
* 1x Micro SD card adapter
## 1. Attach the SO-100 arm
Find a table and fix the SO-100 robot arm using the 2 table clamps in the kit (see image below).
Make sure the arm is securely fastened and won't move. Clear away any clutter that could get in the way of the arm's movement.
## 2. Plug everything together
In this order:
1. Plug the *SO-100 robot arm* into the power supply using the **black** 12V power supply.
2. Plug one end of the **USB-C cable** into the *SO-100 robot arm* and the other into any **front USB port** on the **control module** (use the USB-C to USB **adapter** in the kit).
3. Attach the **stereoscopic camera** to the **camera stand** and place it next to the robot arm.
4. Plug the **stereoscopic camera** into one of the control module **front USB ports**.
5. Plug the **control module** into the **white** power supply (this goes into the **USB-C port on the side of the control module**).
## 3. Connect your control module to your home WiFi
After plugging in the control module, look at the LED indicator: it should blink **four times quickly** and then pause. This means it is in **hotspot** mode (ready for setup).
Now, let's connect the control module to your home WiFi so it can communicate with your devices.
### Connect to the control module hotspot
Using your computer or phone, connect to the control module's WiFi network:
* Open the WiFi settings on your device
* Look for a network called `phosphobot` in your WiFi list and connect to it.
* Enter the password: `phosphobot123`.
### Access the control module dashboard
In your browser, go to [phosphobot.local](http://phosphobot.local). This is the **dashboard** to control and set up your control module.
*On Android, we recommend using the Chrome browser.*
### Connect to your home WiFi
1. On `phosphobot.local`, go to `Network Management`. Enter the **network name** (WiFi SSID) and **password** of your WiFi network.
The network name is cAsE sEnSiTiVe and should be exactly as seen on your device/router. Double-check for typos.
2. The control module will now connect to your WiFi network. If the connection is successful, the LED becomes **solid green.**
If the LED **blinks slowly** (1-second intervals), it means the connection failed. Try these steps:
* Restart the control module by long-pressing the button next to the LED.
* Reconnect to the `phosphobot` WiFi network and try again.
3. Connect your computer back to your home WiFi network (the one you entered in the dashboard).
4. Reload the page [phosphobot.local](http://phosphobot.local) to access the control module dashboard.
5. You're done! Click on `Keyboard Control` and then on `Start Moving Robot`. Follow the instructions to control the robot with your keyboard. If this works, you're ready to send your first commands.
If this fails, restart the control module by long-pressing the button next to the LED. Then, start over this section.
Every time the control module is powered on, it will check for updates and install them automatically. They will be available the next time you power it on.
Using the **BTBerryWiFi** app, you can use Bluetooth to connect the control module to your home WiFi.
*Special thanks to its creator Norm Frenette for this awesome app!*
### Step 1: Download the BTBerryWiFi app
Download the *BTBerryWiFi* app for your smartphone:
* on **iPhone,** [download the app from the AppStore.](https://apps.apple.com/us/app/btberrywifi/id1596978011)
* on **Android,** [download the app here.](https://drive.google.com/drive/folders/12l5lCZS4T8wHfdSLyCGM-hrzh64EM-zo?usp=sharing) Install it with sideloading. *Note: the free version of the Android app only works for 7 days.*
### Step 2: Reboot the control module
1. Long press the *power button* of the control module until the LED turns red.
2. Press the *power button* again and keep it pressed until the LED turns green.
3. Wait for the control module to boot up. When the LED blinks green slowly and regularly, your control module is ready for pairing.
Make sure no device is connected to the control module through WiFi.
### Step 3: Connect to WiFi with BTBerryWiFi
For reference, here's the link to the [full user guide](https://www.btberrywifi.com/).
1. Launch **BTBerryWiFi.** Accept the authorization request to use Bluetooth. Click on the button "Scan for Raspberry Pi".
2. Wait for *phosphobot* to show up in the list below, then select it.
Sometimes, you can see *no\_name* instead of *phosphobot* in the list. If so, select *no name* and carry on.
If no device shows up: close the app, turn Bluetooth off and on on your smartphone, and reboot the control module. Then start again.
3. Wait for your smartphone to pair with the control module, then for the WiFi access points to appear. This can take up to a minute.
If you stay stuck on this screen for longer than 2 minutes, close the app, turn Bluetooth off and on on your smartphone, and reboot the control module. Then start again.
4. Select your home WiFi in the list. Then, enter the WiFi password. This will connect the control module to the WiFi network.
Then enter the WiFi password and press connect.
This step may fail if you're trying to connect to a WiFi hotspot. If this happens to you, learn how to flash your own SD card [using this guide.](https://phospho-ai.notion.site/How-to-setup-the-Raspberry-Pi-with-phospho-teleop-server-1848ca0b4c0480c28281eadb5d1245ee?pvs=4)
5. The control module is now connected to WiFi. Access the control module dashboard on the URL [phosphobot.local](http://phosphobot.local).
6. You're done! Click on "Keyboard Control" and then on "Start Moving Robot" to test the connection. Everything works? Great! You can follow the instruction and control your robot with your keyboard.
## What's next?
Teleoperate a real robot
How to record a dataset with your robot
How to train an AI model from a dataset you recorded
Join the Discord to ask questions, get help from others and get updates
# Starter pack unboxing (DK2)
Source: https://docs.phospho.ai/unboxings/dk2
Unbox and set up your phospho starter pack.
In this guide, we will unbox and set up the **phospho starter pack** (DK2).
We are currently taking orders [here](https://robots.phospho.ai).
## What's in the box?
phospho dev kits come with EU power plugs.
* **2 Robot arm**
* 2x SO-100 robot arm
* 2x 12V power source (for the arms)
* 2x USB-C to USB-C cable
* 4x Table clamps
* **2 Wrist Cameras**
* 2x Wrist cameras
* 2x Camera cables (USB)
* **Access to the [Meta Quest app](../examples/teleop)** for VR control
## 1. Attach the SO-100 arms
Find a table and fix each SO-100 robot arm using the table clamps in the kit (see image below).
Make sure the arm is securely fastened and won't move. Clear away any clutter that could get in the way of the arm's movement.
## 2. Install the wrist cameras
For safe transport, the wrist cameras are not installed on the robot arms. You don't need screws or special tools to install them, just pop them in the holes on the robot arms.
Please refer to the video below to see how to install the wrist cameras.
If you need to transport the robot arms, you can remove the wrist cameras by pulling them out of the holes.
## 3. Plug everything together
In this order:
1. Plug each *SO-100 robot arm* into the power supply using the **black** 12V power supply.
2. Plug each of the **USB-C cable** into the *SO-100 robot arm* and the other into your computer.
3. Plug the cable to the **wrist cameras** and into your computer.
## 4. Install and run the phosphobot software
Once everything is connected and powered on, run the following command in a terminal to install the phosphobot software:
```bash macOS
curl -fsSL https://raw.githubusercontent.com/phospho-app/phosphobot/main/install.sh | bash
```
```bash Linux
curl -fsSL https://raw.githubusercontent.com/phospho-app/phosphobot/main/install.sh | sudo bash
```
```powershell Windows
powershell -ExecutionPolicy ByPass -Command "irm https://raw.githubusercontent.com/phospho-app/phosphobot/main/install.ps1 | iex"
```
```bash uv (Linux and macOS)
# Install uv: https://docs.astral.sh/uv/
curl -LsSf https://astral.sh/uv/install.sh | sh
# Run phosphobot
uvx phosphobot@latest run
```
```powershell uv (Windows)
# Install uv: https://docs.astral.sh/uv/
powershell -ExecutionPolicy ByPass -c "irm https://astral.sh/uv/install.ps1 | iex"
# Run phosphobot
uvx phosphobot@latest run
```
Then, fire up the the server:
```bash
phosphobot run
```
Go to `localhost` in your web browser to access the phosphobot dashboard. Go to **Control** to control your robot using only your keyboard!
## What's next?
Teleoperate a real robot
How to record a dataset with your robot
How to train an AI model from a dataset you recorded
Join the Discord to ask questions, get help from others and get updates
# Welcome to phosphobot
Source: https://docs.phospho.ai/welcome
An absurdly simple way to train AI models for real-world robots, built for ML engineers.
Phospho is how ML engineers make real robots intelligent.
We provide the hardware, libraries, and remote control capabilities so developers can collect data,
train AI models and deploy applications to real robots in minutes instead of months.
# Highlights
* 🕹️ Control your robots to record datasets in minutes with a keyboard, a gamepad, a leader arm, and more
* ⚡ Train Action models such as ACT, π0 or gr00t-n1.5 with one click
* 🦾 Compatible with the SO-100, SO-101, Unitree Go2, Agilex Piper...
* 🚪 Dev-friendly API
* 🤗 Fully compatible with LeRobot and HuggingFace
* 🖥️ Runs on macOS, Linux and Windows
* 🥽 Meta Quest app for teleoperation
* 📸 Supports most cameras (classic, depth, stereo)
* 🔌 Open Source: [Extend it with your own robots and cameras](https://github.com/phospho-app/phosphobot/tree/main/phosphobot)
Pssst... working with phosphobot? Get expert help from the team. Contact us at [contact@phospho.ai](mailto:contact@phospho.ai)
# Installation
In a terminal, run the following command:
```bash macOS
curl -fsSL https://raw.githubusercontent.com/phospho-app/phosphobot/main/install.sh | bash
```
```bash Linux
curl -fsSL https://raw.githubusercontent.com/phospho-app/phosphobot/main/install.sh | sudo bash
```
```powershell Windows
powershell -ExecutionPolicy ByPass -Command "irm https://raw.githubusercontent.com/phospho-app/phosphobot/main/install.ps1 | iex"
```
```bash uv (Linux and macOS)
# Install uv: https://docs.astral.sh/uv/
curl -LsSf https://astral.sh/uv/install.sh | sh
# Run phosphobot
uvx phosphobot@latest run
```
```powershell uv (Windows)
# Install uv: https://docs.astral.sh/uv/
powershell -ExecutionPolicy ByPass -c "irm https://astral.sh/uv/install.ps1 | iex"
# Run phosphobot
uvx phosphobot@latest run
```
Then, fire up the the server:
```bash
phosphobot run
```
It can take up to 15 seconds for the server to start.
Go to `localhost` in your web browser to access the phosphobot dashboard. Go to **Keyboard Control** to control your robot using only your keyboard, record datasets, and train AI models!
# VR Control
phosphobot enables you to [control your robot arm in VR](./examples/teleop.mdx) using a Meta Quest 2, Pro, 3 or 3s. Speed up your data collection and unlock intuitive bimanual control.
Unlock access to VR Control, advanced AI training, and more.
Get the phospho teleoperation app on the Meta Store for Meta Quest 2, Pro, 3, and 3s.
If you bought our [phospho starter pack](https://robots.phospho.ai/starter-pack), you should have received a link to get the phospho teleoperation Meta Quest app. Please [reach out](mailto:contact@phospho.ai) if not.
# How to update phosphobot?
[We're shipping updates daily](https://github.com/phospho-app/phosphobot/releases). We fix bugs, add features, and improve the experience constantly.
Keep your software up-to-date to benefit from the latest improvements.
```bash macOS
brew update && brew upgrade phosphobot
```
```bash Linux
sudo apt update && sudo apt install --only-upgrade phosphobot
```
```powershell Windows
powershell -ExecutionPolicy ByPass -Command "irm https://raw.githubusercontent.com/phospho-app/phosphobot/main/install.ps1 | iex"
```
```uv (pip)
uvx phosphobot@latest run
```
# Next step
How to install phosphobot on your computer
How to get started with the **phospho starter pack**
How to set up your SO-100 or SO-101 robot arm
Join the Discord to ask questions, chat with roboticists, and get updates about AI robotics
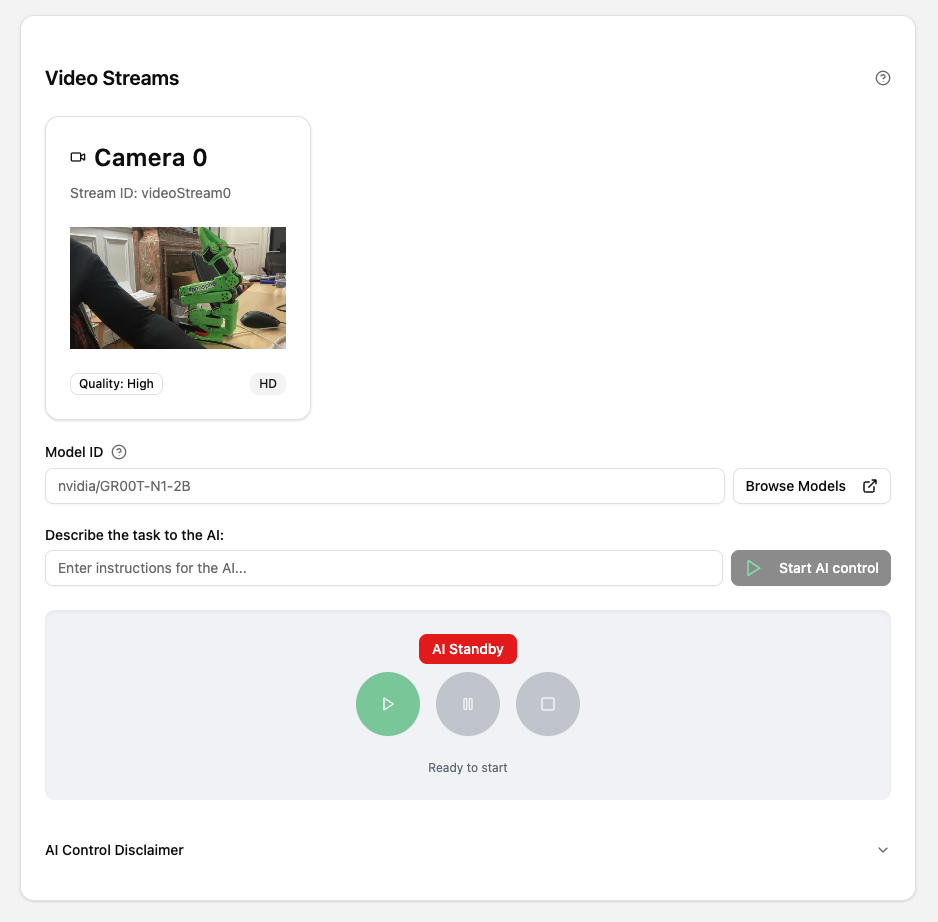 5. In the **Model ID**, enter the name of your model on Hugging Face (example: `phospho-app/YOUR_DATASET_NAME-A_RANDOM_ID`). Double check the camera angles so that they match the ones you used to record the dataset.
6. Click on **Start AI Control**. Please wait: the first time, starting a GPU instance and loading the model can take up to 60 seconds. Then the robot will start moving.
You can pause, resume, and stop the AI control at any time by clicking on the control buttons.
If your model supports it, you can edit the **Instruction** field to change the instruction and run it again to see how the robot reacts.
5. In the **Model ID**, enter the name of your model on Hugging Face (example: `phospho-app/YOUR_DATASET_NAME-A_RANDOM_ID`). Double check the camera angles so that they match the ones you used to record the dataset.
6. Click on **Start AI Control**. Please wait: the first time, starting a GPU instance and loading the model can take up to 60 seconds. Then the robot will start moving.
You can pause, resume, and stop the AI control at any time by clicking on the control buttons.
If your model supports it, you can edit the **Instruction** field to change the instruction and run it again to see how the robot reacts.
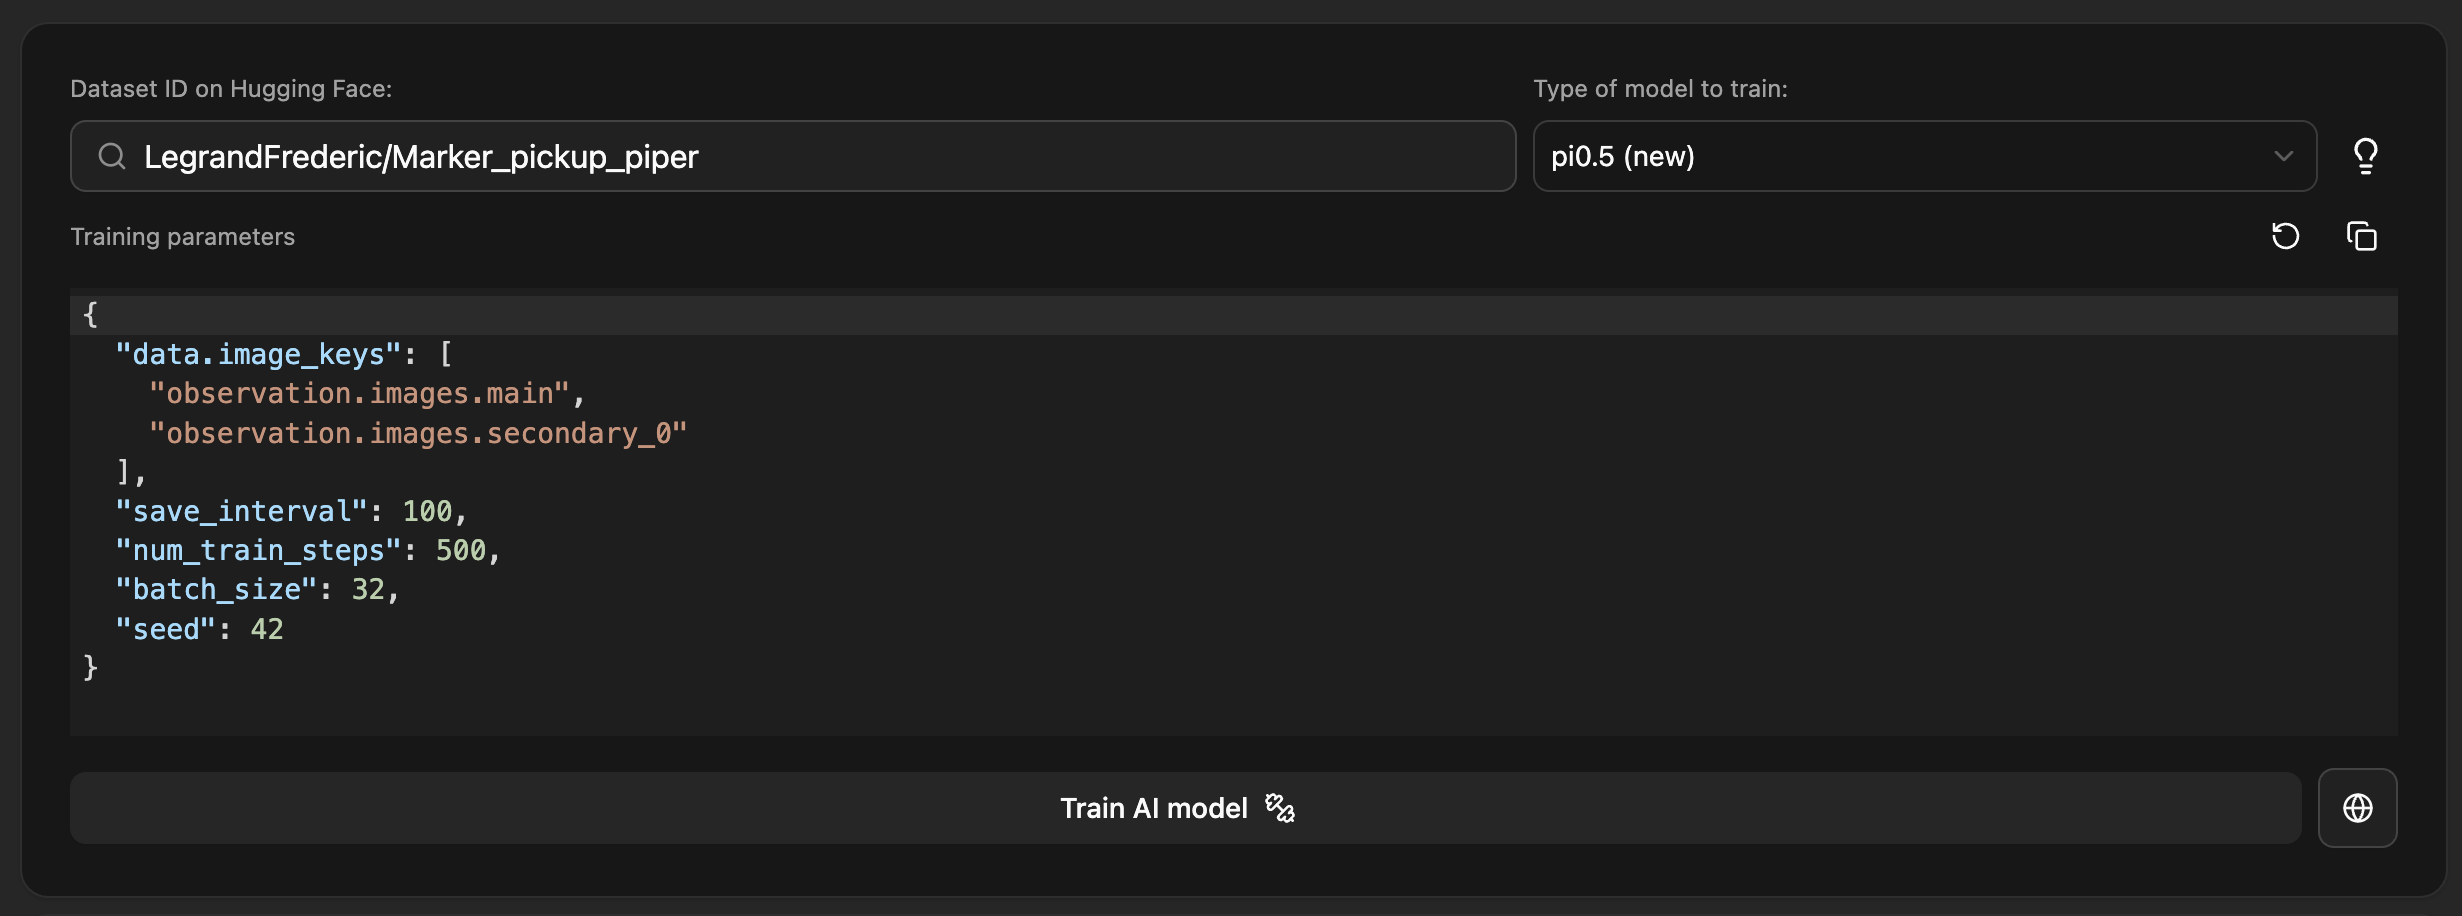 In the top left, enter your **dataset name**, it should be on Hugging Face. For example: `LegrandFrederic/Marker_pickup_piper`.
Then, select the **Pi0.5 model** from the dropdown menu in the upper right.
Change the training parameters such as the image keys to match your dataset. If your dataset only contains one camera, you should set the image keys to `["image.name.in.the.dataset"]`, most likely `["observation.images.main"]` if you recorded it with phosphobot.
In the top left, enter your **dataset name**, it should be on Hugging Face. For example: `LegrandFrederic/Marker_pickup_piper`.
Then, select the **Pi0.5 model** from the dropdown menu in the upper right.
Change the training parameters such as the image keys to match your dataset. If your dataset only contains one camera, you should set the image keys to `["image.name.in.the.dataset"]`, most likely `["observation.images.main"]` if you recorded it with phosphobot.
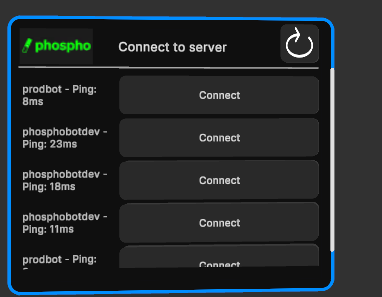 2. After connecting, you'll see the list of connected cameras and recording options.
* Move the windows with the `Grip button` to organize your space.
* Enable preview to see the camera feed. Check the **camera angles** and adjust their positions if needed.
2. After connecting, you'll see the list of connected cameras and recording options.
* Move the windows with the `Grip button` to organize your space.
* Enable preview to see the camera feed. Check the **camera angles** and adjust their positions if needed.
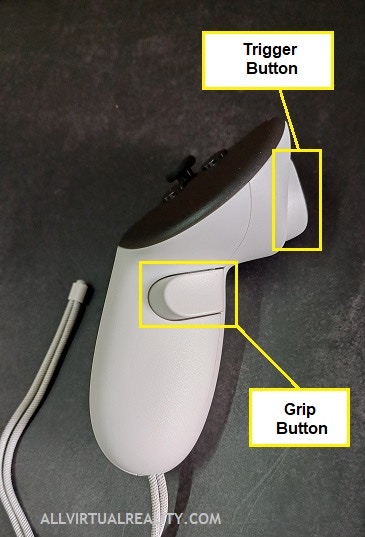 3. Press `A` once to start teleoperation and begin moving your controller.
* The robot will naturally follow the movement of your controller. Press the `Trigger button` to close the gripper.
* Press `A` again to stop the teleoperation. The robot will stop.
4. Press `B` to start recording. You can leave the default settings for your first attempt.
* Press `B` again to stop the recording.
* Press `Y` (left controller) to discard the recording.
5. Continue teleoperating and stop the recording by pressing `B` when you're done.
6. The recording is automatically saved in **LeRobot v2** format and **uploaded to your HuggingFace account.**
## Examples of VR control
The phospho Meta Quest app lets you operate the robot arm in real time. With the built-in stereo camera system, you can see the robot's environment in 3D, allowing you to interact as if you were physically present.
## What's next?
Use your **recorded datasets** to **train AI models**.
3. Press `A` once to start teleoperation and begin moving your controller.
* The robot will naturally follow the movement of your controller. Press the `Trigger button` to close the gripper.
* Press `A` again to stop the teleoperation. The robot will stop.
4. Press `B` to start recording. You can leave the default settings for your first attempt.
* Press `B` again to stop the recording.
* Press `Y` (left controller) to discard the recording.
5. Continue teleoperating and stop the recording by pressing `B` when you're done.
6. The recording is automatically saved in **LeRobot v2** format and **uploaded to your HuggingFace account.**
## Examples of VR control
The phospho Meta Quest app lets you operate the robot arm in real time. With the built-in stereo camera system, you can see the robot's environment in 3D, allowing you to interact as if you were physically present.
## What's next?
Use your **recorded datasets** to **train AI models**.
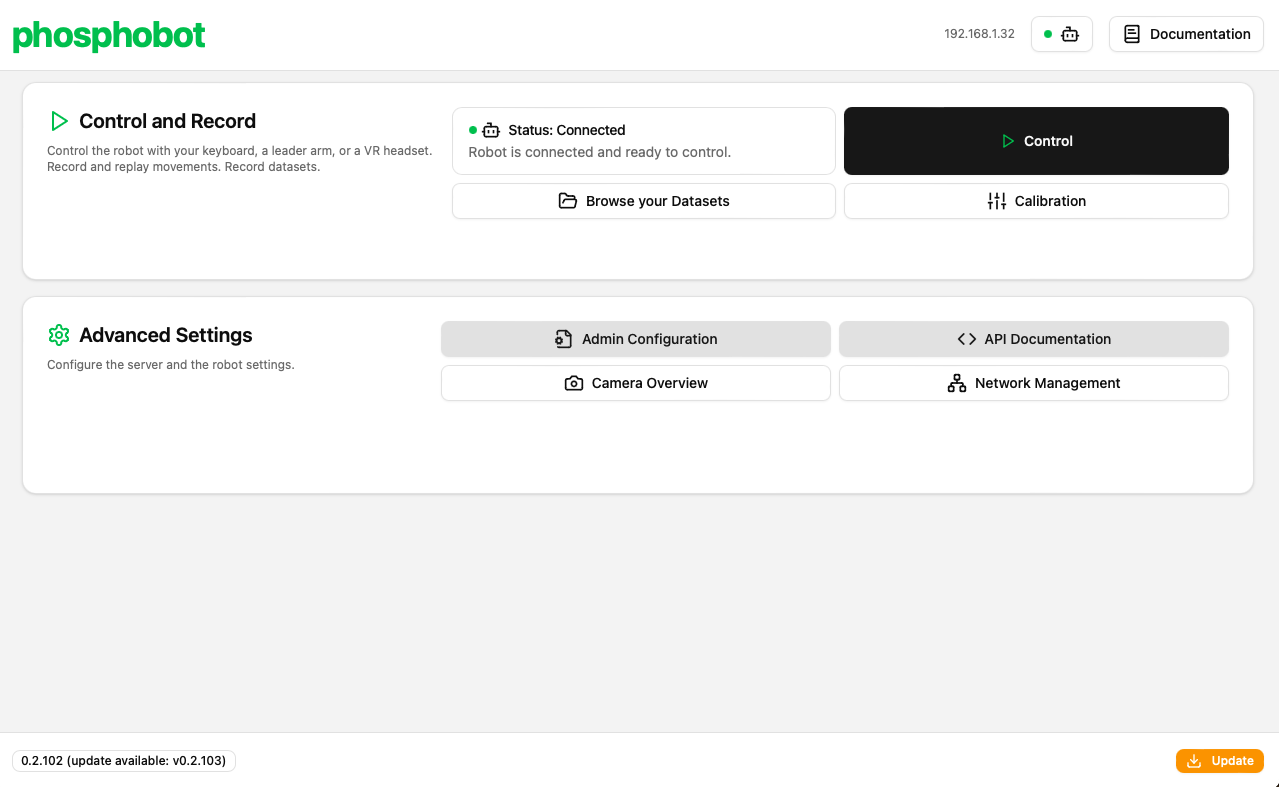
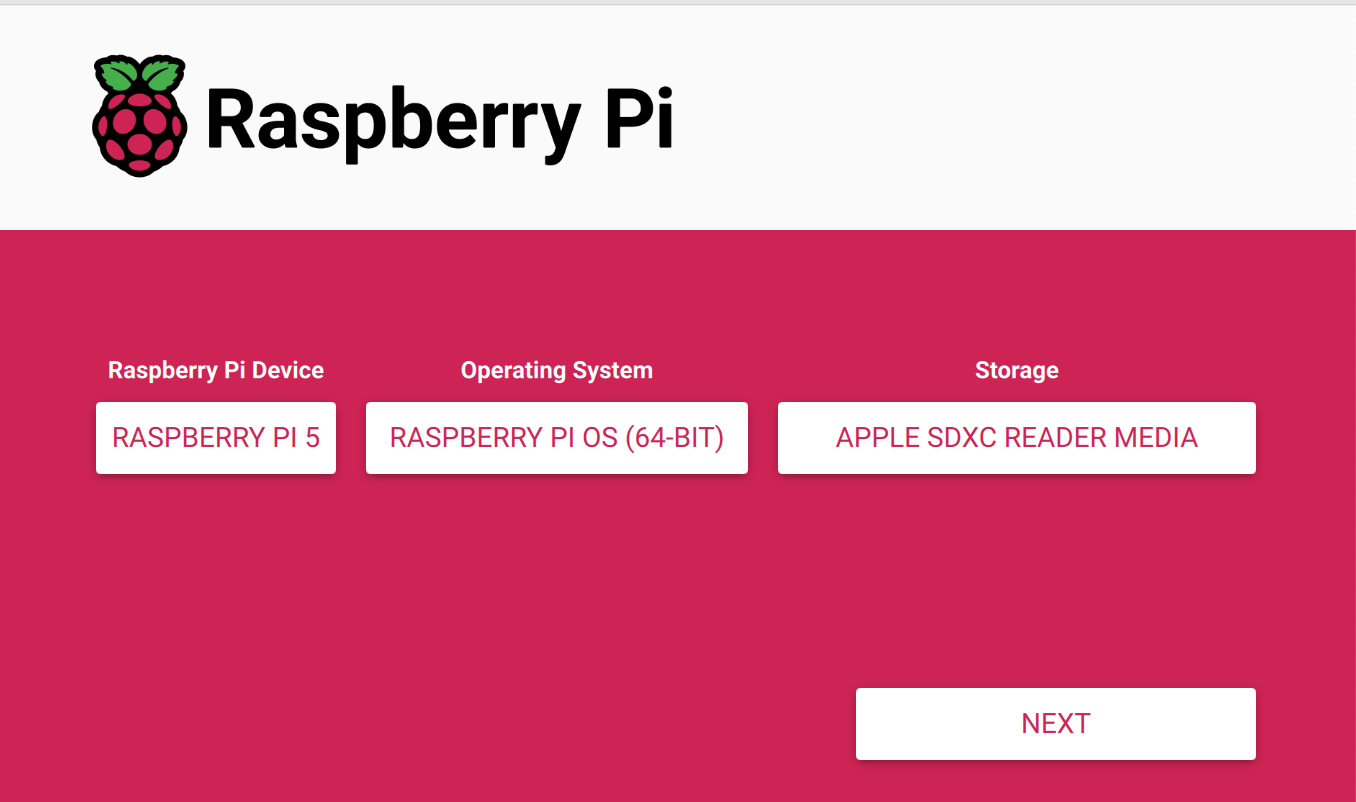 When the window pops up asking for OS customisation, select **Edit Settings**.
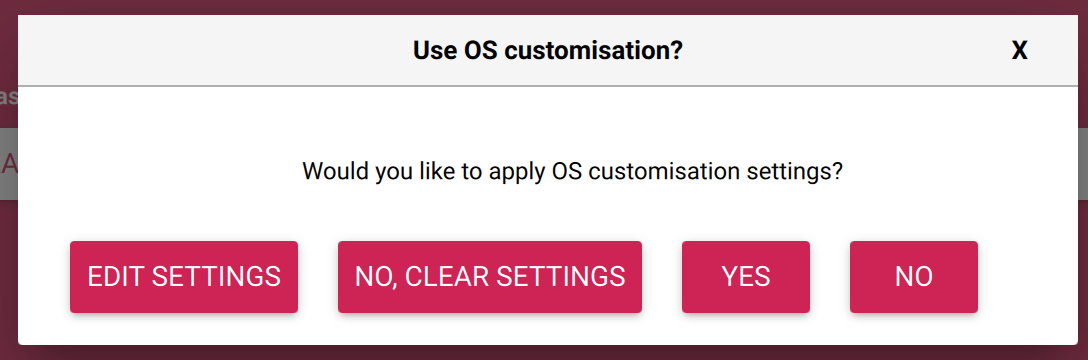 In general settings :
* Set hostname to `phosphobot`?
* Set username and password to `phosphobot` and `password123` (example).
* Configure wireless LAN: add your Wifi network name, password, and country. Be careful: tHiS iS cAsE sEnSiTiVe!
In general settings :
* Set hostname to `phosphobot`?
* Set username and password to `phosphobot` and `password123` (example).
* Configure wireless LAN: add your Wifi network name, password, and country. Be careful: tHiS iS cAsE sEnSiTiVe!
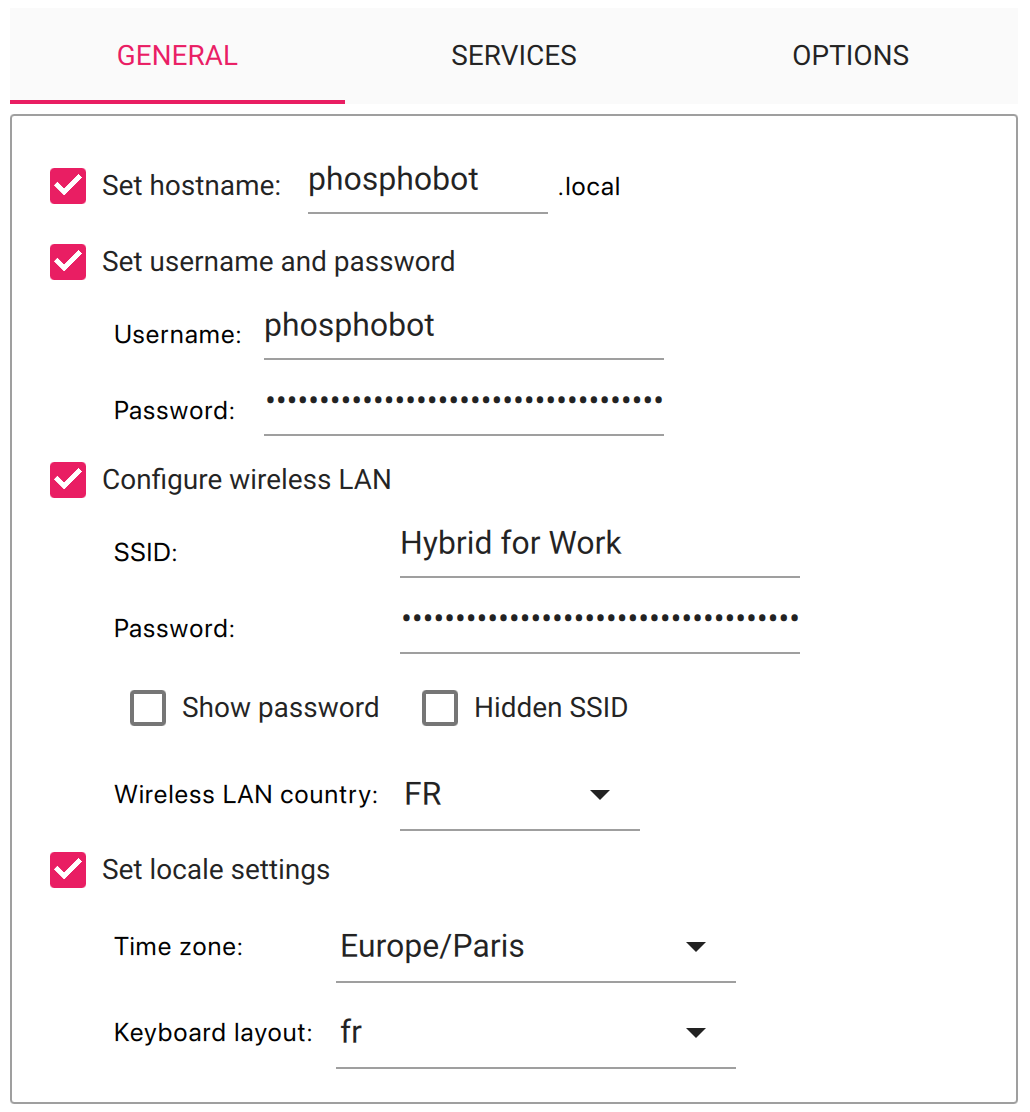 In the Services settings, make sure SSH is enabled.
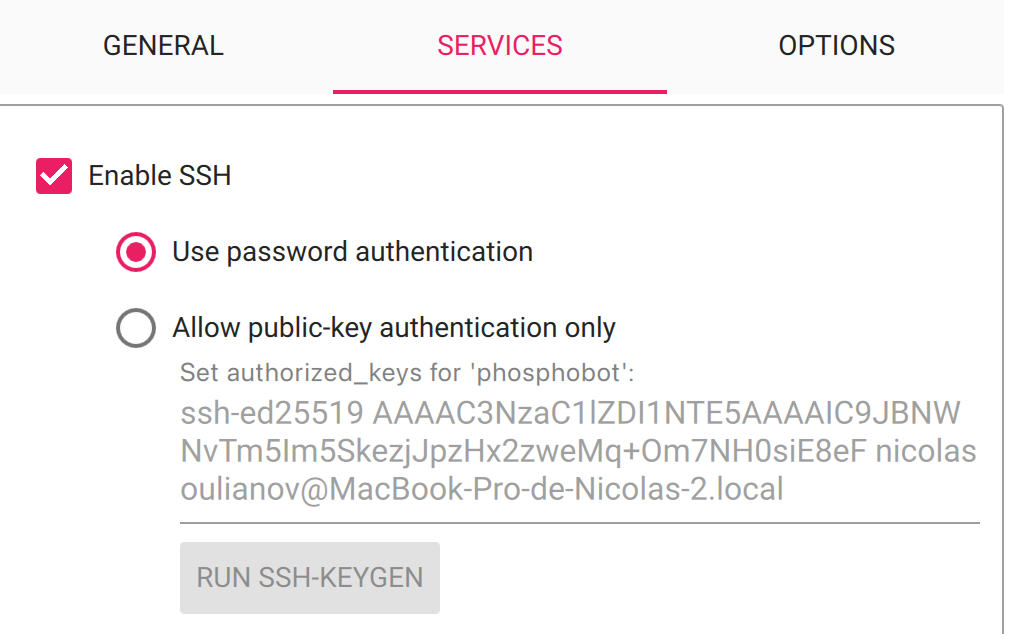 Then hit Save and hit Yes to use the OS customization settings. Write the image to the SD card.
When writing is finished, take out the SD card from your computer.
Insert the microSD into the Raspberry Pi when it's turned off.
Then hit Save and hit Yes to use the OS customization settings. Write the image to the SD card.
When writing is finished, take out the SD card from your computer.
Insert the microSD into the Raspberry Pi when it's turned off.
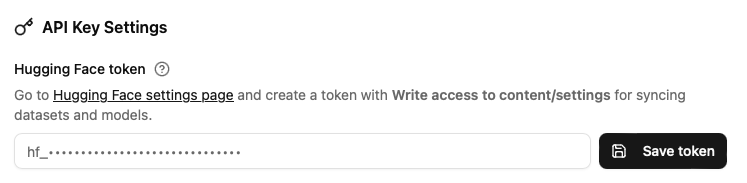 ## 2. Set your dataset name and parameters
Go to the *Admin Configuration* page of your phospshobot dashboard. You can adjust settings. The most important are:
* **Dataset Name**: The name of the dataset you want to record.
* **Task**: A text description of the task you're about to record. For example: *"Pick up the lego brick and put it in the box"*. This helps you remember what you recorded and is used by some AI models to understand the task.
* **Camera**: The cameras you want to record. By default, all cameras are recorded. You can select the cameras to record in the Admin Configuration.
* **Video Codec**: The video codec used to record the videos. The default is `AVC1`, which is the most efficient codec. If you're having compatibility issues due to unavailable codecs (eg on Linux), switch to `mp4v` which is more compatible.
## 3. Control the robot in the Meta Quest app
The easiest way to record a dataset is to use the Meta Quest app.
## 2. Set your dataset name and parameters
Go to the *Admin Configuration* page of your phospshobot dashboard. You can adjust settings. The most important are:
* **Dataset Name**: The name of the dataset you want to record.
* **Task**: A text description of the task you're about to record. For example: *"Pick up the lego brick and put it in the box"*. This helps you remember what you recorded and is used by some AI models to understand the task.
* **Camera**: The cameras you want to record. By default, all cameras are recorded. You can select the cameras to record in the Admin Configuration.
* **Video Codec**: The video codec used to record the videos. The default is `AVC1`, which is the most efficient codec. If you're having compatibility issues due to unavailable codecs (eg on Linux), switch to `mp4v` which is more compatible.
## 3. Control the robot in the Meta Quest app
The easiest way to record a dataset is to use the Meta Quest app.
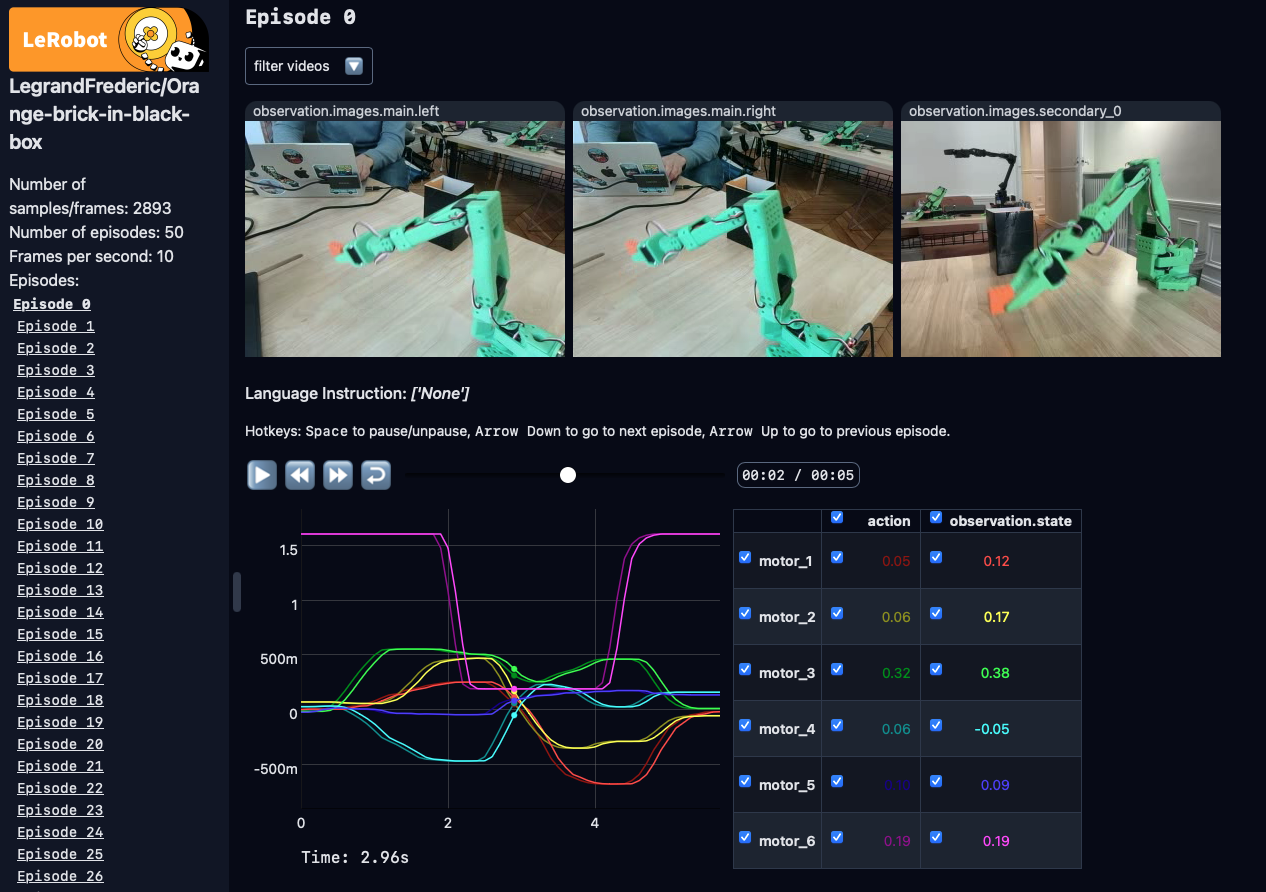
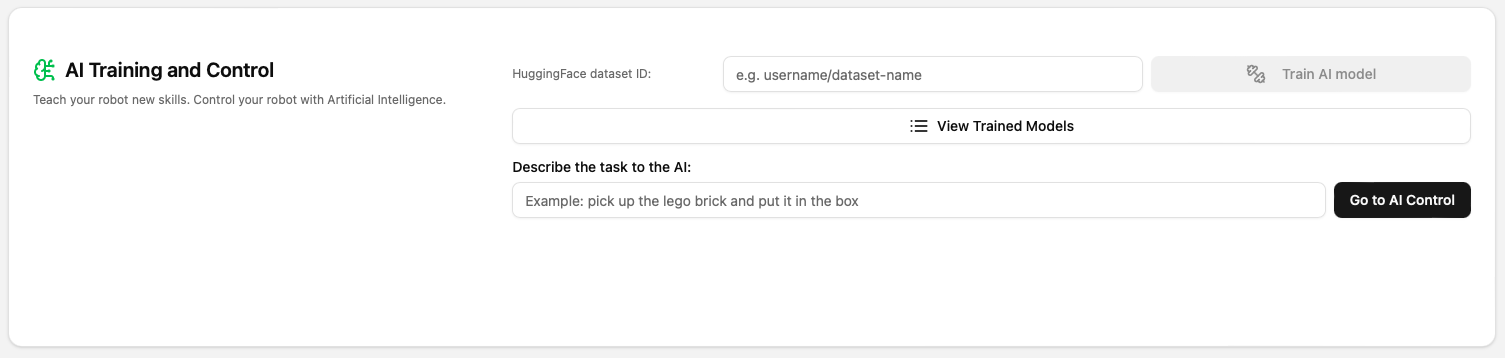
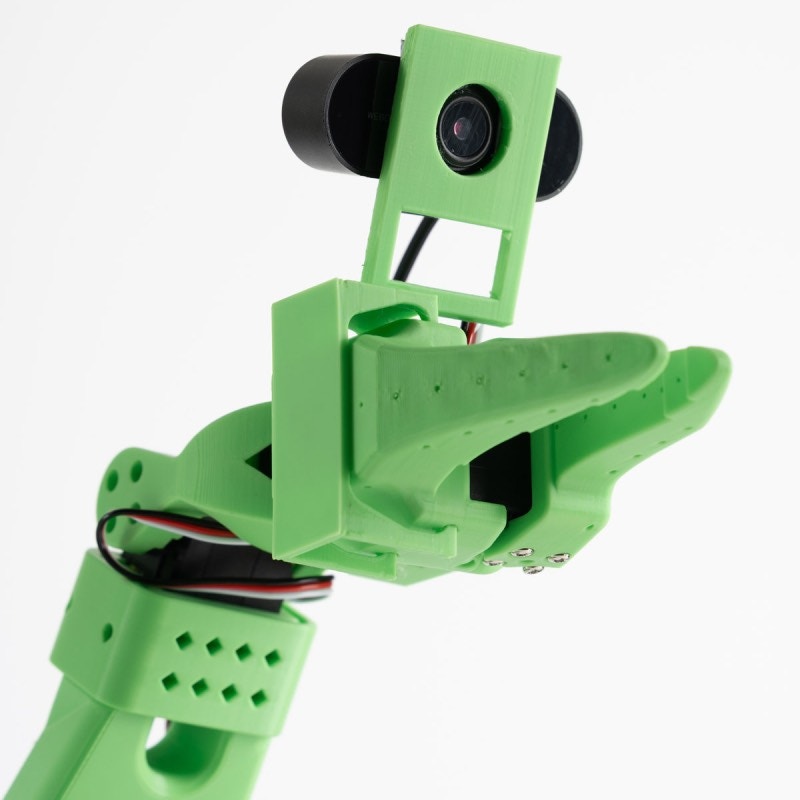 Adding more cameras usually helps to improve AI accuracy. However, it requires more compute at inference time (slower models) and makes the real-life setup more cumbersome. Usually, one context camera and two wrist cameras are a good trade-off.
### What are stereo cameras?
Stereo Cameras are made of two lenses that capture two images of the same scene from slightly different angles.
Adding more cameras usually helps to improve AI accuracy. However, it requires more compute at inference time (slower models) and makes the real-life setup more cumbersome. Usually, one context camera and two wrist cameras are a good trade-off.
### What are stereo cameras?
Stereo Cameras are made of two lenses that capture two images of the same scene from slightly different angles.
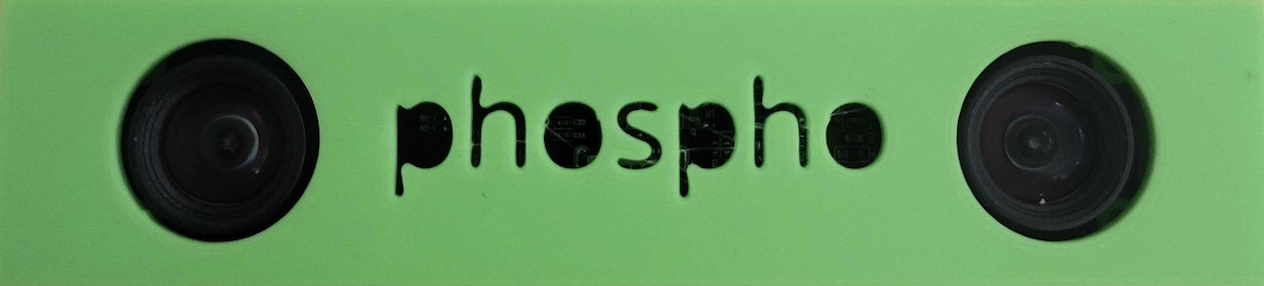 The shift between the two images is used to calculate the depth of the scene. The greater the shift, the closer the object is to the camera.
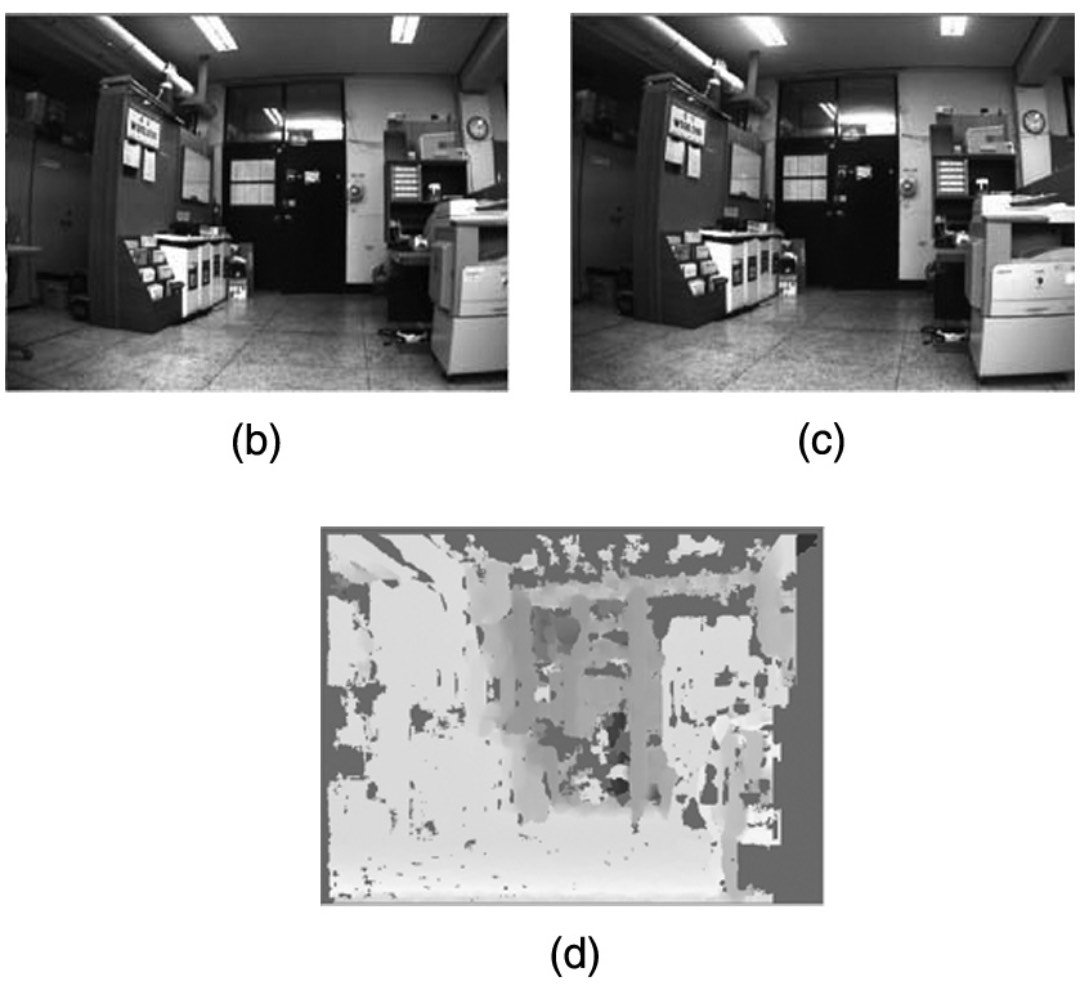
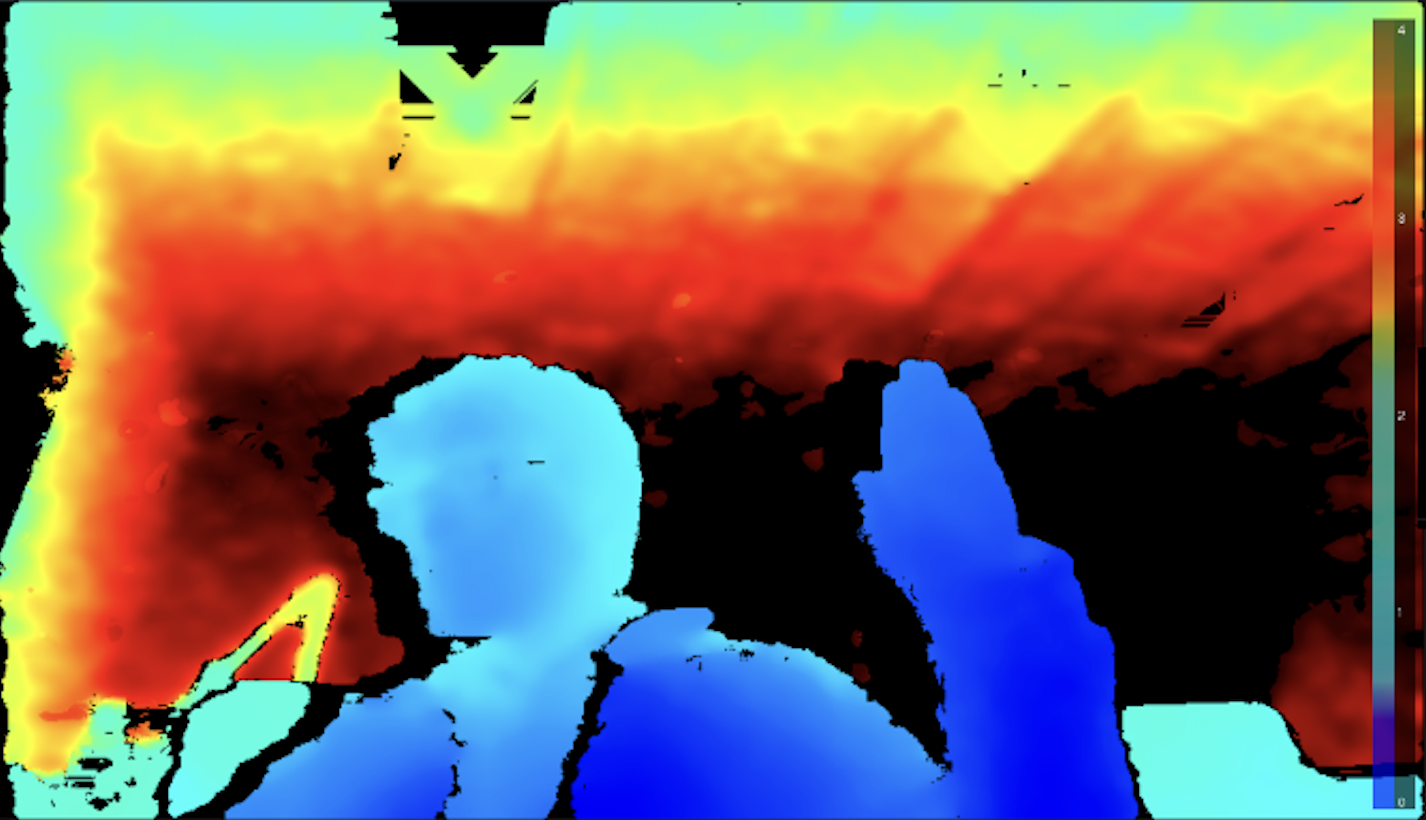 Intel RealSense cameras are a popular choice for depth cameras. They are more complex than standard cameras. They have multiple sensors (infrared, multiple color sensors, etc.) and a **processor** used to combine them to compute the depth map.
This means they are pricier than standard cameras and tend to be more difficult to set up.
Intel RealSense cameras are a popular choice for depth cameras. They are more complex than standard cameras. They have multiple sensors (infrared, multiple color sensors, etc.) and a **processor** used to combine them to compute the depth map.
This means they are pricier than standard cameras and tend to be more difficult to set up.
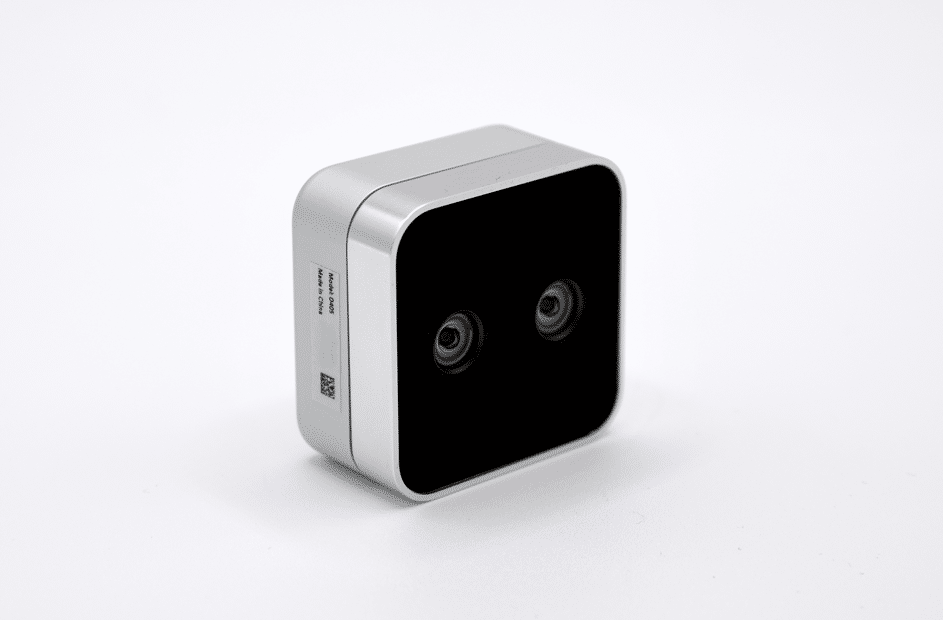
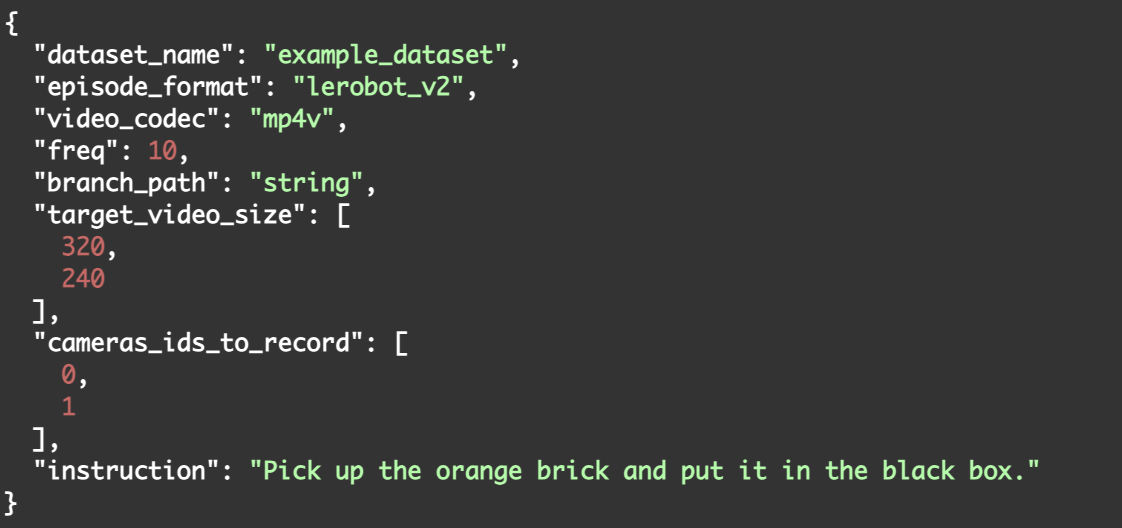 Anybody can contribute to add new types of cameras to the phospho starter packs by creating a new camera class inheriting from `BaseCamera`.
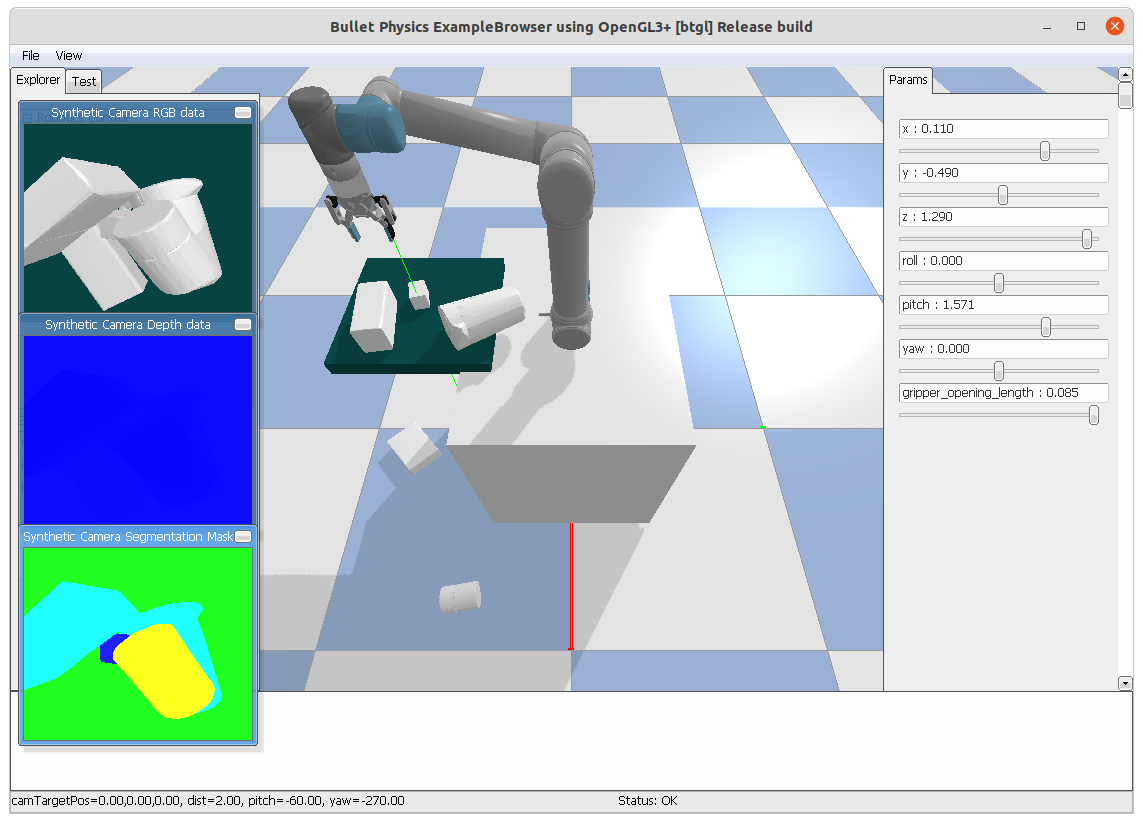 ### Requirements
PyBullet uses URDF (Unified Robot Description Format) files to define robot structures.
It's lightweight and runs on most modern computers without specialized hardware.
### Features
PyBullet offers a balance between realism and computational efficiency, suitable for real-time simulations and educational purposes.
Despite being old, Pybullet is easy to set up, with extensive documentation and community support.
### Requirements
PyBullet uses URDF (Unified Robot Description Format) files to define robot structures.
It's lightweight and runs on most modern computers without specialized hardware.
### Features
PyBullet offers a balance between realism and computational efficiency, suitable for real-time simulations and educational purposes.
Despite being old, Pybullet is easy to set up, with extensive documentation and community support.
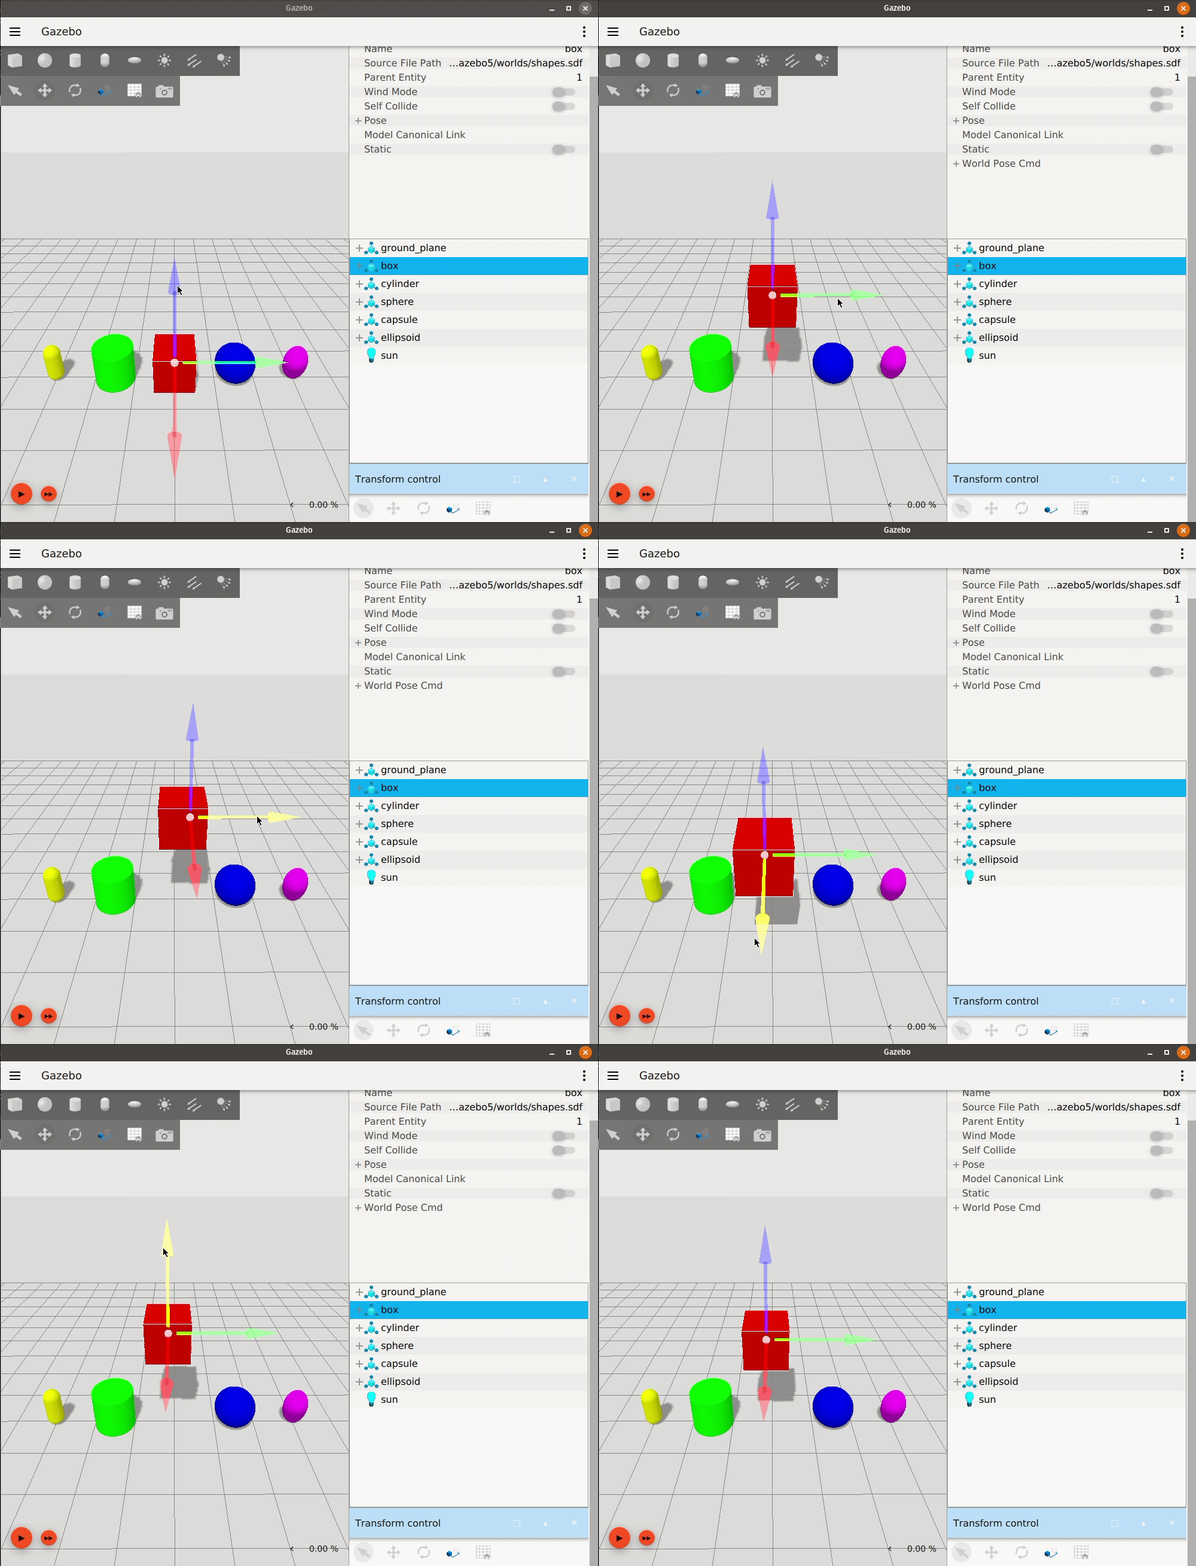 ### Requirements
Gazebo uses SDF (Simulation Description Format) files to define robot models and environments. It supports a wide range of operating systems, including Linux, macOS, and Windows, and can run on standard hardware without the need for specialized equipment.
### Features
Gazebo provides a robust simulation environment with realistic physics, sensor models, and a variety of plugins for customization. It is particularly well-suited for testing robotic algorithms in complex environments.
Gazebo is known for its ease of integration with [ROS](https://www.ros.org), making it a popular choice for robotics research and development.
### Requirements
Gazebo uses SDF (Simulation Description Format) files to define robot models and environments. It supports a wide range of operating systems, including Linux, macOS, and Windows, and can run on standard hardware without the need for specialized equipment.
### Features
Gazebo provides a robust simulation environment with realistic physics, sensor models, and a variety of plugins for customization. It is particularly well-suited for testing robotic algorithms in complex environments.
Gazebo is known for its ease of integration with [ROS](https://www.ros.org), making it a popular choice for robotics research and development.
 ### Requirements
Required Files: MuJoCo uses XML files, specifically the MJCF (MuJoCo XML) format, to define robot models and environments. This format allows for detailed specification of the physical properties and dynamics of the simulated entities.
Hardware Requirements: MuJoCo is optimized for performance and can run efficiently on standard hardware. However, it really shines by running on GPUs and TPUs, making it suitable for data-intensive tasks like reinforcement learning.
### Features
MuJoCo is best for contact dynamics and complex interactions.
Mujoco is straightforward to set up, with comprehensive docs. The recent open-source release has made it more accessible to researchers and developers.
### Requirements
Required Files: MuJoCo uses XML files, specifically the MJCF (MuJoCo XML) format, to define robot models and environments. This format allows for detailed specification of the physical properties and dynamics of the simulated entities.
Hardware Requirements: MuJoCo is optimized for performance and can run efficiently on standard hardware. However, it really shines by running on GPUs and TPUs, making it suitable for data-intensive tasks like reinforcement learning.
### Features
MuJoCo is best for contact dynamics and complex interactions.
Mujoco is straightforward to set up, with comprehensive docs. The recent open-source release has made it more accessible to researchers and developers.
 ### Requirements
Required Files: It uses USD (Universal Scene Description) files for defining environments and robots.
Hardware Requirements: NVIDIA Isaac is optimized for NVIDIA GPUs, leveraging their power for high-performance simulations.
### Features
Nvidia Isaac provides a highly realistic simulation environment. It's great for autonomous systems.
Setting up NVIDIA Isaac can be complex, requiring specific hardware and software configurations.
### Requirements
Required Files: It uses USD (Universal Scene Description) files for defining environments and robots.
Hardware Requirements: NVIDIA Isaac is optimized for NVIDIA GPUs, leveraging their power for high-performance simulations.
### Features
Nvidia Isaac provides a highly realistic simulation environment. It's great for autonomous systems.
Setting up NVIDIA Isaac can be complex, requiring specific hardware and software configurations.
 ### Requirements
Genesis supports MJCF (.xml), URDF, and 3D model formats like .obj and .stl.
The framework leverages GPU-accelerated parallel computation, making it highly efficient on modern GPUs. The current version is mostly compatible with Linux and Nvidia GPUs (CUDA), while support for other platforms is under development.
### Features
Genesis excels in simulating a wide range of physical phenomena, including rigid body dynamics, fluid mechanics, and soft robotics. It aims to let you train AI models and test robotic systems in complex environments.
Genesis is designed to be user-friendly with a Pythonic interface, making it accessible to both beginners and experienced developers.
### Requirements
Genesis supports MJCF (.xml), URDF, and 3D model formats like .obj and .stl.
The framework leverages GPU-accelerated parallel computation, making it highly efficient on modern GPUs. The current version is mostly compatible with Linux and Nvidia GPUs (CUDA), while support for other platforms is under development.
### Features
Genesis excels in simulating a wide range of physical phenomena, including rigid body dynamics, fluid mechanics, and soft robotics. It aims to let you train AI models and test robotic systems in complex environments.
Genesis is designed to be user-friendly with a Pythonic interface, making it accessible to both beginners and experienced developers.
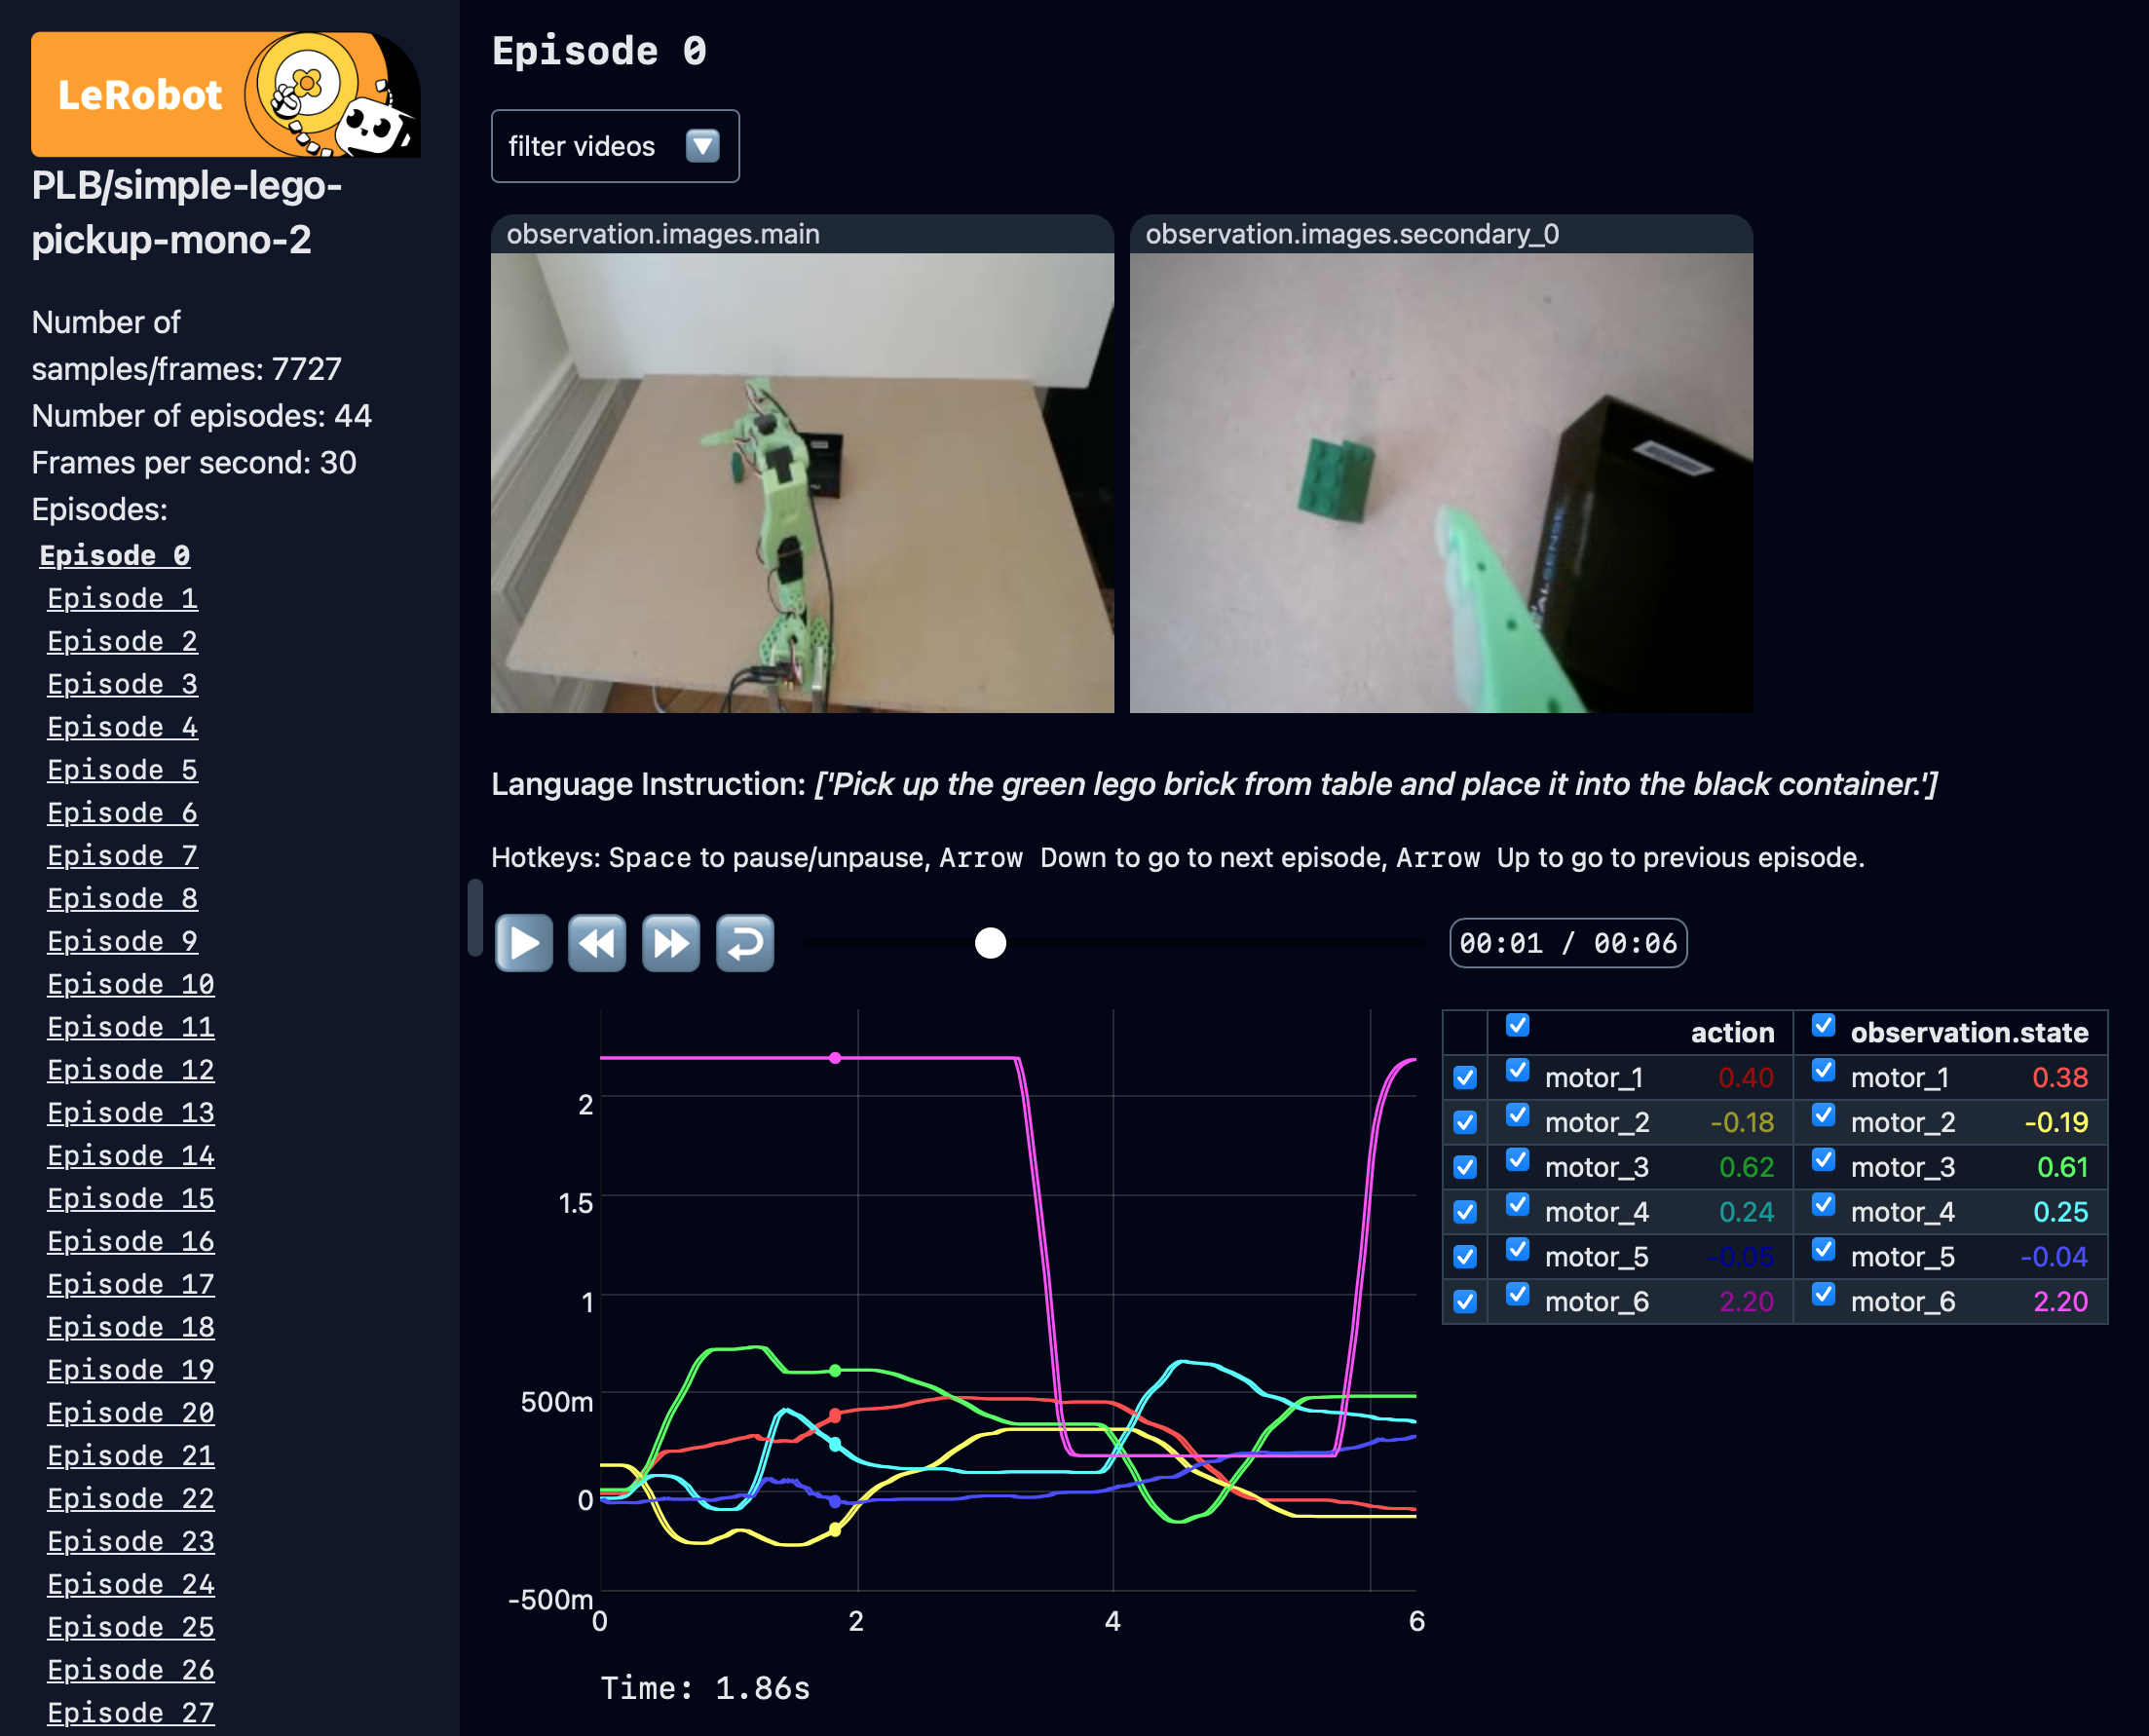 ## What are the columns in a LeRobot Dataset?
The core data in a LeRobot dataset consists of Parquet files containing trajectory information (like robot states and actions) and MP4 video files for camera observations.
1. **Parquet Files (`data/chunk-000/episode_xxxxxx.parquet`):**
* These files store the step-by-step data for each robot episode.
* When loaded, this becomes part of a Hugging Face `Dataset` object (often named `hf_dataset` in the `LeRobotDataset` object).
* **Common features you'll find inside:**
* `observation.state` (list of numbers): Robot's state, like joint angles or end-effector position.
* `action` (list of numbers): The action taken, like target joint angles.
* `timestamp` (number): Time in seconds from the start of the episode.
* `episode_index` (integer): ID for the episode.
* `frame_index` (integer): ID for the frame *within* its episode (starts at 0 for each episode).
* `index` (integer): A unique ID for the frame across the *entire* dataset.
* `next.done` (true/false, optional): True if this is the last frame of an episode.
* `task_index` (integer, optional): Links to a task in `tasks.jsonl`.
2. **Video Files (`videos/chunk-000/camera_key/episode_xxxxxx.mp4`):**
* Camera images are stored as MP4 videos to save space.
* Each MP4 file is usually one camera's view for one full episode.
* The `hf_dataset` (when loaded) will point to these video frames using a `VideoFrame` object for each camera observation (e.g., `observation.images.cam_high`):
* `VideoFrame = {'path': 'path/to/video.mp4', 'timestamp': time_in_video_seconds}`.
* The system uses this to grab the correct image from the video.
## What Information is Stored in the LeRobot Metadata Files?
LeRobot metadata files, found in the `meta/` directory, store crucial information about the dataset's structure, content, statistics, and individual episodes.
1. **`info.json`:** Contains general information about the whole dataset.
* `codebase_version` (text): "v2.0" or "v2.1". Tells you how to read other metadata, especially stats.
* `robot_type` (text): What kind of robot was used.
* `fps` (number): The intended frames-per-second of the data.
* `total_episodes` (integer): How many episodes are in the dataset.
* `total_frames` (integer): Total number of frames across all episodes.
* `total_tasks` (integer): Number of different tasks defined.
* `total_videos` (integer): Total number of video files.
* `splits` (dictionary): Info on data splits, like `{"train": "0:N"}` means episodes 0 to N-1 are for training.
* `features` (dictionary): Very important! This describes every piece of data: its type, shape, and sometimes names.
* Example for `observation.state`: `{"dtype": "float32", "shape": [7], "names": ["joint1", ...]}`
* Example for a camera `observation.images.main`:
```json
"observation.images.main": {
"dtype": "video",
"shape": [224, 224, 3], // height, width, channels
"names": ["height", "width", "channel"],
"info": { // Details about the video itself
"video.fps": 10,
"video.codec": "mp4v",
// ... other video details
}
}
```
* `camera_keys` (list of text, implied by `features`): Names for camera data, like `observation.images.main`.
2. **`episodes.jsonl`:** A file where each line is a JSON object describing one episode.
* `episode_index` (integer): The episode's ID.
* `tasks` (list of text): List of task descriptions (e.g., "pick up the red block") for this episode.
* `length` (integer): Number of frames in this episode.
3. **`tasks.jsonl`:** A file where each line is a JSON object linking task IDs to descriptions.
* `task_index` (integer): The ID used in the Parquet files.
* `task` (text): The actual task description.
4. **`episodes_stats.jsonl` (for v2.1):** Each line is a JSON object with statistics for one episode.
* `episode_index` (integer): The episode ID.
* `stats` (dictionary): Contains stats (`{'max': ..., 'min': ..., 'mean': ..., 'std': ...}`) for each feature (like `observation.state`, `action`) *within that specific episode*.
* For images, stats (mean, std) are usually per-channel.
5. **`stats.json` (for v2.0):** A single JSON file with statistics for the entire dataset combined.
* Similar structure to the `stats` object in `episodes_stats.jsonl`, but for all data.
## What are the Key Concepts and Important Fields in a LeRobot Dataset?
Key concepts in a LeRobot dataset include different types of indices (episode, frame, global), timestamps, and specific fields like `action` and `observation.state` which have precise meanings.
* **Indices:**
* `episode_index`: Identifies an episode (e.g., 0, 1, 2...).
* `frame_index`: Identifies a frame *within* an episode (e.g., 0, 1, ... up to `length-1`). It resets for each new episode.
* `index`: A global, unique ID for a frame across the *entire dataset*. For example, if episode 0 has 100 frames (index 0-99), and episode 1 has 50 frames, episode 1's frames would have global indices 100-149.
* **Timestamps:**
* `timestamp` (in Parquet files): Time in seconds from the start of the current episode for that frame.
* `VideoFrame.timestamp` (for video features): Time in seconds *within the MP4 video file* where that specific frame is.
* `fps` (in `info.json`): The intended frame rate. Ideally, `timestamp` should be close to `frame_index / fps`.
* **`action` field:** In robot learning, the `action` recorded at frame `t` is usually the action that *caused* the observation at frame `t+1`. For instance, if actions are target joint positions, `action[t]` might be the joint positions observed at `observation.state[t+1]`.
* **`observation.state` vs. `joints_position`:** The Python code example you saw might use `joints_position` for joint angles and `state` for something else (like end-effector pose). LeRobot examples often use `observation.state` more broadly for the robot's proprioceptive data (like joint positions). Always check the dataset's `info.json -> features` to know exactly what `observation.state` means for that specific dataset.
## What are Common Pitfalls and Best Practices for Working with LeRobot Datasets?
Common pitfalls when working with LeRobot datasets include version incompatibilities and memory issues, while best practices involve using version 2.1, understanding feature definitions, and ensuring data consistency.
1. **Hugging Face Hub:**
* LeRobot tools often use the `main` branch on the Hub, but some datasets have their latest data on the `v2.1` branch. Make sure the training script references your correct dataset branch.
* You'll need a Hugging Face token with write access to upload or change datasets on the Hub.
2. **Local Cache:** Datasets from the Hub usually download to `~/.cache/huggingface/lerobot`. You can change this with the `root` argument when loading. Cache can lead to issue: sometimes, if you change a dataset on the Hub, your local cache might not update automatically. If this is the case, **delete the local cache folder** for that dataset to force a fresh download.
3. **Version Choice:** **Strongly prefer `v2.1`**. It uses `episodes_stats.jsonl` (per-episode stats), making it easier to manage and modify datasets (delete, merge, split, shuffle). `v2.0` (with a single `stats.json`) is harder to keep correct if you change the dataset.
4. **`delta_timestamps` and History:** This is great for temporal context but be aware that asking for a long history (many previous frames) means loading more data for each sample, which uses more memory and can be slower.
5. **Feature Naming:** Use the dot-notation like `observation.images.camera_name` or `observation.state`. This is what LeRobot expects.
6. **Data Consistency:**
* Try to keep feature shapes (like the number of elements in `observation.state` or image sizes) the same, at least within an episode, and ideally across the whole dataset. If they vary, your code will need to handle it.
* `fps` should be consistent. If it varies, `delta_timestamps` might not give you the time intervals you expect.
7. **Video Encoding:** Videos are usually MP4, and only the **avc1** codec is visible in the LeRobot dataset viewer. LeRobot uses torchvision to decode video. Details like codec are listed in `info.json`.
8. **Generating Statistics:** If you make your own dataset, make sure the stats (`stats.json` or `episodes_stats.jsonl`) are correct. They are important for normalizing data during training. The `phosphobot` code has tools for this.
9. **`episode_data_index`:** The `LeRobotDataset` calculates this automatically when loaded. It helps quickly map global frame numbers to episode-specific frames, especially with `delta_timestamps`.
10. **Memory for Videos frames:** Loading many high-resolution videos (from `delta_timestamps`) can use a lot of memory. Choose video sizes that fit your needs and hardware. If you run into "Cuda out of memory" errors, lower the resolution of the videos.
11. **Action Definition:** Know exactly what `action` means in your dataset (e.g., target joint positions, joint velocities?). This is vital for training a policy.
12. **Adding Custom Data:** You can add your own observation or action types. Just make sure they can be turned into tensors and describe them in `info.json`.
## LeRobot Dataset Versions
LeRobot datasets have different versions (v1, v2, v2.1), with `v2.1` being the recommended version for most use cases. The version is specified in the `info.json` file under the `codebase_version` field.
### What are the Differences Between LeRobot v2.0 and v2.1 Dataset Versions?
The main differences between LeRobot `v2.0` and `v2.1` dataset versions lie in how they store statistics and support dataset modifications, with `v2.1` being the recommended, more flexible version.
* **`lerobot_v2.0` (Older):**
* Uses one file, `meta/stats.json`, to store statistics (like mean, min, max) for the entire dataset.
* Modifying the dataset (like deleting an episode) is not well-supported with this version because updating these global statistics is tricky.
* **`lerobot_v2.1` (Recommended):**
* Uses `meta/episodes_stats.jsonl` instead of `stats.json`.
* This file stores statistics *for each episode separately*. Each line in the file is for one episode and its stats.
* This makes it much easier to manage the dataset, like deleting, merging, or splitting episodes, because stats can be updated or recalculated more easily for the affected parts.
* The `info.json` file will clearly state `codebase_version: "v2.1"`.
* **Recommendation:** Always try to use or convert datasets to `v2.1` for the best experience and support.
Tooling around LeRobot, like the `phosphobot` code, usually handles both versions, but `v2.1` gives you more power.
### What's New in the Upcoming LeRobot v3.0 Dataset Format?
The upcoming LeRobot v3.0 dataset format introduces significant changes aimed at improving scalability, data organization, and efficiency, particularly for handling very large datasets. The primary rationale appears to be a move towards a more sharded and consolidated data structure, where episode data, videos, and metadata are grouped into larger, chunked files rather than per-episode files. This is evident from the conversion script `convert_dataset_v21_to_v30.py` (from [Pull Request #969 on GitHub](https://github.com/huggingface/lerobot/pull/969)), which details the transformation from v2.1 to v3.0.
**Key Changes from v2.1 to v3.0:**
1. **Consolidation of Episode Data and Videos:**
* **Old (v2.1):** Each episode had its own Parquet file (`data/chunk-000/episode_000000.parquet`) and its own video file per camera (`videos/chunk-000/CAMERA/episode_000000.mp4`).
* **New (v3.0):** Multiple episodes' data will be concatenated into larger Parquet files (e.g., `data/chunk-000/file_000.parquet`). Similarly, videos from multiple episodes for a specific camera will be concatenated into larger video files (e.g., `videos/chunk-000/CAMERA/file_000.mp4`).
* The target size for these concatenated files seems to be configurable (e.g., `DEFAULT_DATA_FILE_SIZE_IN_MB`, `DEFAULT_VIDEO_FILE_SIZE_IN_MB`).
2. **Restructuring of Metadata Files:**
* **`episodes.jsonl` (Old v2.1):** A single JSON Lines file where each line detailed an episode (`episode_index`, `tasks`, `length`).
* **`meta/episodes/chunk-000/episodes_000.parquet` (New v3.0):** This information, along with new indexing details (pointing to the specific chunk and file for data and video, and `from/to_timestamp` for video segments), will now be stored in sharded Parquet files. The schema will include columns like `episode_index`, `video_chunk_index`, `video_file_index`, `data_chunk_index`, `data_file_index`, `tasks`, `length`, `dataset_from_index`, `dataset_to_index`, and video timestamp information.
* **`tasks.jsonl` (Old v2.1):** A single JSON Lines file mapping `task_index` to `task` description.
* **`meta/tasks/chunk-000/file_000.parquet` (New v3.0):** Task information will also be stored in sharded Parquet files (e.g., columns `task_index`, `task`).
* **`episodes_stats.jsonl` (Old v2.1):** Per-episode statistics in a JSON Lines file.
* **`meta/episodes_stats/chunk-000/file_000.parquet` (New v3.0):** Per-episode statistics will also move to sharded Parquet files, likely containing `episode_index` and flattened statistics (mean, std, min, max for various features).
3. **Updates to `meta/info.json`:**
* `codebase_version` will be updated to `"v3.0"`.
* Fields like `total_chunks` and `total_videos` (which were aggregates) might be removed or rethought, as chunking is now more explicit.
* New fields like `data_files_size_in_mb` and `video_files_size_in_mb` will specify the target sizes for the concatenated files.
* `data_path` and `video_path` will reflect the new `file_xxx.parquet/mp4` naming scheme.
* FPS information will be added to features in `info["features"]` if not already present in video-specific info.
4. **Removal of `stats.json`:** The script explicitly mentions removing the deprecated `stats.json` (which was already superseded by `episodes_stats.jsonl` in v2.1). Global aggregated stats will now be computed from the sharded per-episode stats.
**Rationale Behind v3.0 Changes:**
* **Scalability for Large Datasets:** The most significant driver appears to be improved handling of massive datasets (like DROID, mentioned in the PR diffs).
* Having fewer, larger files reduces filesystem overhead (e.g., inode limits) and can be more efficient for I/O operations, especially in distributed computing environments (like SLURM, also mentioned).
* Concatenating data into larger chunks makes sharding and parallel processing more manageable.
* **Efficiency:** Reading fewer, larger files can sometimes be faster than reading many small files.
* **Standardization with Parquet for Metadata:** Moving more metadata (episodes, tasks, episode\_stats) into Parquet files brings consistency and allows leveraging the benefits of the Parquet format (columnar storage, compression, schema evolution) for metadata as well.
* **Hub Management:** The script includes steps for updating tags and cleaning up old file structures on the Hugging Face Hub, indicating a more robust versioning and deployment strategy.
In essence, LeRobot v3.0 is evolving to become a more robust and scalable format, better suited for the increasingly large and complex datasets used in robotics research. While it introduces changes to the underlying file structure and metadata organization, the goal is to enhance performance and manageability without sacrificing the core ease of use provided by the `LeRobotDataset` abstraction.
# What’s next?
Next, record your own dataset and use it to train a policy!
## What are the columns in a LeRobot Dataset?
The core data in a LeRobot dataset consists of Parquet files containing trajectory information (like robot states and actions) and MP4 video files for camera observations.
1. **Parquet Files (`data/chunk-000/episode_xxxxxx.parquet`):**
* These files store the step-by-step data for each robot episode.
* When loaded, this becomes part of a Hugging Face `Dataset` object (often named `hf_dataset` in the `LeRobotDataset` object).
* **Common features you'll find inside:**
* `observation.state` (list of numbers): Robot's state, like joint angles or end-effector position.
* `action` (list of numbers): The action taken, like target joint angles.
* `timestamp` (number): Time in seconds from the start of the episode.
* `episode_index` (integer): ID for the episode.
* `frame_index` (integer): ID for the frame *within* its episode (starts at 0 for each episode).
* `index` (integer): A unique ID for the frame across the *entire* dataset.
* `next.done` (true/false, optional): True if this is the last frame of an episode.
* `task_index` (integer, optional): Links to a task in `tasks.jsonl`.
2. **Video Files (`videos/chunk-000/camera_key/episode_xxxxxx.mp4`):**
* Camera images are stored as MP4 videos to save space.
* Each MP4 file is usually one camera's view for one full episode.
* The `hf_dataset` (when loaded) will point to these video frames using a `VideoFrame` object for each camera observation (e.g., `observation.images.cam_high`):
* `VideoFrame = {'path': 'path/to/video.mp4', 'timestamp': time_in_video_seconds}`.
* The system uses this to grab the correct image from the video.
## What Information is Stored in the LeRobot Metadata Files?
LeRobot metadata files, found in the `meta/` directory, store crucial information about the dataset's structure, content, statistics, and individual episodes.
1. **`info.json`:** Contains general information about the whole dataset.
* `codebase_version` (text): "v2.0" or "v2.1". Tells you how to read other metadata, especially stats.
* `robot_type` (text): What kind of robot was used.
* `fps` (number): The intended frames-per-second of the data.
* `total_episodes` (integer): How many episodes are in the dataset.
* `total_frames` (integer): Total number of frames across all episodes.
* `total_tasks` (integer): Number of different tasks defined.
* `total_videos` (integer): Total number of video files.
* `splits` (dictionary): Info on data splits, like `{"train": "0:N"}` means episodes 0 to N-1 are for training.
* `features` (dictionary): Very important! This describes every piece of data: its type, shape, and sometimes names.
* Example for `observation.state`: `{"dtype": "float32", "shape": [7], "names": ["joint1", ...]}`
* Example for a camera `observation.images.main`:
```json
"observation.images.main": {
"dtype": "video",
"shape": [224, 224, 3], // height, width, channels
"names": ["height", "width", "channel"],
"info": { // Details about the video itself
"video.fps": 10,
"video.codec": "mp4v",
// ... other video details
}
}
```
* `camera_keys` (list of text, implied by `features`): Names for camera data, like `observation.images.main`.
2. **`episodes.jsonl`:** A file where each line is a JSON object describing one episode.
* `episode_index` (integer): The episode's ID.
* `tasks` (list of text): List of task descriptions (e.g., "pick up the red block") for this episode.
* `length` (integer): Number of frames in this episode.
3. **`tasks.jsonl`:** A file where each line is a JSON object linking task IDs to descriptions.
* `task_index` (integer): The ID used in the Parquet files.
* `task` (text): The actual task description.
4. **`episodes_stats.jsonl` (for v2.1):** Each line is a JSON object with statistics for one episode.
* `episode_index` (integer): The episode ID.
* `stats` (dictionary): Contains stats (`{'max': ..., 'min': ..., 'mean': ..., 'std': ...}`) for each feature (like `observation.state`, `action`) *within that specific episode*.
* For images, stats (mean, std) are usually per-channel.
5. **`stats.json` (for v2.0):** A single JSON file with statistics for the entire dataset combined.
* Similar structure to the `stats` object in `episodes_stats.jsonl`, but for all data.
## What are the Key Concepts and Important Fields in a LeRobot Dataset?
Key concepts in a LeRobot dataset include different types of indices (episode, frame, global), timestamps, and specific fields like `action` and `observation.state` which have precise meanings.
* **Indices:**
* `episode_index`: Identifies an episode (e.g., 0, 1, 2...).
* `frame_index`: Identifies a frame *within* an episode (e.g., 0, 1, ... up to `length-1`). It resets for each new episode.
* `index`: A global, unique ID for a frame across the *entire dataset*. For example, if episode 0 has 100 frames (index 0-99), and episode 1 has 50 frames, episode 1's frames would have global indices 100-149.
* **Timestamps:**
* `timestamp` (in Parquet files): Time in seconds from the start of the current episode for that frame.
* `VideoFrame.timestamp` (for video features): Time in seconds *within the MP4 video file* where that specific frame is.
* `fps` (in `info.json`): The intended frame rate. Ideally, `timestamp` should be close to `frame_index / fps`.
* **`action` field:** In robot learning, the `action` recorded at frame `t` is usually the action that *caused* the observation at frame `t+1`. For instance, if actions are target joint positions, `action[t]` might be the joint positions observed at `observation.state[t+1]`.
* **`observation.state` vs. `joints_position`:** The Python code example you saw might use `joints_position` for joint angles and `state` for something else (like end-effector pose). LeRobot examples often use `observation.state` more broadly for the robot's proprioceptive data (like joint positions). Always check the dataset's `info.json -> features` to know exactly what `observation.state` means for that specific dataset.
## What are Common Pitfalls and Best Practices for Working with LeRobot Datasets?
Common pitfalls when working with LeRobot datasets include version incompatibilities and memory issues, while best practices involve using version 2.1, understanding feature definitions, and ensuring data consistency.
1. **Hugging Face Hub:**
* LeRobot tools often use the `main` branch on the Hub, but some datasets have their latest data on the `v2.1` branch. Make sure the training script references your correct dataset branch.
* You'll need a Hugging Face token with write access to upload or change datasets on the Hub.
2. **Local Cache:** Datasets from the Hub usually download to `~/.cache/huggingface/lerobot`. You can change this with the `root` argument when loading. Cache can lead to issue: sometimes, if you change a dataset on the Hub, your local cache might not update automatically. If this is the case, **delete the local cache folder** for that dataset to force a fresh download.
3. **Version Choice:** **Strongly prefer `v2.1`**. It uses `episodes_stats.jsonl` (per-episode stats), making it easier to manage and modify datasets (delete, merge, split, shuffle). `v2.0` (with a single `stats.json`) is harder to keep correct if you change the dataset.
4. **`delta_timestamps` and History:** This is great for temporal context but be aware that asking for a long history (many previous frames) means loading more data for each sample, which uses more memory and can be slower.
5. **Feature Naming:** Use the dot-notation like `observation.images.camera_name` or `observation.state`. This is what LeRobot expects.
6. **Data Consistency:**
* Try to keep feature shapes (like the number of elements in `observation.state` or image sizes) the same, at least within an episode, and ideally across the whole dataset. If they vary, your code will need to handle it.
* `fps` should be consistent. If it varies, `delta_timestamps` might not give you the time intervals you expect.
7. **Video Encoding:** Videos are usually MP4, and only the **avc1** codec is visible in the LeRobot dataset viewer. LeRobot uses torchvision to decode video. Details like codec are listed in `info.json`.
8. **Generating Statistics:** If you make your own dataset, make sure the stats (`stats.json` or `episodes_stats.jsonl`) are correct. They are important for normalizing data during training. The `phosphobot` code has tools for this.
9. **`episode_data_index`:** The `LeRobotDataset` calculates this automatically when loaded. It helps quickly map global frame numbers to episode-specific frames, especially with `delta_timestamps`.
10. **Memory for Videos frames:** Loading many high-resolution videos (from `delta_timestamps`) can use a lot of memory. Choose video sizes that fit your needs and hardware. If you run into "Cuda out of memory" errors, lower the resolution of the videos.
11. **Action Definition:** Know exactly what `action` means in your dataset (e.g., target joint positions, joint velocities?). This is vital for training a policy.
12. **Adding Custom Data:** You can add your own observation or action types. Just make sure they can be turned into tensors and describe them in `info.json`.
## LeRobot Dataset Versions
LeRobot datasets have different versions (v1, v2, v2.1), with `v2.1` being the recommended version for most use cases. The version is specified in the `info.json` file under the `codebase_version` field.
### What are the Differences Between LeRobot v2.0 and v2.1 Dataset Versions?
The main differences between LeRobot `v2.0` and `v2.1` dataset versions lie in how they store statistics and support dataset modifications, with `v2.1` being the recommended, more flexible version.
* **`lerobot_v2.0` (Older):**
* Uses one file, `meta/stats.json`, to store statistics (like mean, min, max) for the entire dataset.
* Modifying the dataset (like deleting an episode) is not well-supported with this version because updating these global statistics is tricky.
* **`lerobot_v2.1` (Recommended):**
* Uses `meta/episodes_stats.jsonl` instead of `stats.json`.
* This file stores statistics *for each episode separately*. Each line in the file is for one episode and its stats.
* This makes it much easier to manage the dataset, like deleting, merging, or splitting episodes, because stats can be updated or recalculated more easily for the affected parts.
* The `info.json` file will clearly state `codebase_version: "v2.1"`.
* **Recommendation:** Always try to use or convert datasets to `v2.1` for the best experience and support.
Tooling around LeRobot, like the `phosphobot` code, usually handles both versions, but `v2.1` gives you more power.
### What's New in the Upcoming LeRobot v3.0 Dataset Format?
The upcoming LeRobot v3.0 dataset format introduces significant changes aimed at improving scalability, data organization, and efficiency, particularly for handling very large datasets. The primary rationale appears to be a move towards a more sharded and consolidated data structure, where episode data, videos, and metadata are grouped into larger, chunked files rather than per-episode files. This is evident from the conversion script `convert_dataset_v21_to_v30.py` (from [Pull Request #969 on GitHub](https://github.com/huggingface/lerobot/pull/969)), which details the transformation from v2.1 to v3.0.
**Key Changes from v2.1 to v3.0:**
1. **Consolidation of Episode Data and Videos:**
* **Old (v2.1):** Each episode had its own Parquet file (`data/chunk-000/episode_000000.parquet`) and its own video file per camera (`videos/chunk-000/CAMERA/episode_000000.mp4`).
* **New (v3.0):** Multiple episodes' data will be concatenated into larger Parquet files (e.g., `data/chunk-000/file_000.parquet`). Similarly, videos from multiple episodes for a specific camera will be concatenated into larger video files (e.g., `videos/chunk-000/CAMERA/file_000.mp4`).
* The target size for these concatenated files seems to be configurable (e.g., `DEFAULT_DATA_FILE_SIZE_IN_MB`, `DEFAULT_VIDEO_FILE_SIZE_IN_MB`).
2. **Restructuring of Metadata Files:**
* **`episodes.jsonl` (Old v2.1):** A single JSON Lines file where each line detailed an episode (`episode_index`, `tasks`, `length`).
* **`meta/episodes/chunk-000/episodes_000.parquet` (New v3.0):** This information, along with new indexing details (pointing to the specific chunk and file for data and video, and `from/to_timestamp` for video segments), will now be stored in sharded Parquet files. The schema will include columns like `episode_index`, `video_chunk_index`, `video_file_index`, `data_chunk_index`, `data_file_index`, `tasks`, `length`, `dataset_from_index`, `dataset_to_index`, and video timestamp information.
* **`tasks.jsonl` (Old v2.1):** A single JSON Lines file mapping `task_index` to `task` description.
* **`meta/tasks/chunk-000/file_000.parquet` (New v3.0):** Task information will also be stored in sharded Parquet files (e.g., columns `task_index`, `task`).
* **`episodes_stats.jsonl` (Old v2.1):** Per-episode statistics in a JSON Lines file.
* **`meta/episodes_stats/chunk-000/file_000.parquet` (New v3.0):** Per-episode statistics will also move to sharded Parquet files, likely containing `episode_index` and flattened statistics (mean, std, min, max for various features).
3. **Updates to `meta/info.json`:**
* `codebase_version` will be updated to `"v3.0"`.
* Fields like `total_chunks` and `total_videos` (which were aggregates) might be removed or rethought, as chunking is now more explicit.
* New fields like `data_files_size_in_mb` and `video_files_size_in_mb` will specify the target sizes for the concatenated files.
* `data_path` and `video_path` will reflect the new `file_xxx.parquet/mp4` naming scheme.
* FPS information will be added to features in `info["features"]` if not already present in video-specific info.
4. **Removal of `stats.json`:** The script explicitly mentions removing the deprecated `stats.json` (which was already superseded by `episodes_stats.jsonl` in v2.1). Global aggregated stats will now be computed from the sharded per-episode stats.
**Rationale Behind v3.0 Changes:**
* **Scalability for Large Datasets:** The most significant driver appears to be improved handling of massive datasets (like DROID, mentioned in the PR diffs).
* Having fewer, larger files reduces filesystem overhead (e.g., inode limits) and can be more efficient for I/O operations, especially in distributed computing environments (like SLURM, also mentioned).
* Concatenating data into larger chunks makes sharding and parallel processing more manageable.
* **Efficiency:** Reading fewer, larger files can sometimes be faster than reading many small files.
* **Standardization with Parquet for Metadata:** Moving more metadata (episodes, tasks, episode\_stats) into Parquet files brings consistency and allows leveraging the benefits of the Parquet format (columnar storage, compression, schema evolution) for metadata as well.
* **Hub Management:** The script includes steps for updating tags and cleaning up old file structures on the Hugging Face Hub, indicating a more robust versioning and deployment strategy.
In essence, LeRobot v3.0 is evolving to become a more robust and scalable format, better suited for the increasingly large and complex datasets used in robotics research. While it introduces changes to the underlying file structure and metadata organization, the goal is to enhance performance and manageability without sacrificing the core ease of use provided by the `LeRobotDataset` abstraction.
# What’s next?
Next, record your own dataset and use it to train a policy!
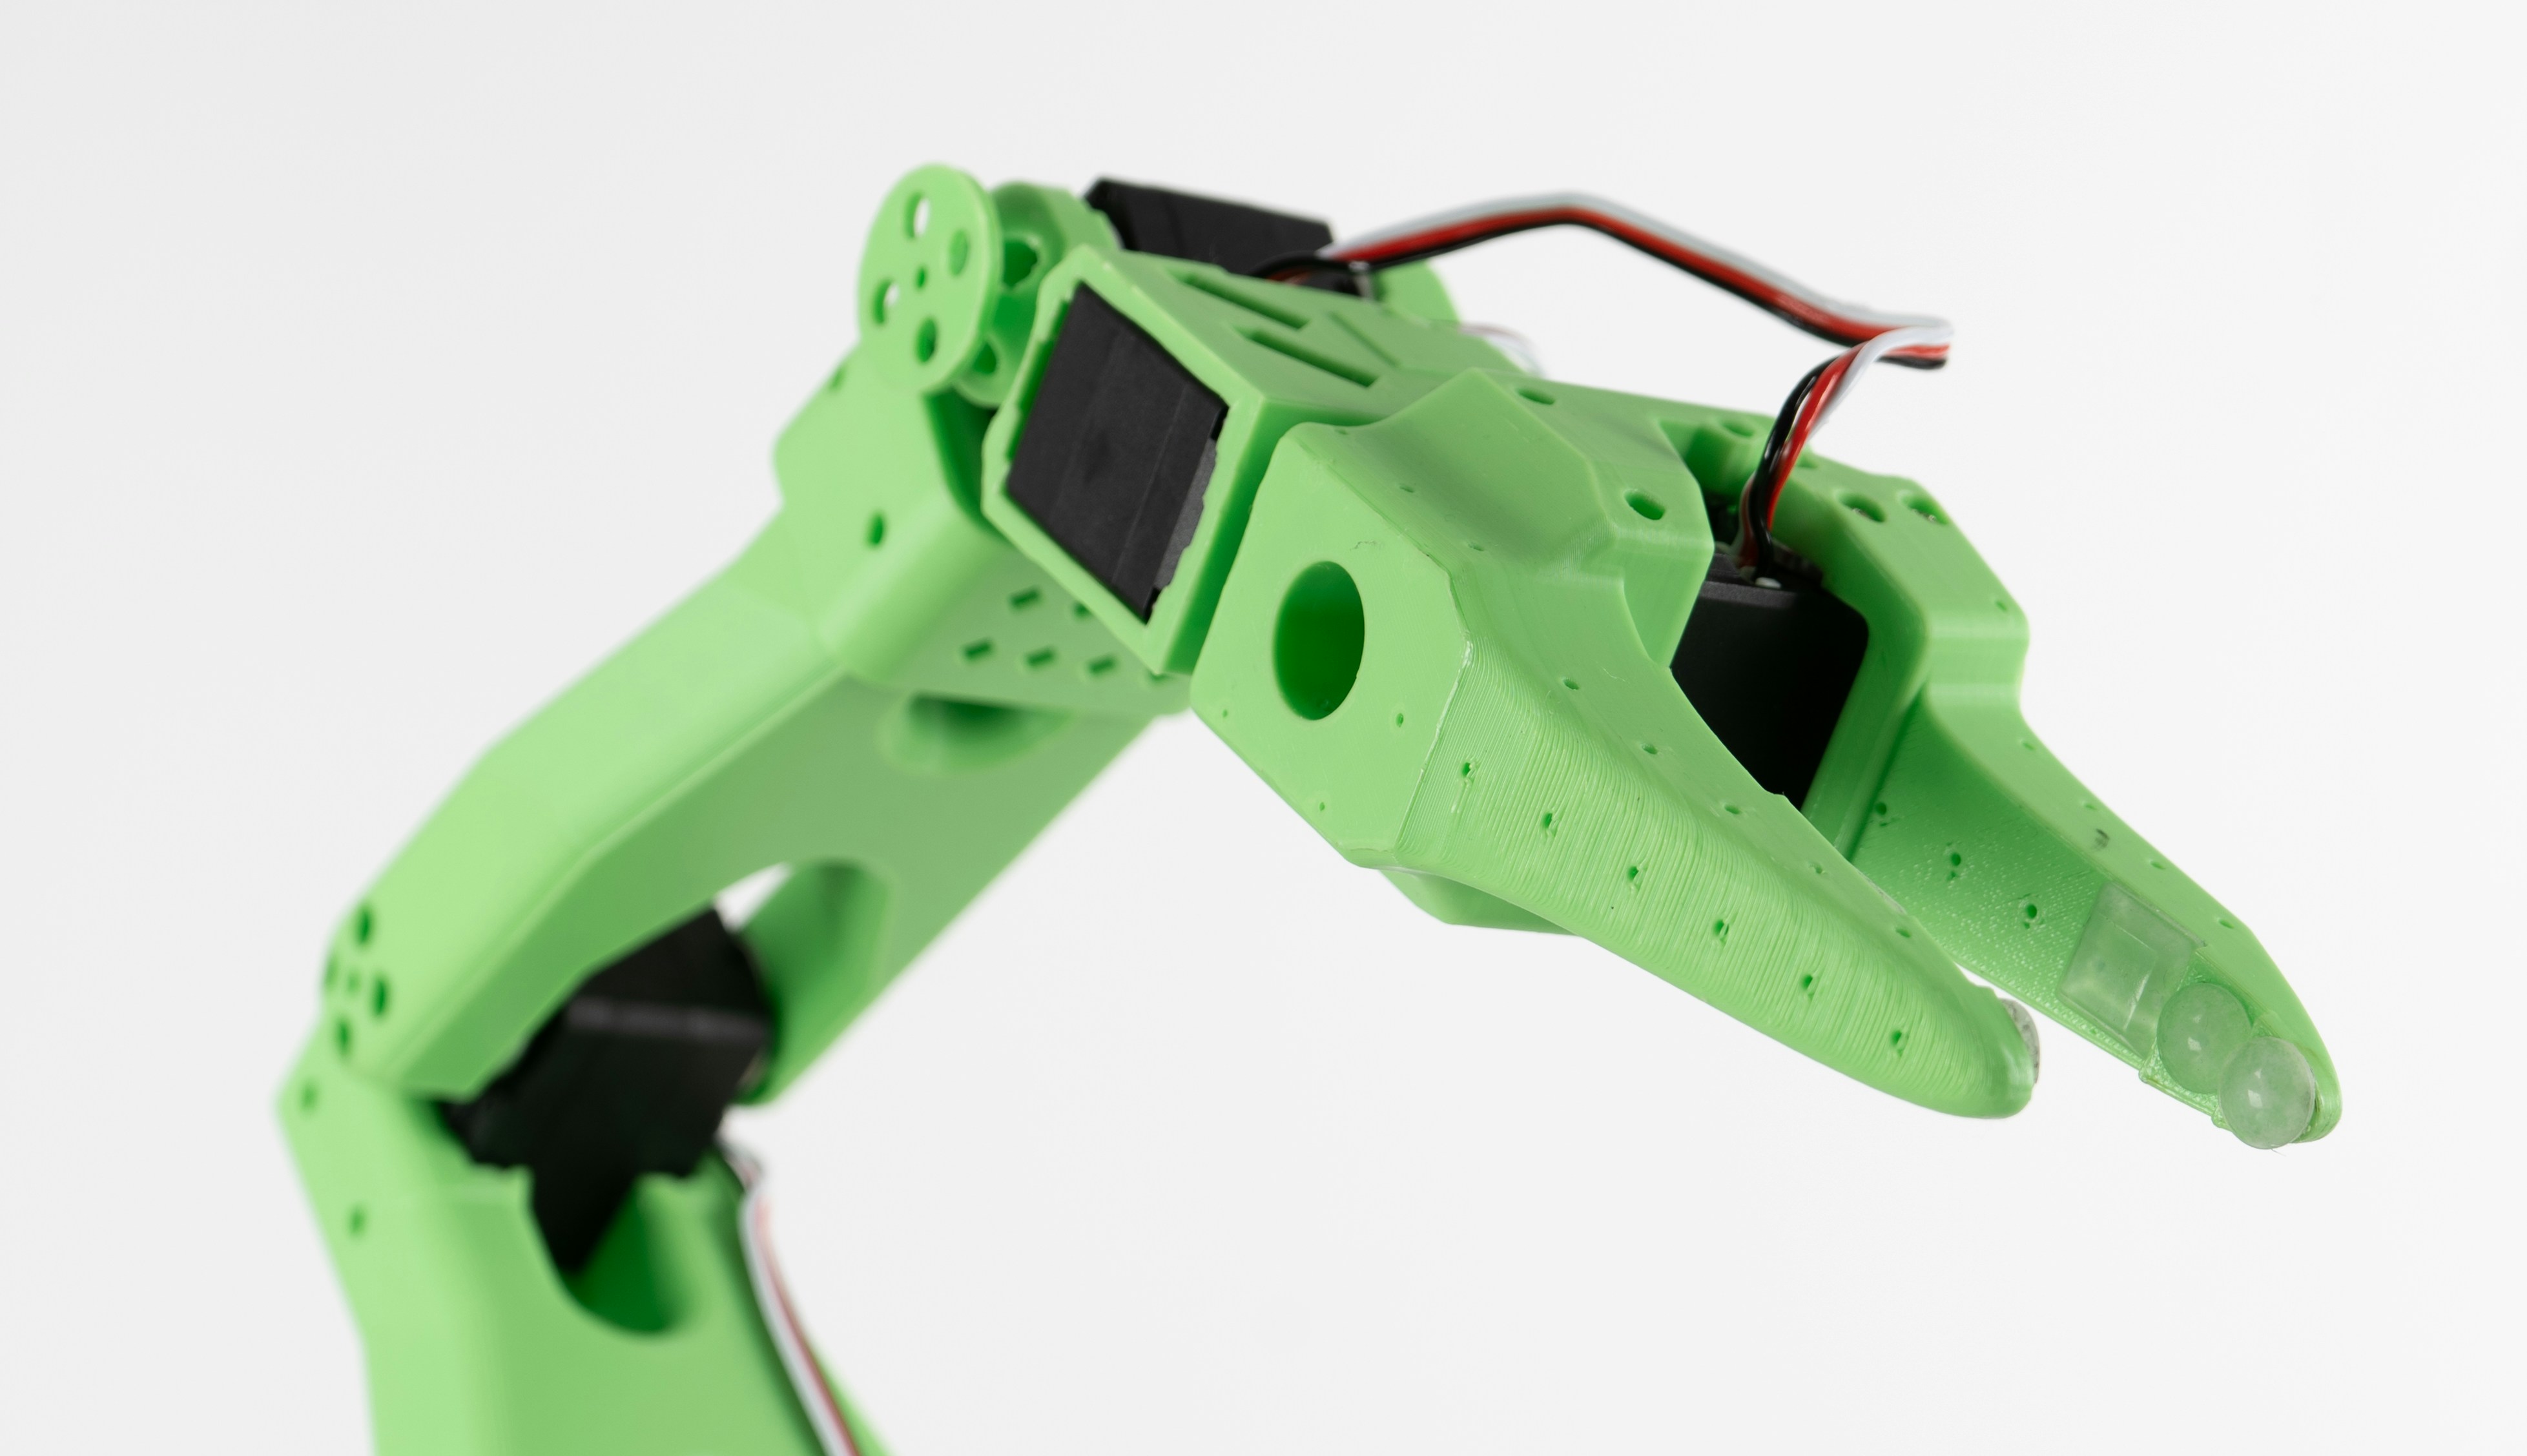 * **Joints/Actuators**: The motors of the robot that allow the links to move relative to each other.
* **Links**: The rigid plastic parts of the robot that are connected by joints.
* **End effector**: The last part of the robot that interacts with the environment (e.g., a gripper).
* **Sensors**: The robot's eyes and ears. They allow the robot to perceive the world around it.
* **Controller**: The robot's brain. It processes the sensor data and sends commands to the actuators.
The main challenge is coordinating all these components to perform specific tasks.
How do you program a robot to do something? How can it learn to do something new? How can it adapt to changes in its environment? These are all questions robotics researchers are trying to answer.
The most basic way to control a robot is to send it a sequence of commands. For example, you can tell the robot to move its arm to a specific position. This is called **kinematics**.
* **Joints/Actuators**: The motors of the robot that allow the links to move relative to each other.
* **Links**: The rigid plastic parts of the robot that are connected by joints.
* **End effector**: The last part of the robot that interacts with the environment (e.g., a gripper).
* **Sensors**: The robot's eyes and ears. They allow the robot to perceive the world around it.
* **Controller**: The robot's brain. It processes the sensor data and sends commands to the actuators.
The main challenge is coordinating all these components to perform specific tasks.
How do you program a robot to do something? How can it learn to do something new? How can it adapt to changes in its environment? These are all questions robotics researchers are trying to answer.
The most basic way to control a robot is to send it a sequence of commands. For example, you can tell the robot to move its arm to a specific position. This is called **kinematics**.
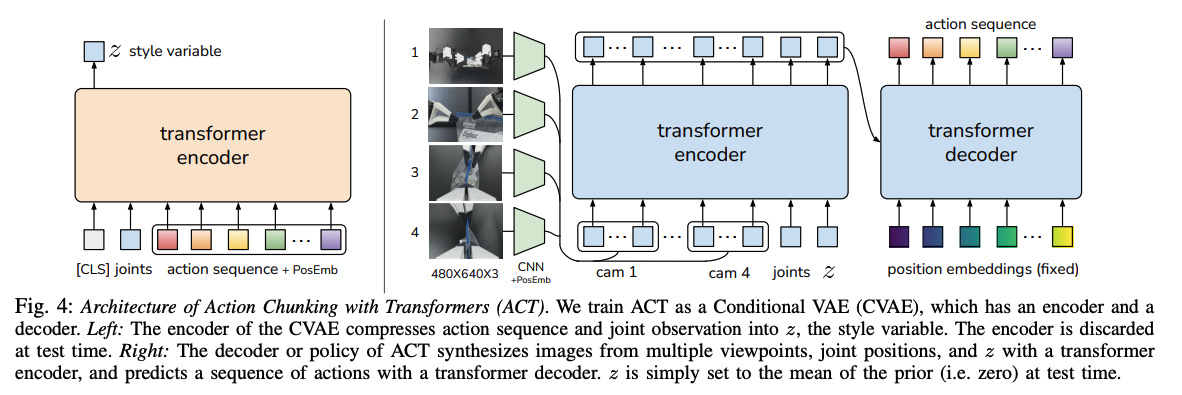 **How it works**:
* You record episodes of your robot performing a task. (e.g., picking up a lego brick).
* The model learns from this data and enacts a policy based on it. (e.g., it will pick up the lego brick no matter where it is placed).
**Why use ACT?**
* Typically requires \~30 episodes for training
* Can run on an RTX 3000 series GPU in less than 30 minutes.
* This is a great starting point to get your hands dirty with AI in robotics.
* You don't need prompts to train the model.
**How it works**:
* You record episodes of your robot performing a task. (e.g., picking up a lego brick).
* The model learns from this data and enacts a policy based on it. (e.g., it will pick up the lego brick no matter where it is placed).
**Why use ACT?**
* Typically requires \~30 episodes for training
* Can run on an RTX 3000 series GPU in less than 30 minutes.
* This is a great starting point to get your hands dirty with AI in robotics.
* You don't need prompts to train the model.
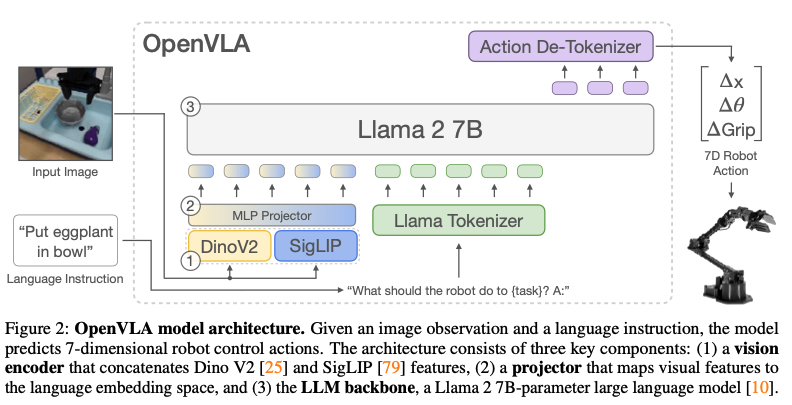 **Key differences with ACT:**
* Training such a model requires more data and computational power.
* Typically needs \~100 episodes for training
* Training takes a few hours on an NVIDIA A100 GPU.
For more details, check out [Nvidia's blog post](https://www.jetson-ai-lab.com/openvla.html) on OpenVLA and the [arxiV paper](https://arxiv.org/pdf/2406.09246).
### Diffusion Transformers
**Diffusion transformers** are a family of models based on the **[diffusion process](https://en.wikipedia.org/wiki/Diffusion_model)**. Instead of deterministically mapping states to actions, the model **hallucinates** (generates) the **most probable next action** based on **patterns learned from data**. You can also see this as **denoizing** actions. This mechanism is common to many image generation models (e.g., DALL-E, Stable Diffusion, Midjourney...)
**Key differences with ACT:**
* Training such a model requires more data and computational power.
* Typically needs \~100 episodes for training
* Training takes a few hours on an NVIDIA A100 GPU.
For more details, check out [Nvidia's blog post](https://www.jetson-ai-lab.com/openvla.html) on OpenVLA and the [arxiV paper](https://arxiv.org/pdf/2406.09246).
### Diffusion Transformers
**Diffusion transformers** are a family of models based on the **[diffusion process](https://en.wikipedia.org/wiki/Diffusion_model)**. Instead of deterministically mapping states to actions, the model **hallucinates** (generates) the **most probable next action** based on **patterns learned from data**. You can also see this as **denoizing** actions. This mechanism is common to many image generation models (e.g., DALL-E, Stable Diffusion, Midjourney...)
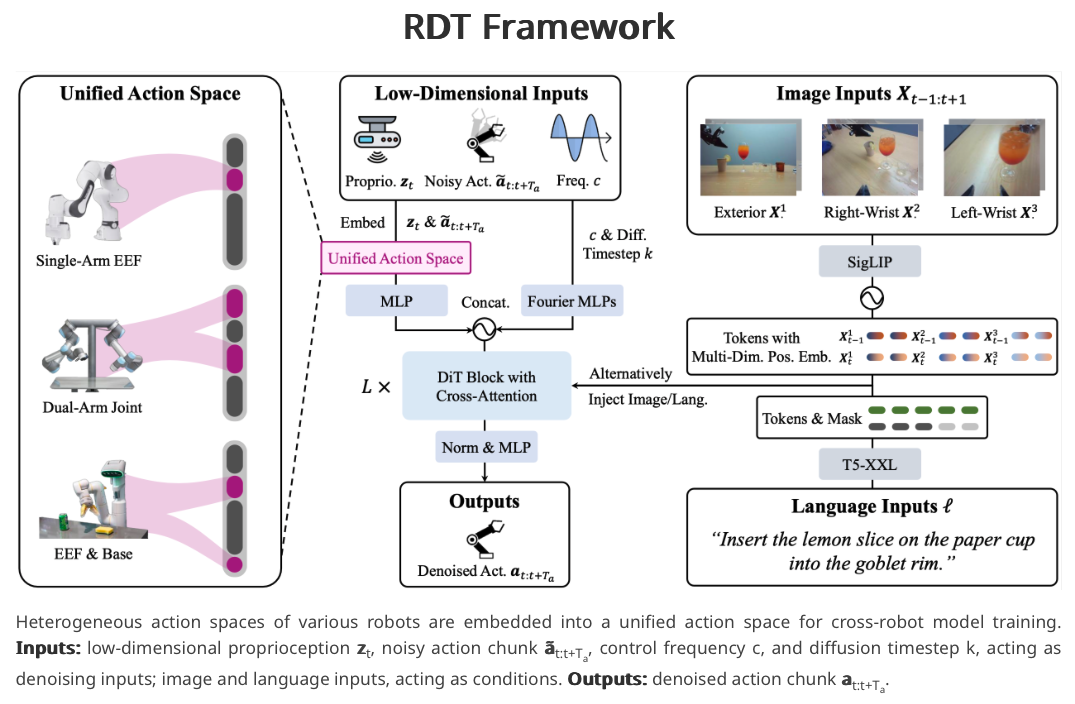 **Why consider Diffusion Transformers?**
* The currently **#1 model in robotics** on Hugging Face is a diffusion transformer called [RDT-1b](https://huggingface.co/robotics-diffusion-transformer/rdt-1b) (May 2024)
* Fine tuning the model on your own data is expensive but inference is fast.
## What are the latest models in AI robotics?
Here are some of the latest models that combine ideas from ACT, OpenVLA, and Diffusion Transformers.
### gr00t-n1-2B and gr00t-n1.5-3B by Nvidia
[GR00T-N1 (Generalist Robot 00 Technology)](https://github.com/NVIDIA/Isaac-GR00T) (March 2025) is NVIDIA's foundation model for robots. It's a performant models, trained on lots of data, which is ideal for fine tuning. The model weights [are available on Hugging Face](https://huggingface.co/nvidia/GR00T-N1-2B).
GR00T-N1 combines both [VLA](#openvla) for language understanding and [Diffusion transformers](#diffusion-transformers) for fine grained controls. For details, see their [paper on arxiv](https://arxiv.org/abs/2503.14734)
**Why consider Diffusion Transformers?**
* The currently **#1 model in robotics** on Hugging Face is a diffusion transformer called [RDT-1b](https://huggingface.co/robotics-diffusion-transformer/rdt-1b) (May 2024)
* Fine tuning the model on your own data is expensive but inference is fast.
## What are the latest models in AI robotics?
Here are some of the latest models that combine ideas from ACT, OpenVLA, and Diffusion Transformers.
### gr00t-n1-2B and gr00t-n1.5-3B by Nvidia
[GR00T-N1 (Generalist Robot 00 Technology)](https://github.com/NVIDIA/Isaac-GR00T) (March 2025) is NVIDIA's foundation model for robots. It's a performant models, trained on lots of data, which is ideal for fine tuning. The model weights [are available on Hugging Face](https://huggingface.co/nvidia/GR00T-N1-2B).
GR00T-N1 combines both [VLA](#openvla) for language understanding and [Diffusion transformers](#diffusion-transformers) for fine grained controls. For details, see their [paper on arxiv](https://arxiv.org/abs/2503.14734)
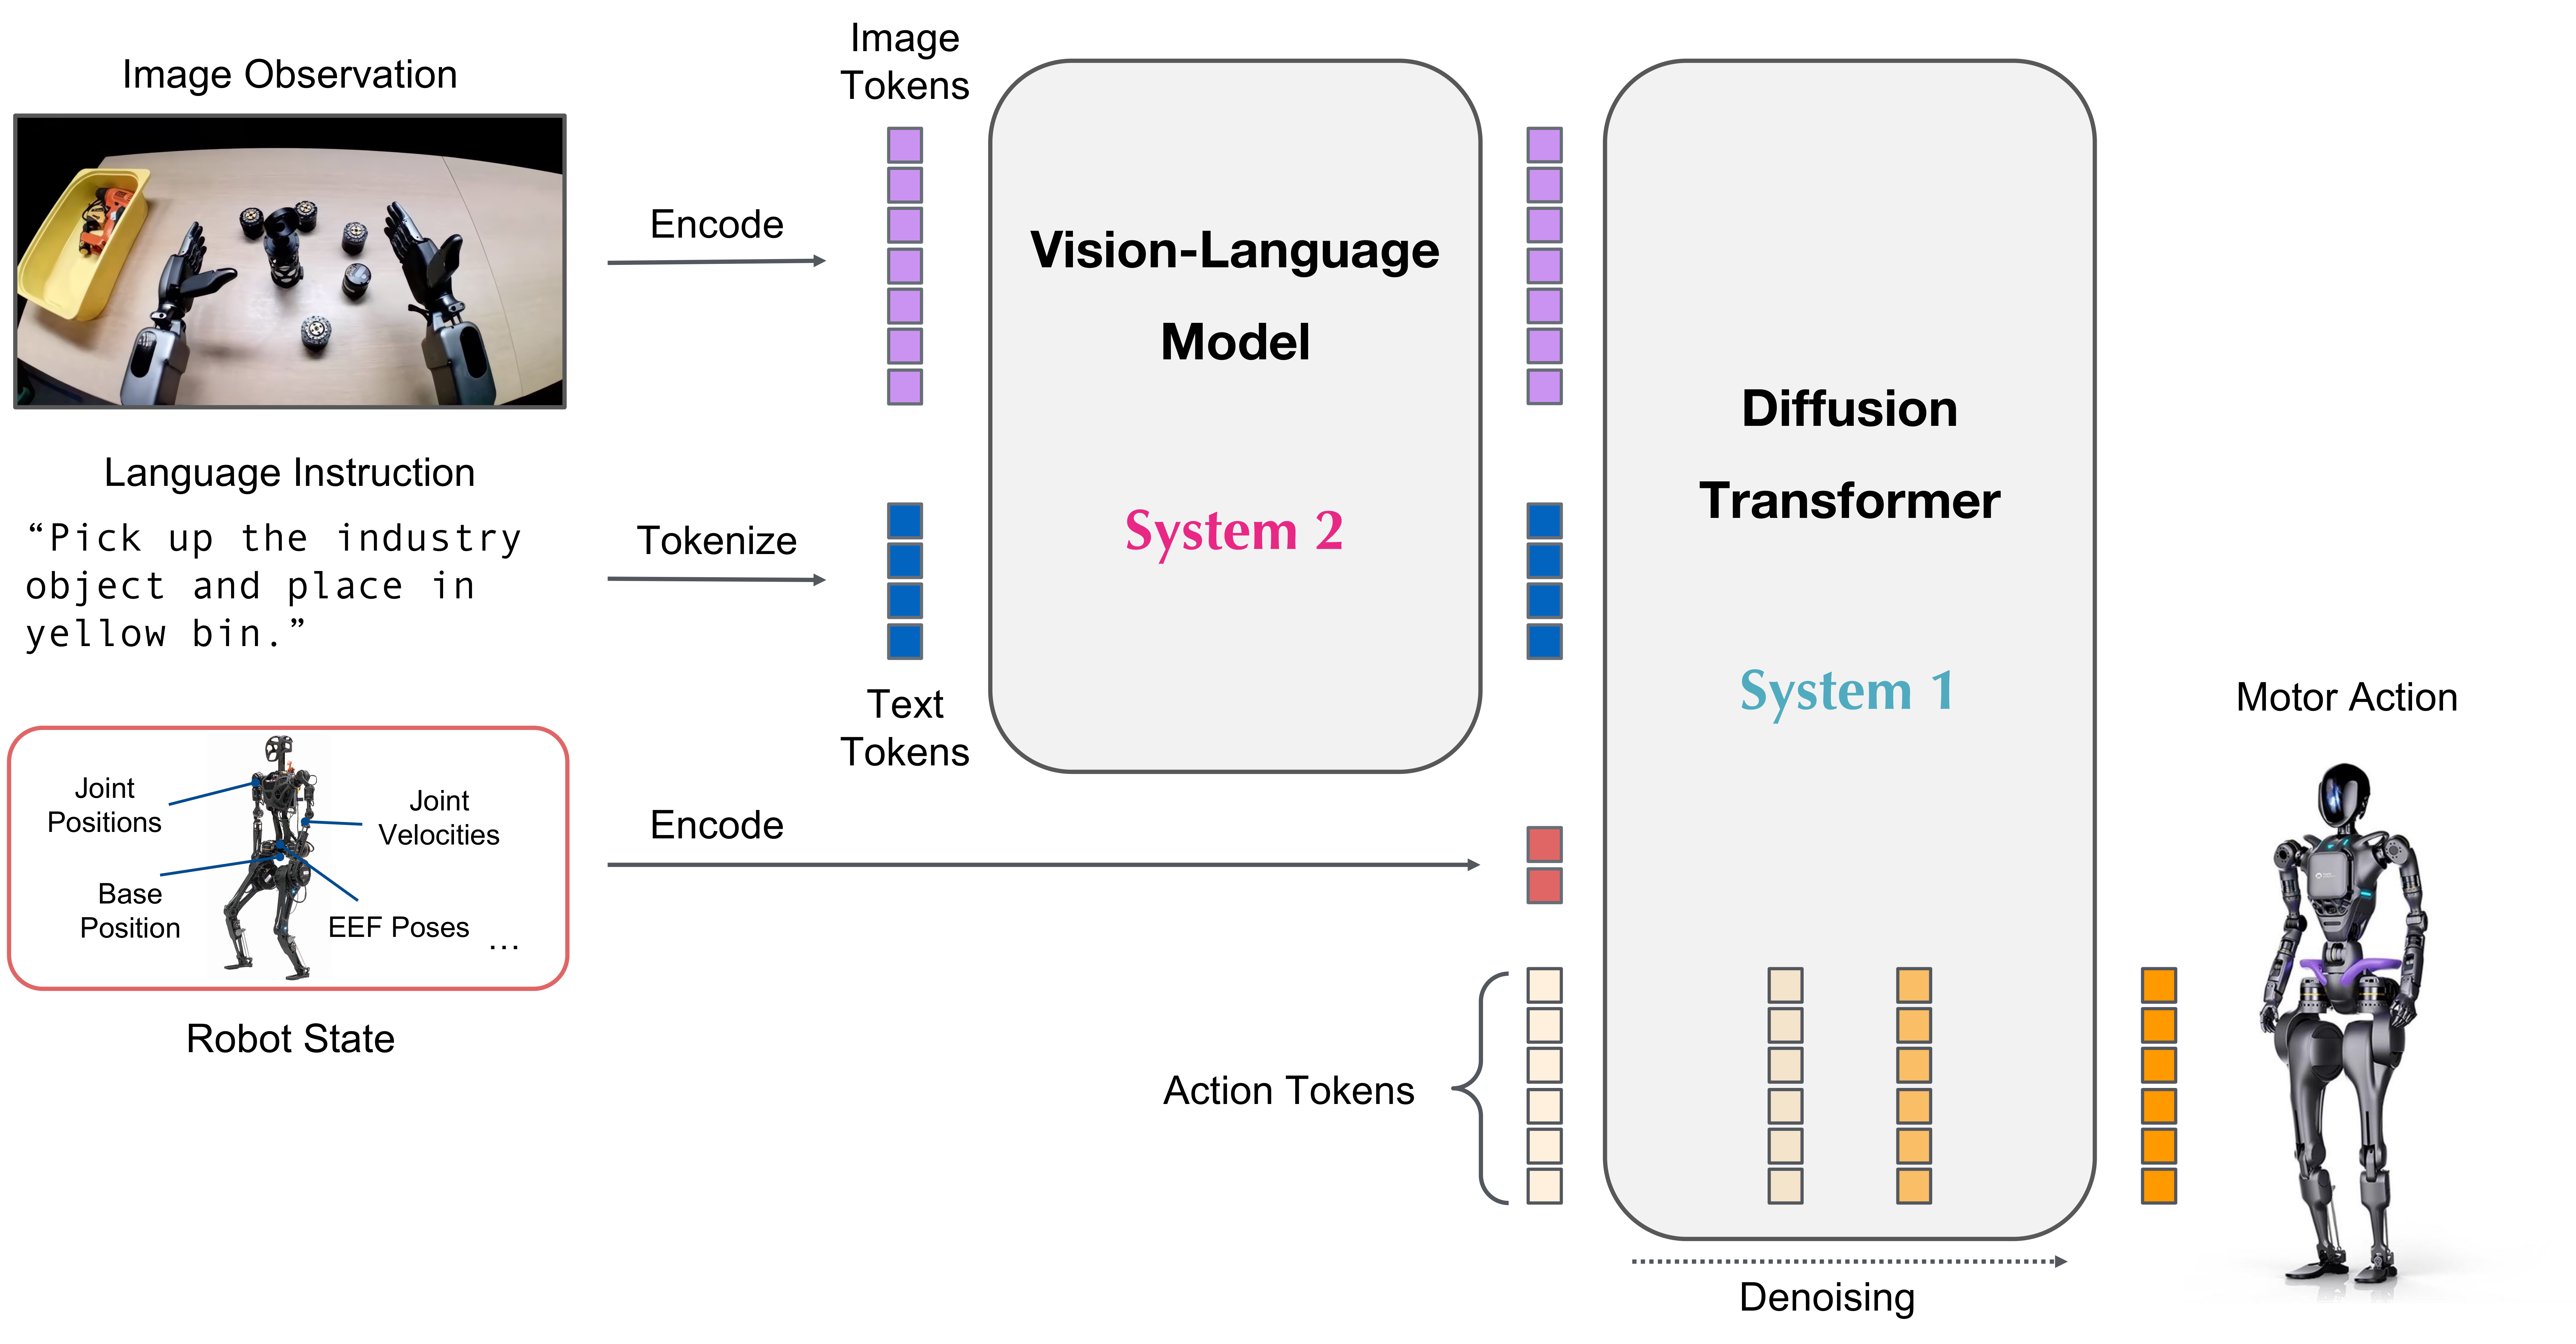 **Key features:**
* Processes natural language instructions, camera feeds, and sensor data to generate actions.
* Based on denoizing of the action space, kind of like a Diffusion transformer.
* Trained on a massive datasets of human movements, 3D environments, and AI-generated data.
**Why use GR00T-N1?**
* Typically requires \~50 episodes for training.
* Supports prompting and zero-shot learning for tasks not explicitly seen during training.
* Small model size (2B parameters) for efficient fine-tuning and fast inference on Nvidia Jetson devices.
[GR00T N1.5](https://huggingface.co/nvidia/GR00T-N1.5-3B) (June 2025) is an updated version of Nvidia's open foundation model for humanoid robots. It's also open source, but has 3B parameters instead of 2B like gr00t n1. The model weights are available on [Hugging Face](https://huggingface.co/nvidia/GR00T-N1.5-3B).
Key differences with gr00t n1.5 are:
* The VLM is frozen during both pretraining and finetuning.
* The adapter MLP connecting the vision encoder to the LLM is simplified and adds layer normalization to both visual and text token embeddings input to the LLM.
**Key features:**
* Processes natural language instructions, camera feeds, and sensor data to generate actions.
* Based on denoizing of the action space, kind of like a Diffusion transformer.
* Trained on a massive datasets of human movements, 3D environments, and AI-generated data.
**Why use GR00T-N1?**
* Typically requires \~50 episodes for training.
* Supports prompting and zero-shot learning for tasks not explicitly seen during training.
* Small model size (2B parameters) for efficient fine-tuning and fast inference on Nvidia Jetson devices.
[GR00T N1.5](https://huggingface.co/nvidia/GR00T-N1.5-3B) (June 2025) is an updated version of Nvidia's open foundation model for humanoid robots. It's also open source, but has 3B parameters instead of 2B like gr00t n1. The model weights are available on [Hugging Face](https://huggingface.co/nvidia/GR00T-N1.5-3B).
Key differences with gr00t n1.5 are:
* The VLM is frozen during both pretraining and finetuning.
* The adapter MLP connecting the vision encoder to the LLM is simplified and adds layer normalization to both visual and text token embeddings input to the LLM.
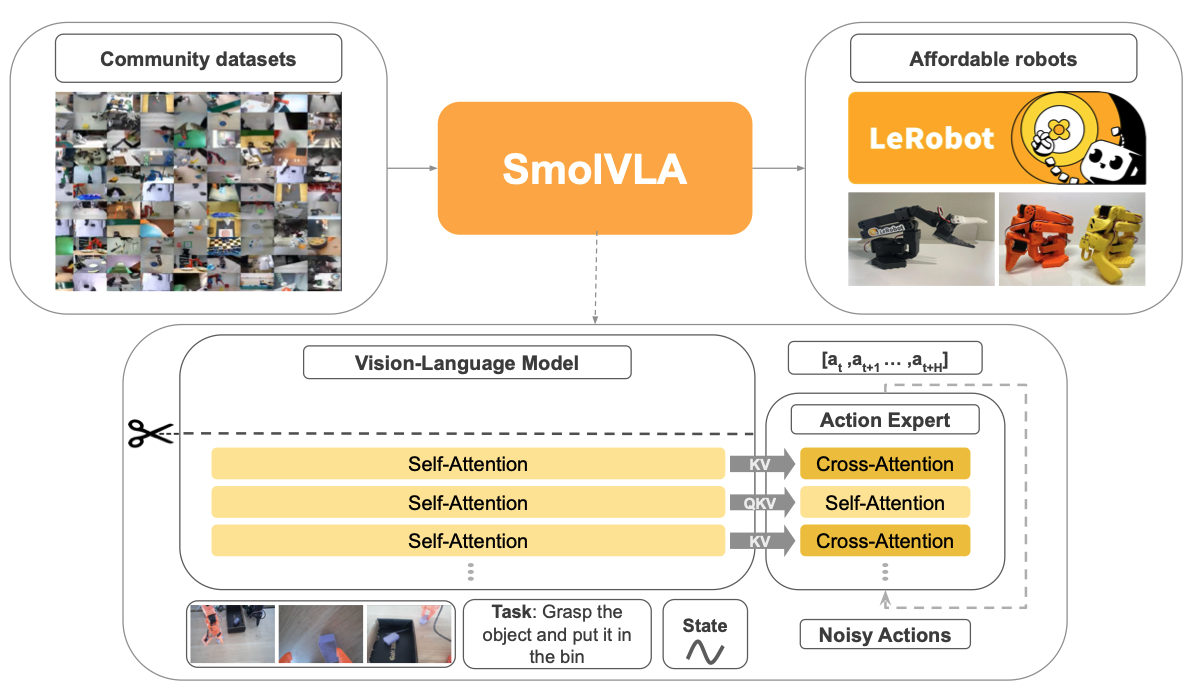 **How it works**:
* SmolVLA has a modular architecture with two main parts: a vision-language model (a cut-out SmolVLM) that processes images and text, and an "action expert" that generates the robot's next moves.
* The action expert is a compact transformer that uses a flow matching objective to predict a sequence of future actions in a non-autoregressive way.
* The model needs to be fine-tuned on a specific robot and task. Fine-tuning takes about 8 hours on a single NVIDIA A100 GPU.
**How it works**:
* SmolVLA has a modular architecture with two main parts: a vision-language model (a cut-out SmolVLM) that processes images and text, and an "action expert" that generates the robot's next moves.
* The action expert is a compact transformer that uses a flow matching objective to predict a sequence of future actions in a non-autoregressive way.
* The model needs to be fine-tuned on a specific robot and task. Fine-tuning takes about 8 hours on a single NVIDIA A100 GPU.
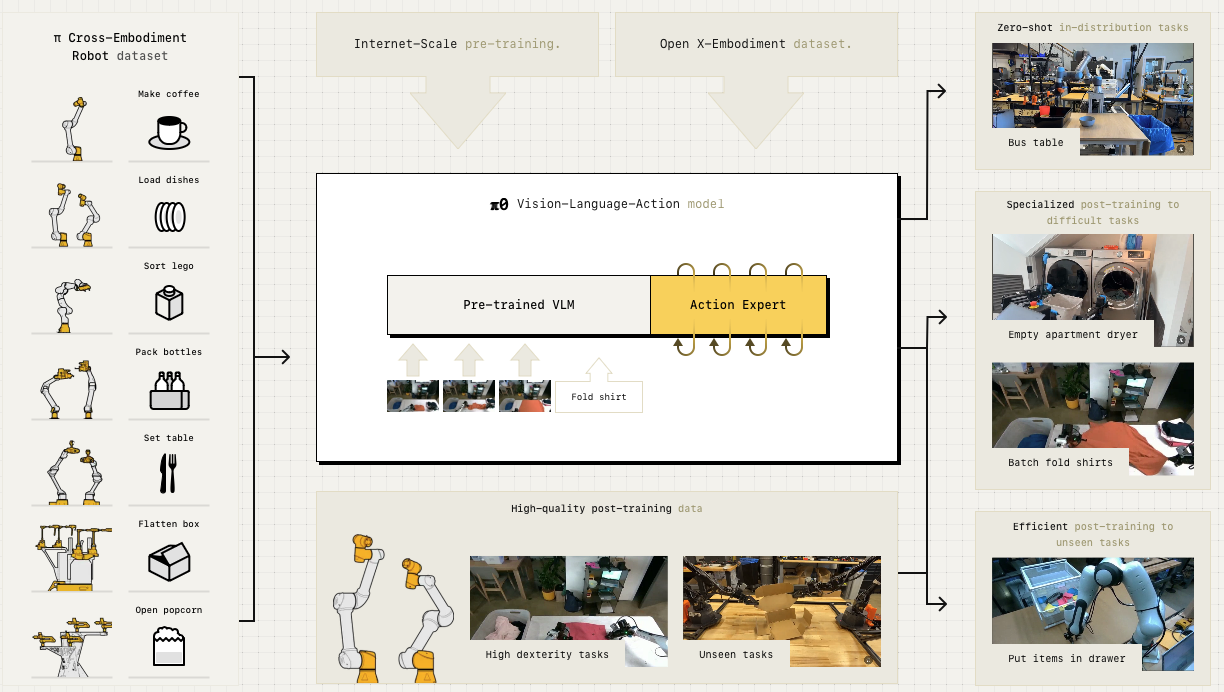 [pi0 FAST](https://github.com/Physical-Intelligence/openpi) (February 2025), also written as **π₀-FAST** or pi zero FAST, is an **autoregressive VLA**, based on the FAST action tokenizer. Similar to how LLMs generate text token by token, pi0 FAST generates actions token by token. [Learn more.](https://www.physicalintelligence.company/research/fast)
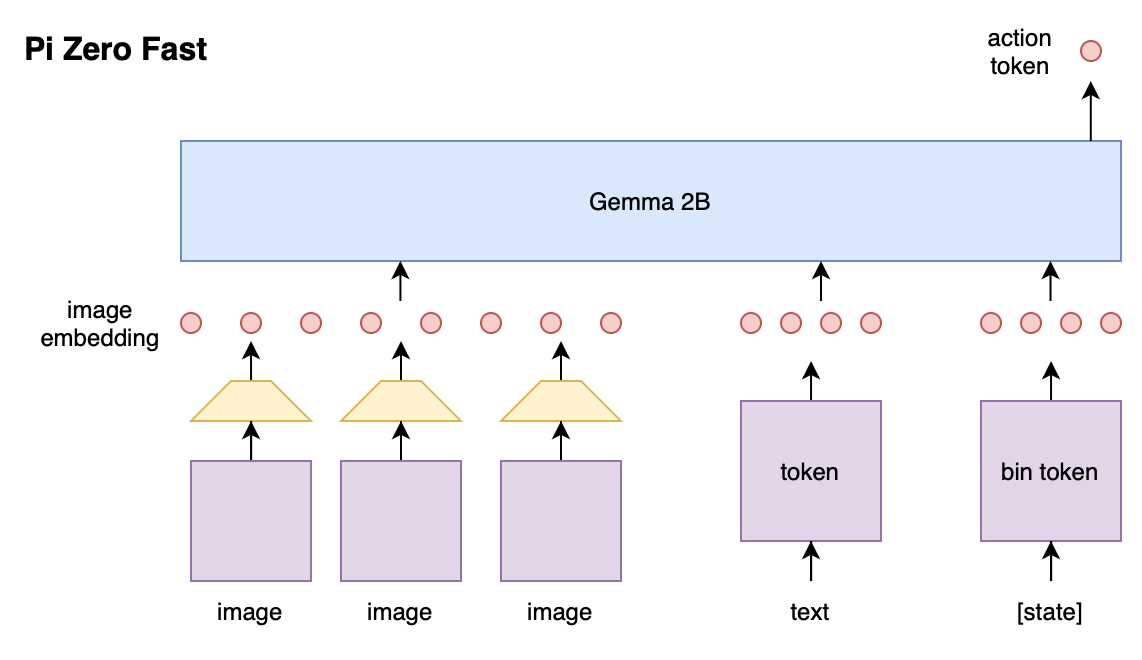 [pi0.5](https://www.physicalintelligence.company/blog/pi05) (April 2025) is a Vision-Language-Action model by Physical Intelligence that focuses on "open-world generalization." It's designed to enable robots to perform tasks in entirely new environments that they have not seen during training, a significant step toward creating truly general-purpose robots for homes and other unstructured spaces. While the [research](https://www.physicalintelligence.company/download/pi05.pdf) and results are public, the model itself is not open-source.
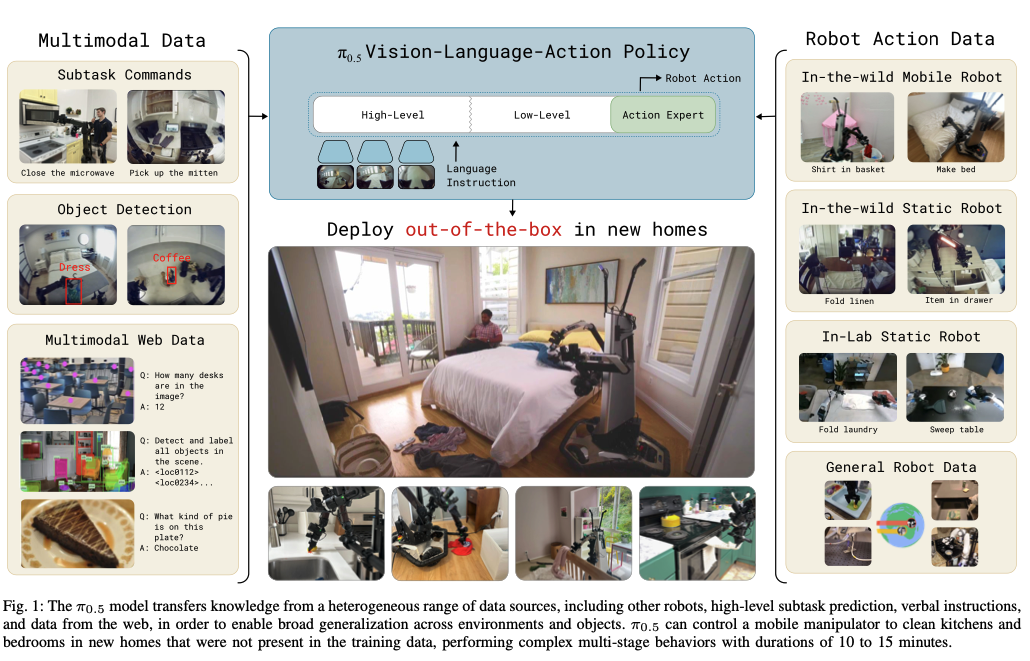
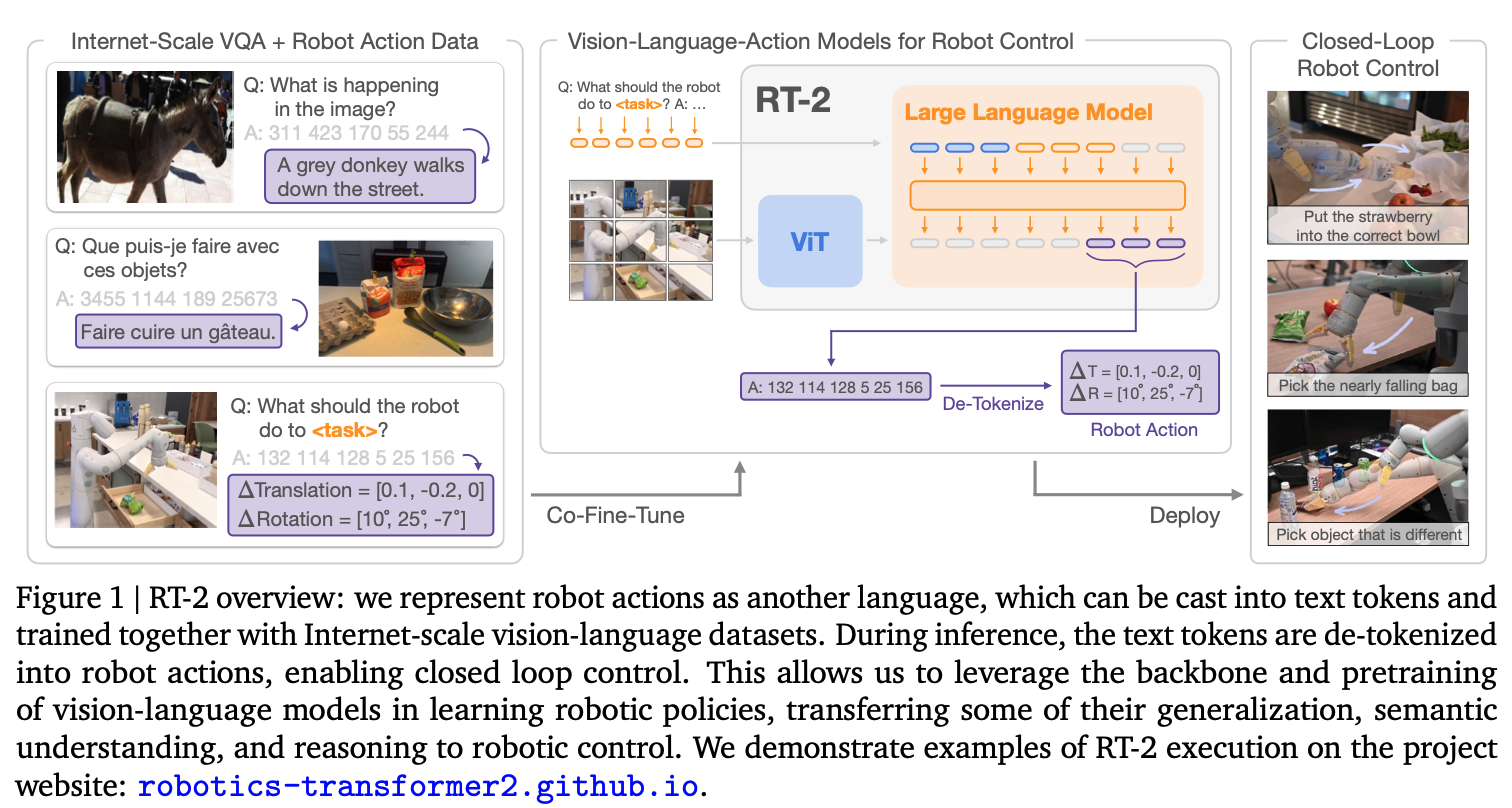 [**AutoRT**](https://github.com/kyegomez/AutoRT) (January 2024) is a framework by Google DeepMind, designed for robot fleets and data collection. A LLM is used to generate "to do lists" for robots based on descriptions of the environment. The to do lists tasks are then executed by teleoperators, a scripted pick policy, or RT-2 (Google's VLA). [Learn more.](https://auto-rt.github.io/static/pdf/AutoRT.pdf)
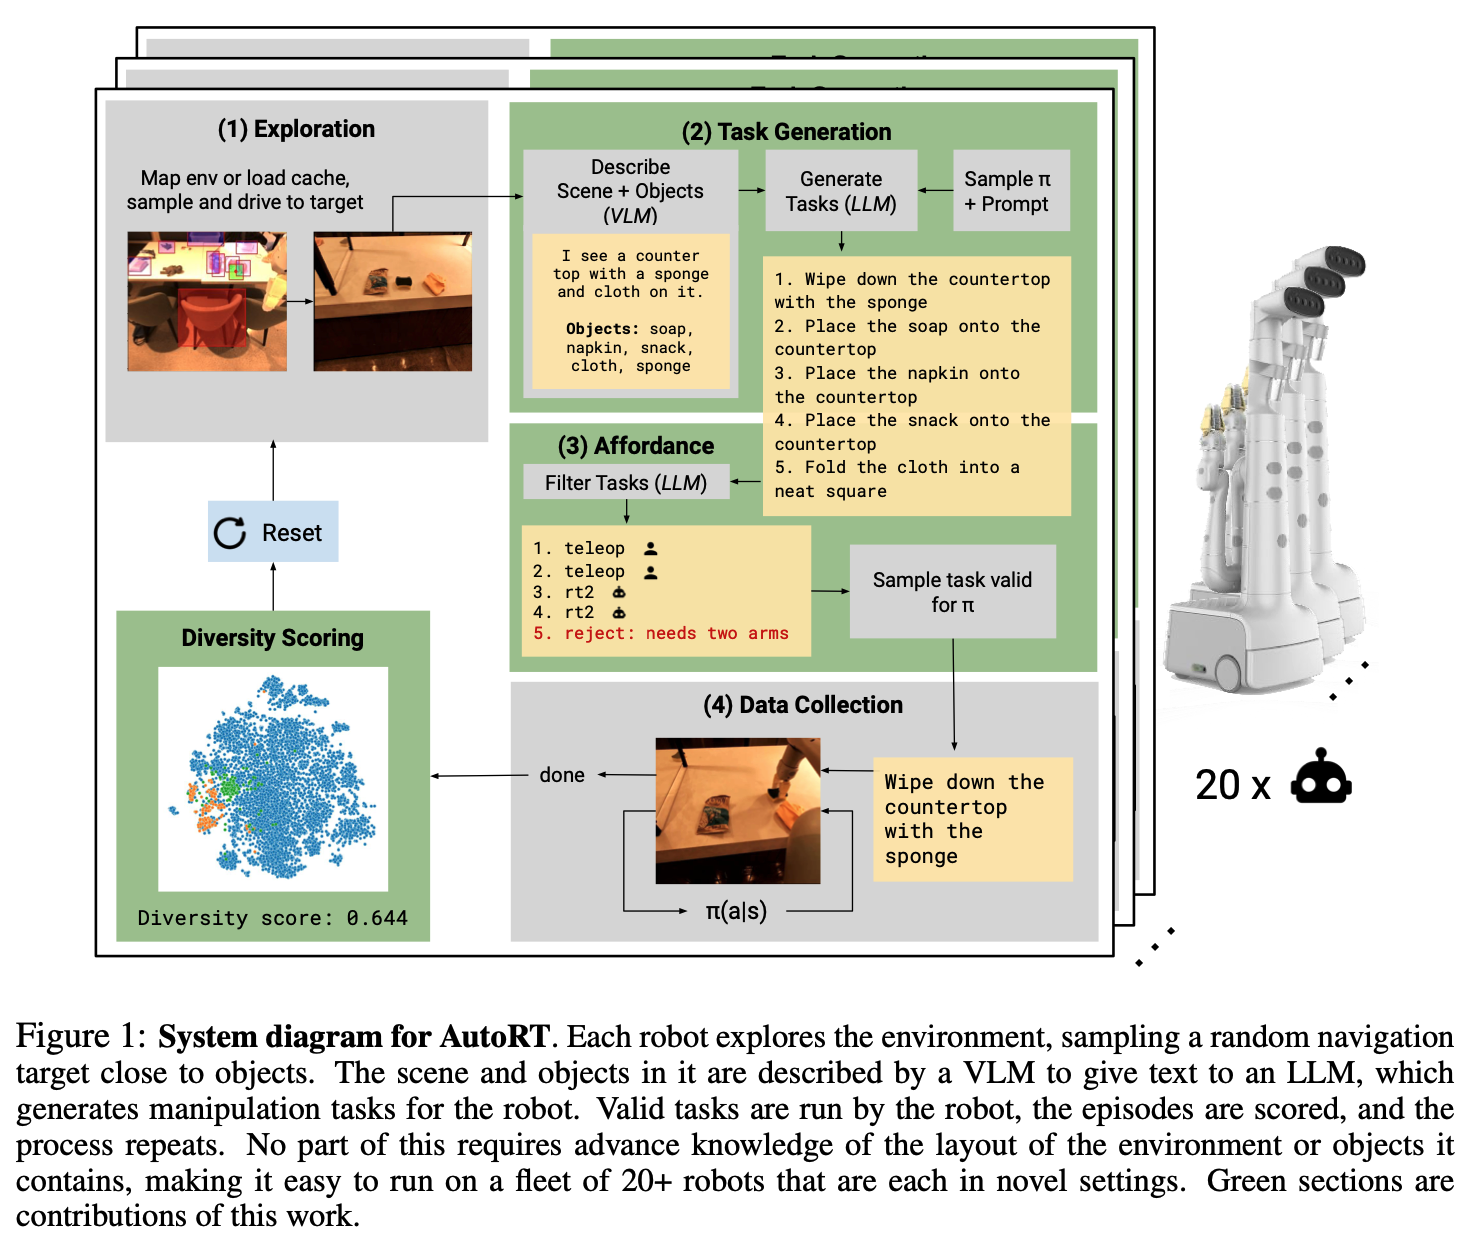 ## LeRobot Integration
[LeRobot is a github repo by Hugging Face](https://github.com/huggingface/lerobot/tree/main/lerobot/common/policies) which implements training scripts for various policies in a standardized way. Supported policies include:
* act
* diffusion
* pi0
* tdmpc (September 2022)
* vqbet (October 2023)
## More models
Here is [a list](https://github.com/epoch-research/robotic-manipulation-compute/blob/main/data/Robotics%20Models.csv) compiling more references.
# Train SmolVLA
Source: https://docs.phospho.ai/learn/train-smolvla
How to Train and Run SmolVLA with LeRobot: A Step-by-Step Guide
In this tutorial, we will walk you through the process of fine-tuning a SmolVLA model and deploying it on a real robot arm. We will cover environment setup, training, inference, and common troubleshooting issues.
## LeRobot Integration
[LeRobot is a github repo by Hugging Face](https://github.com/huggingface/lerobot/tree/main/lerobot/common/policies) which implements training scripts for various policies in a standardized way. Supported policies include:
* act
* diffusion
* pi0
* tdmpc (September 2022)
* vqbet (October 2023)
## More models
Here is [a list](https://github.com/epoch-research/robotic-manipulation-compute/blob/main/data/Robotics%20Models.csv) compiling more references.
# Train SmolVLA
Source: https://docs.phospho.ai/learn/train-smolvla
How to Train and Run SmolVLA with LeRobot: A Step-by-Step Guide
In this tutorial, we will walk you through the process of fine-tuning a SmolVLA model and deploying it on a real robot arm. We will cover environment setup, training, inference, and common troubleshooting issues.
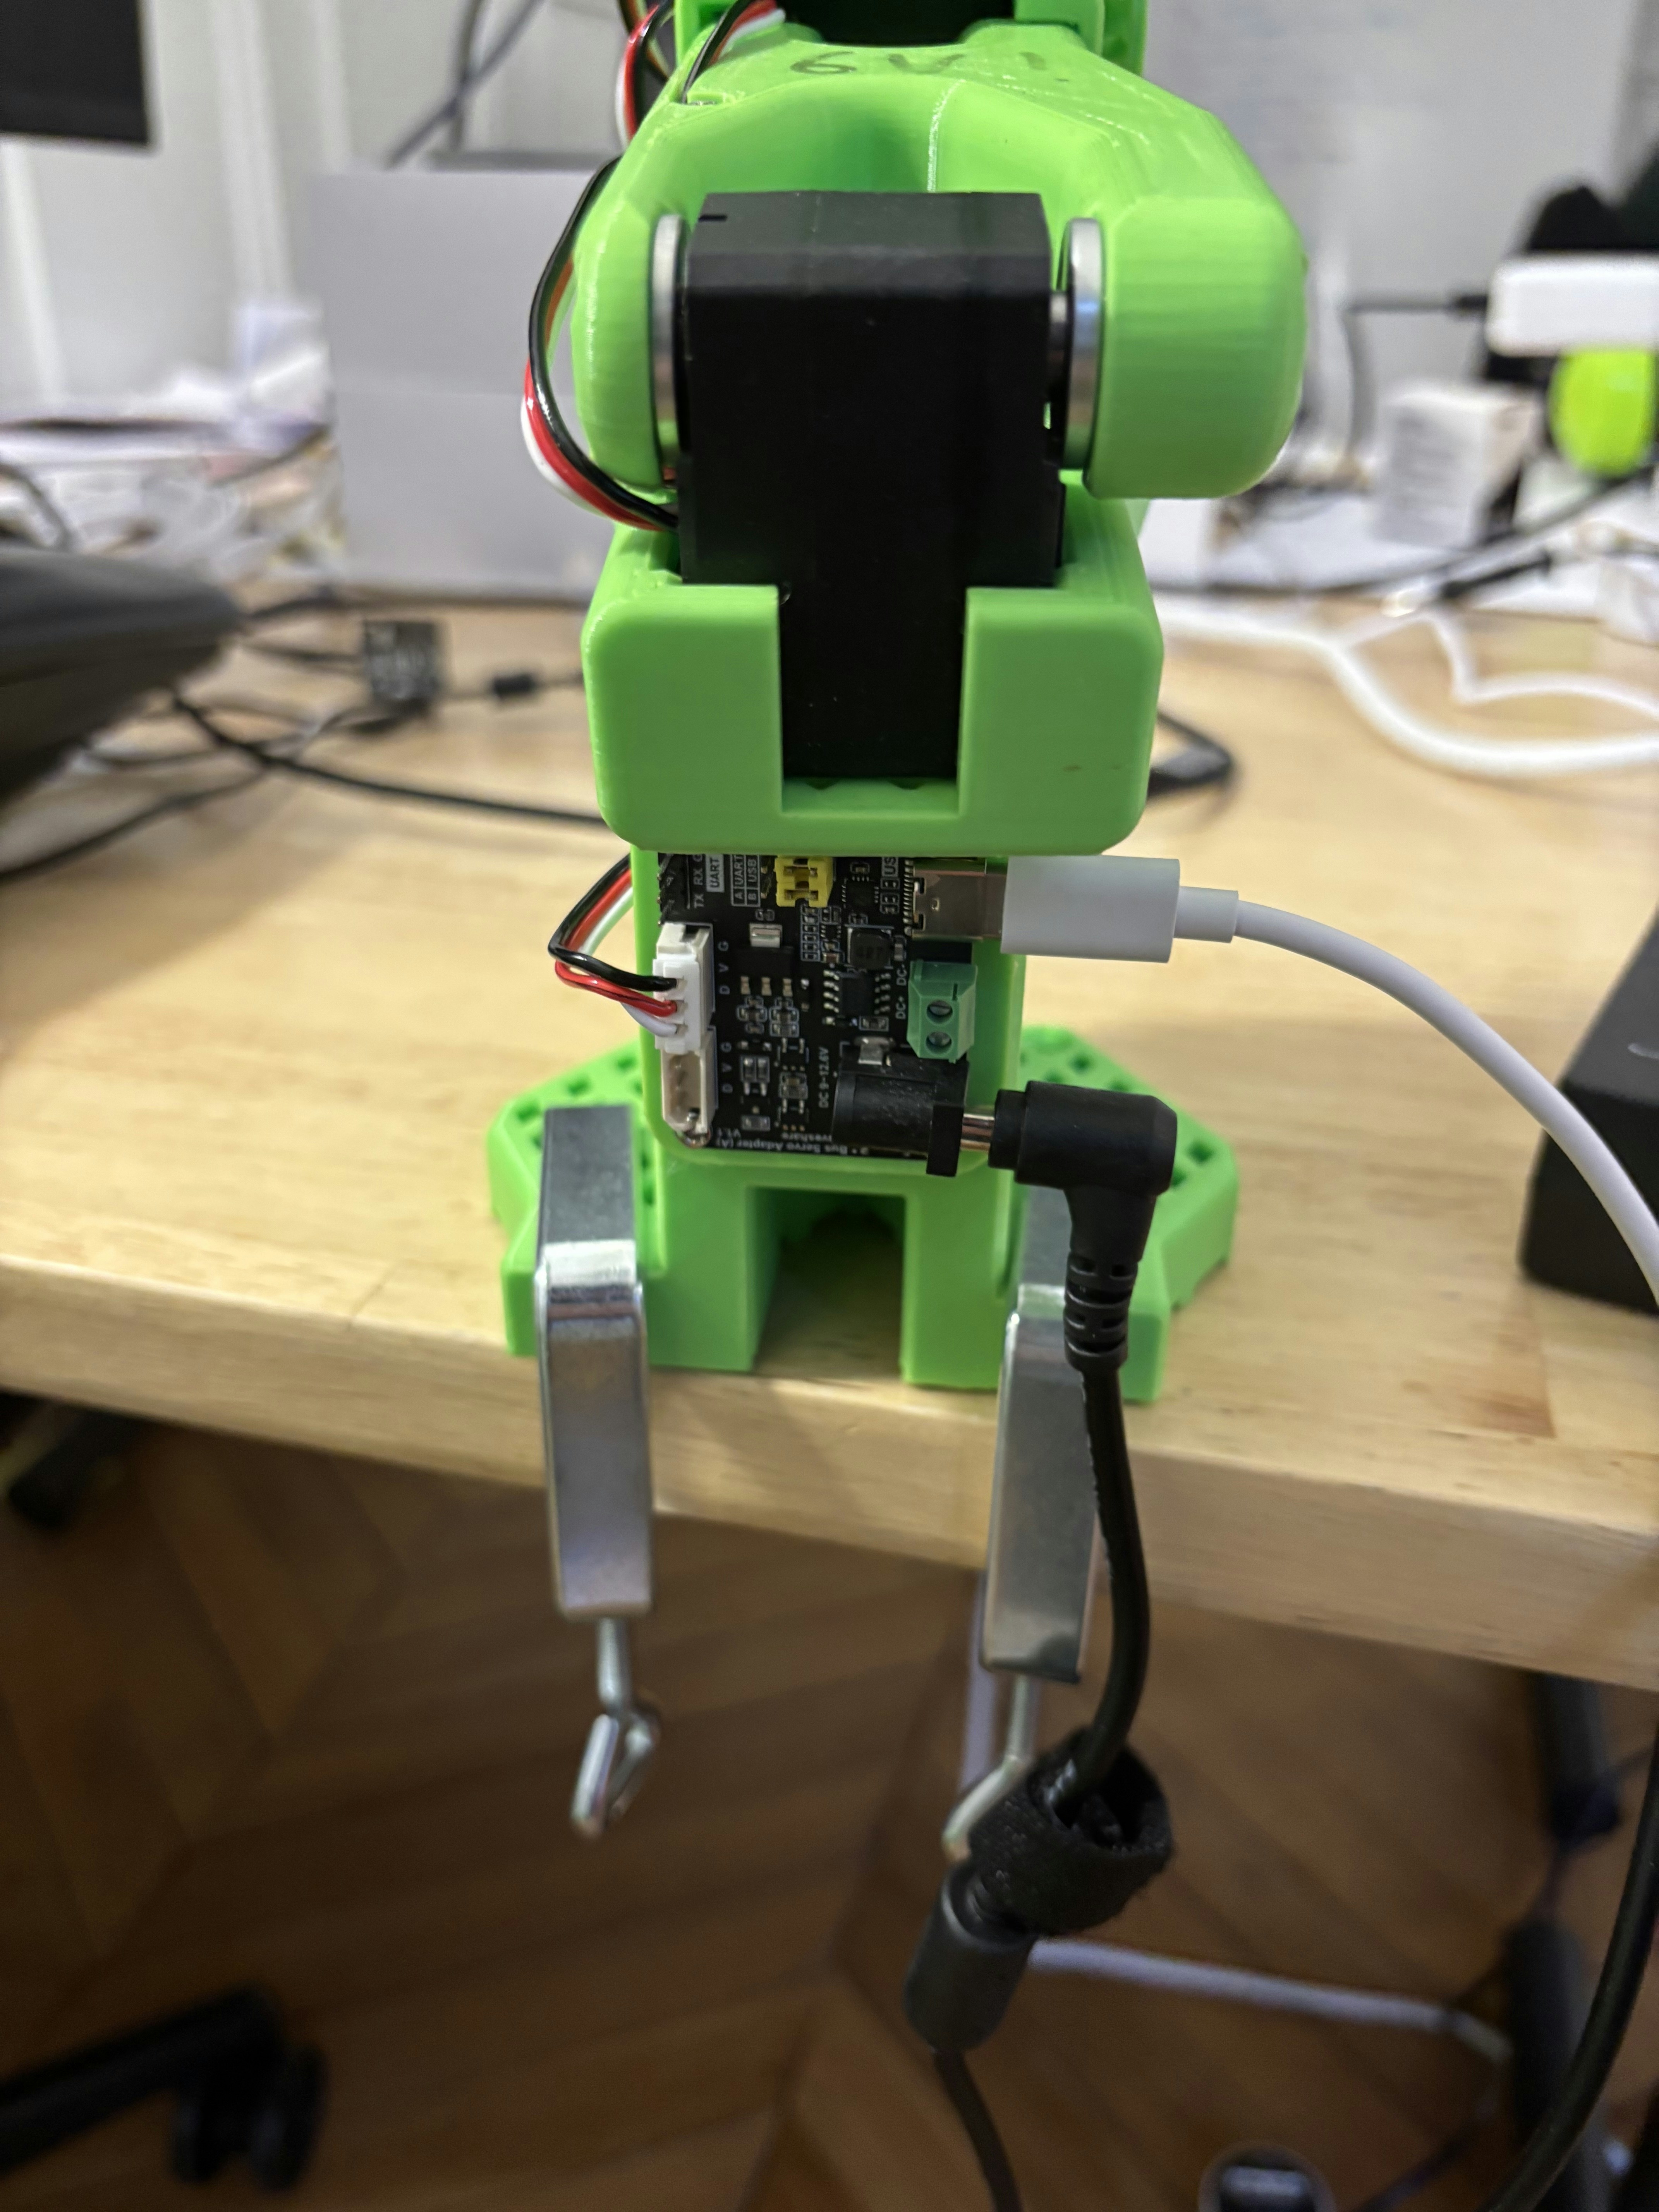 ## Plug everything together
In this order:
1. Plug the *SO-100 robot arm* into the power supply using the **black** 12V power supply.
2. Plug one end of the **USB-C cable** into the *SO-100 robot arm* and the other into your computer (laptop, raspberry pi, etc).
3. If you have additional cameras, plug them into your computer
Below is an example of a full setup with a SO-100 arm, a stereoscopic camera plugged on a Raspberry Pi.
## Plug everything together
In this order:
1. Plug the *SO-100 robot arm* into the power supply using the **black** 12V power supply.
2. Plug one end of the **USB-C cable** into the *SO-100 robot arm* and the other into your computer (laptop, raspberry pi, etc).
3. If you have additional cameras, plug them into your computer
Below is an example of a full setup with a SO-100 arm, a stereoscopic camera plugged on a Raspberry Pi.
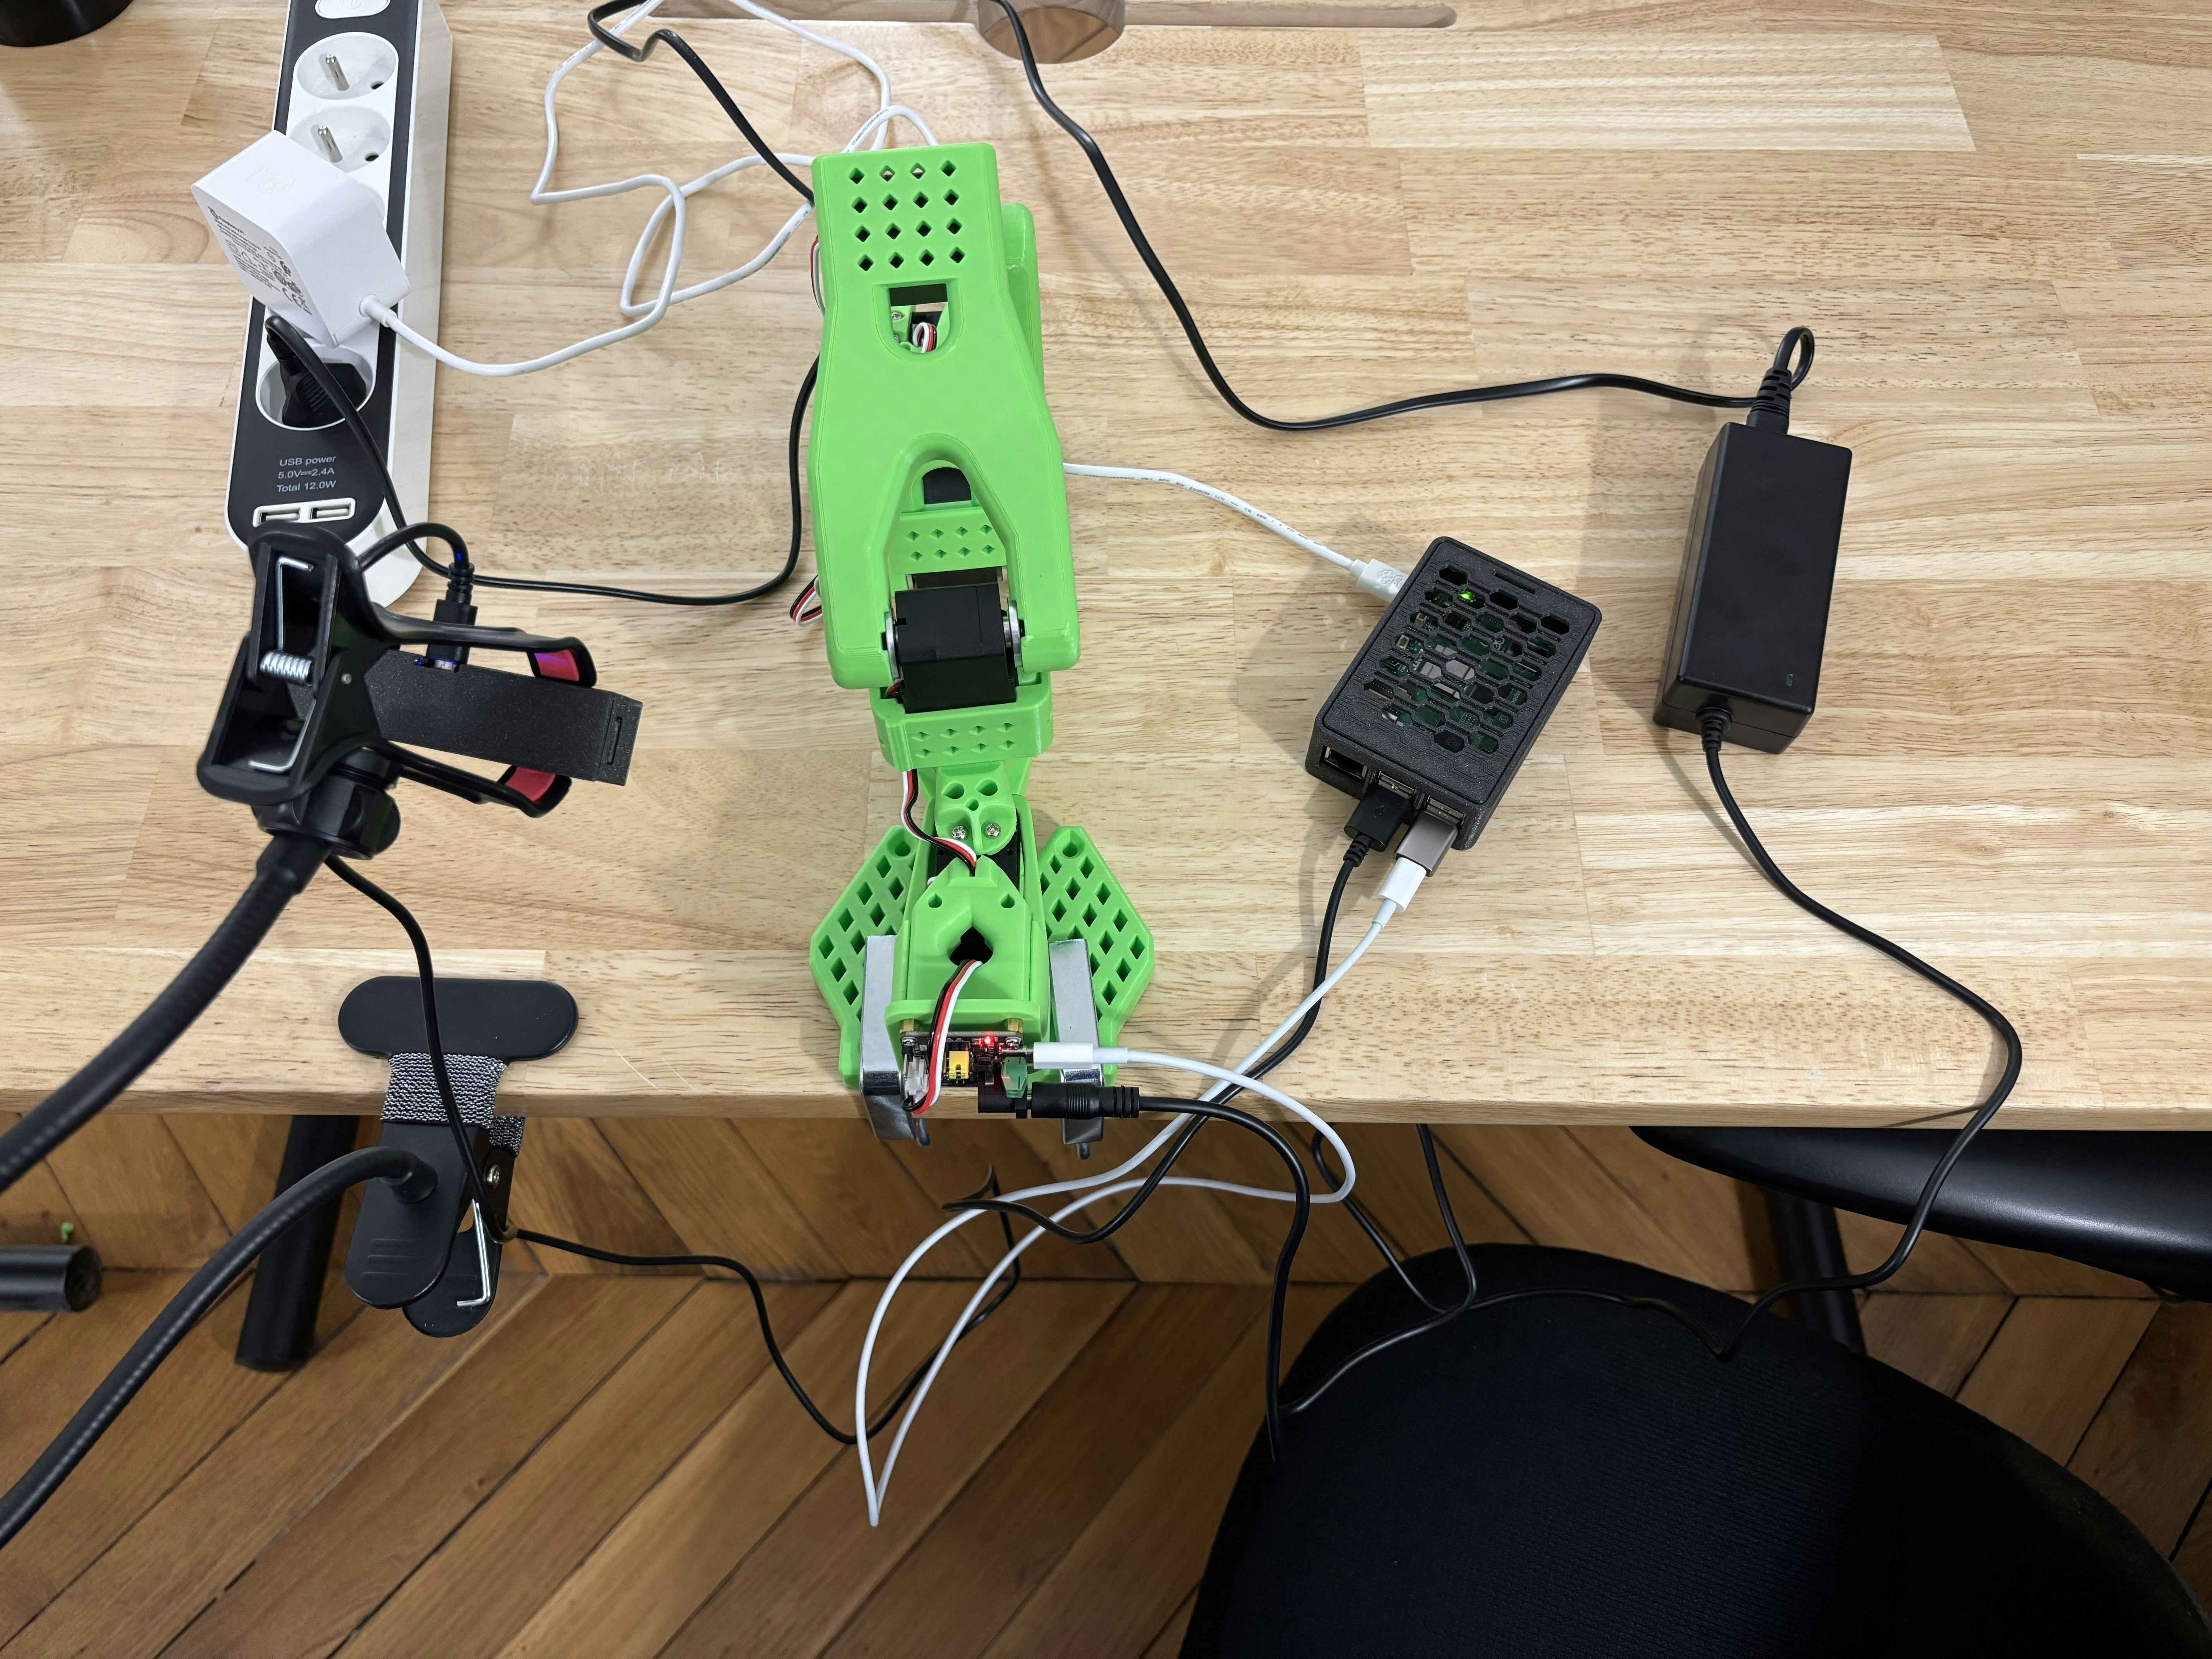 ## Start phosphobot
Once everything is connected and powered on, run the following command in a terminal to install the phosphobot software:
## Start phosphobot
Once everything is connected and powered on, run the following command in a terminal to install the phosphobot software:
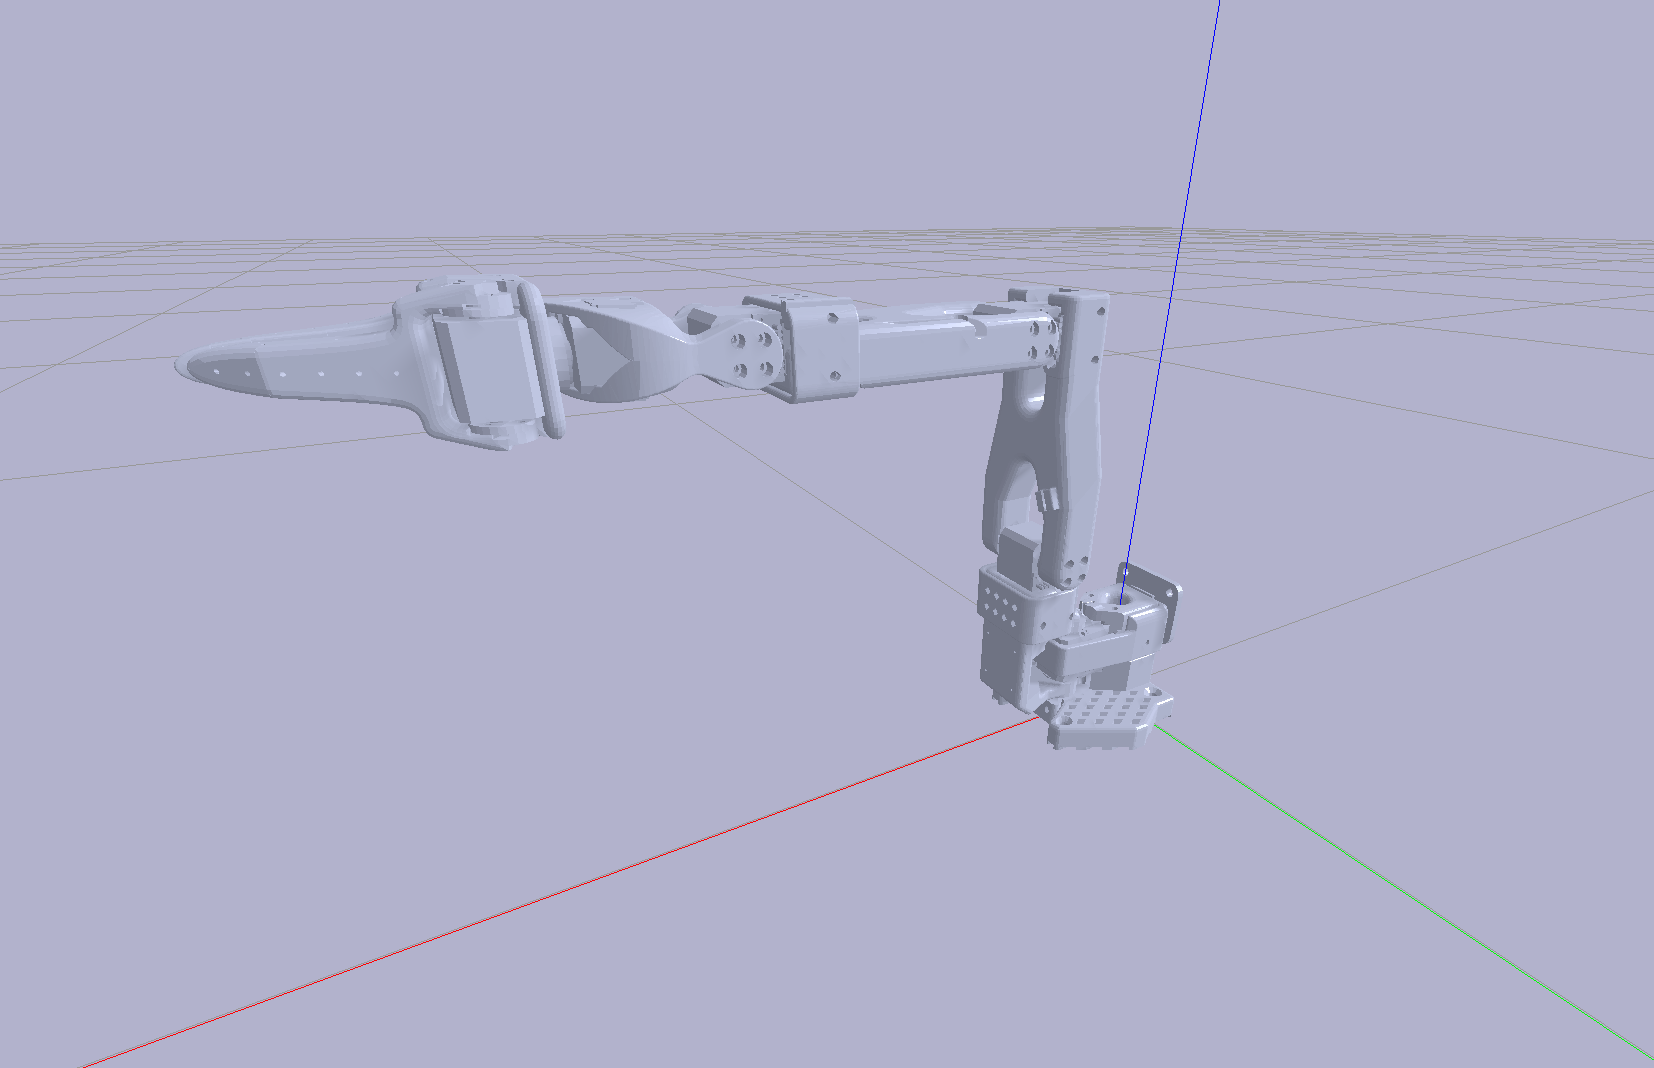 red is x, green is y, blue is z
**Position 2:** Arm is twisted to its **left**. Gripper is fully **open**.
red is x, green is y, blue is z
**Position 2:** Arm is twisted to its **left**. Gripper is fully **open**.
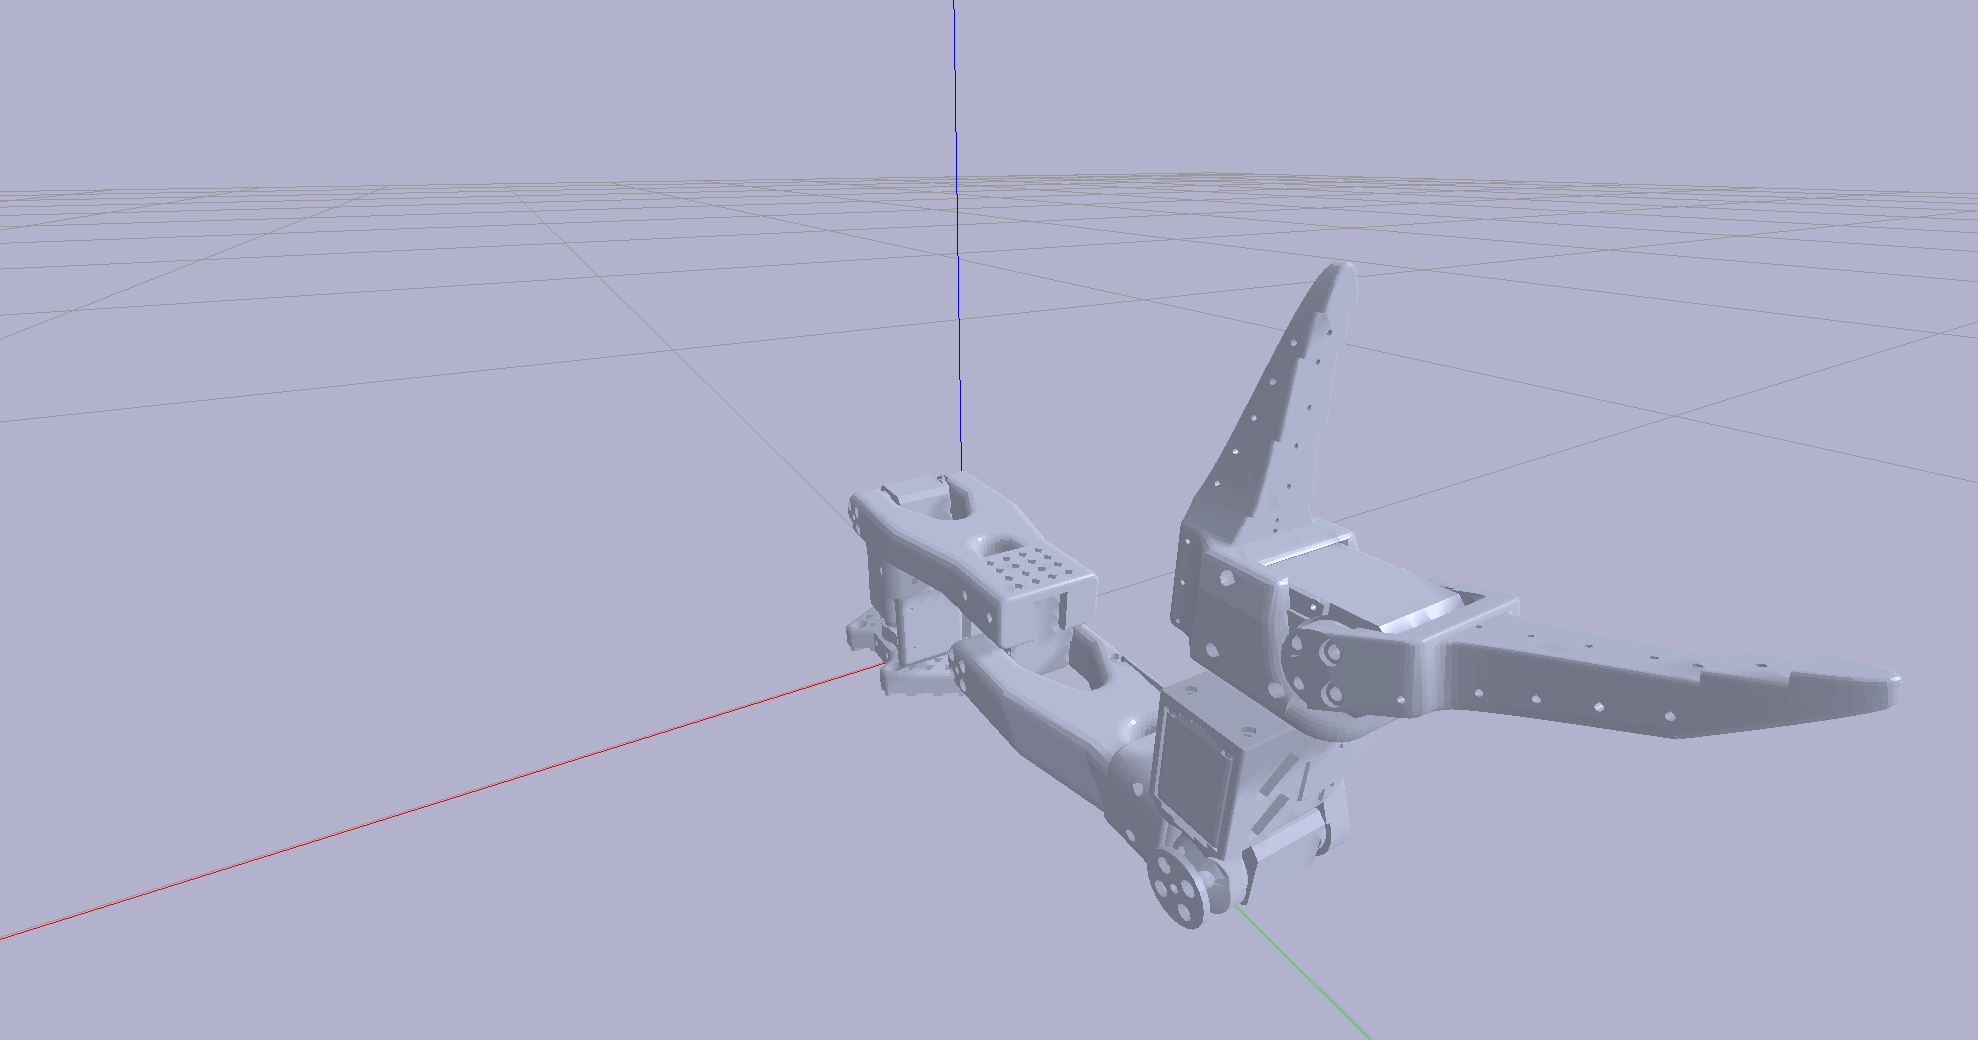 red is x, green is y, blue is z
After moving to position 2, **finish** the calibration sequence by clicking the button.
red is x, green is y, blue is z
After moving to position 2, **finish** the calibration sequence by clicking the button.
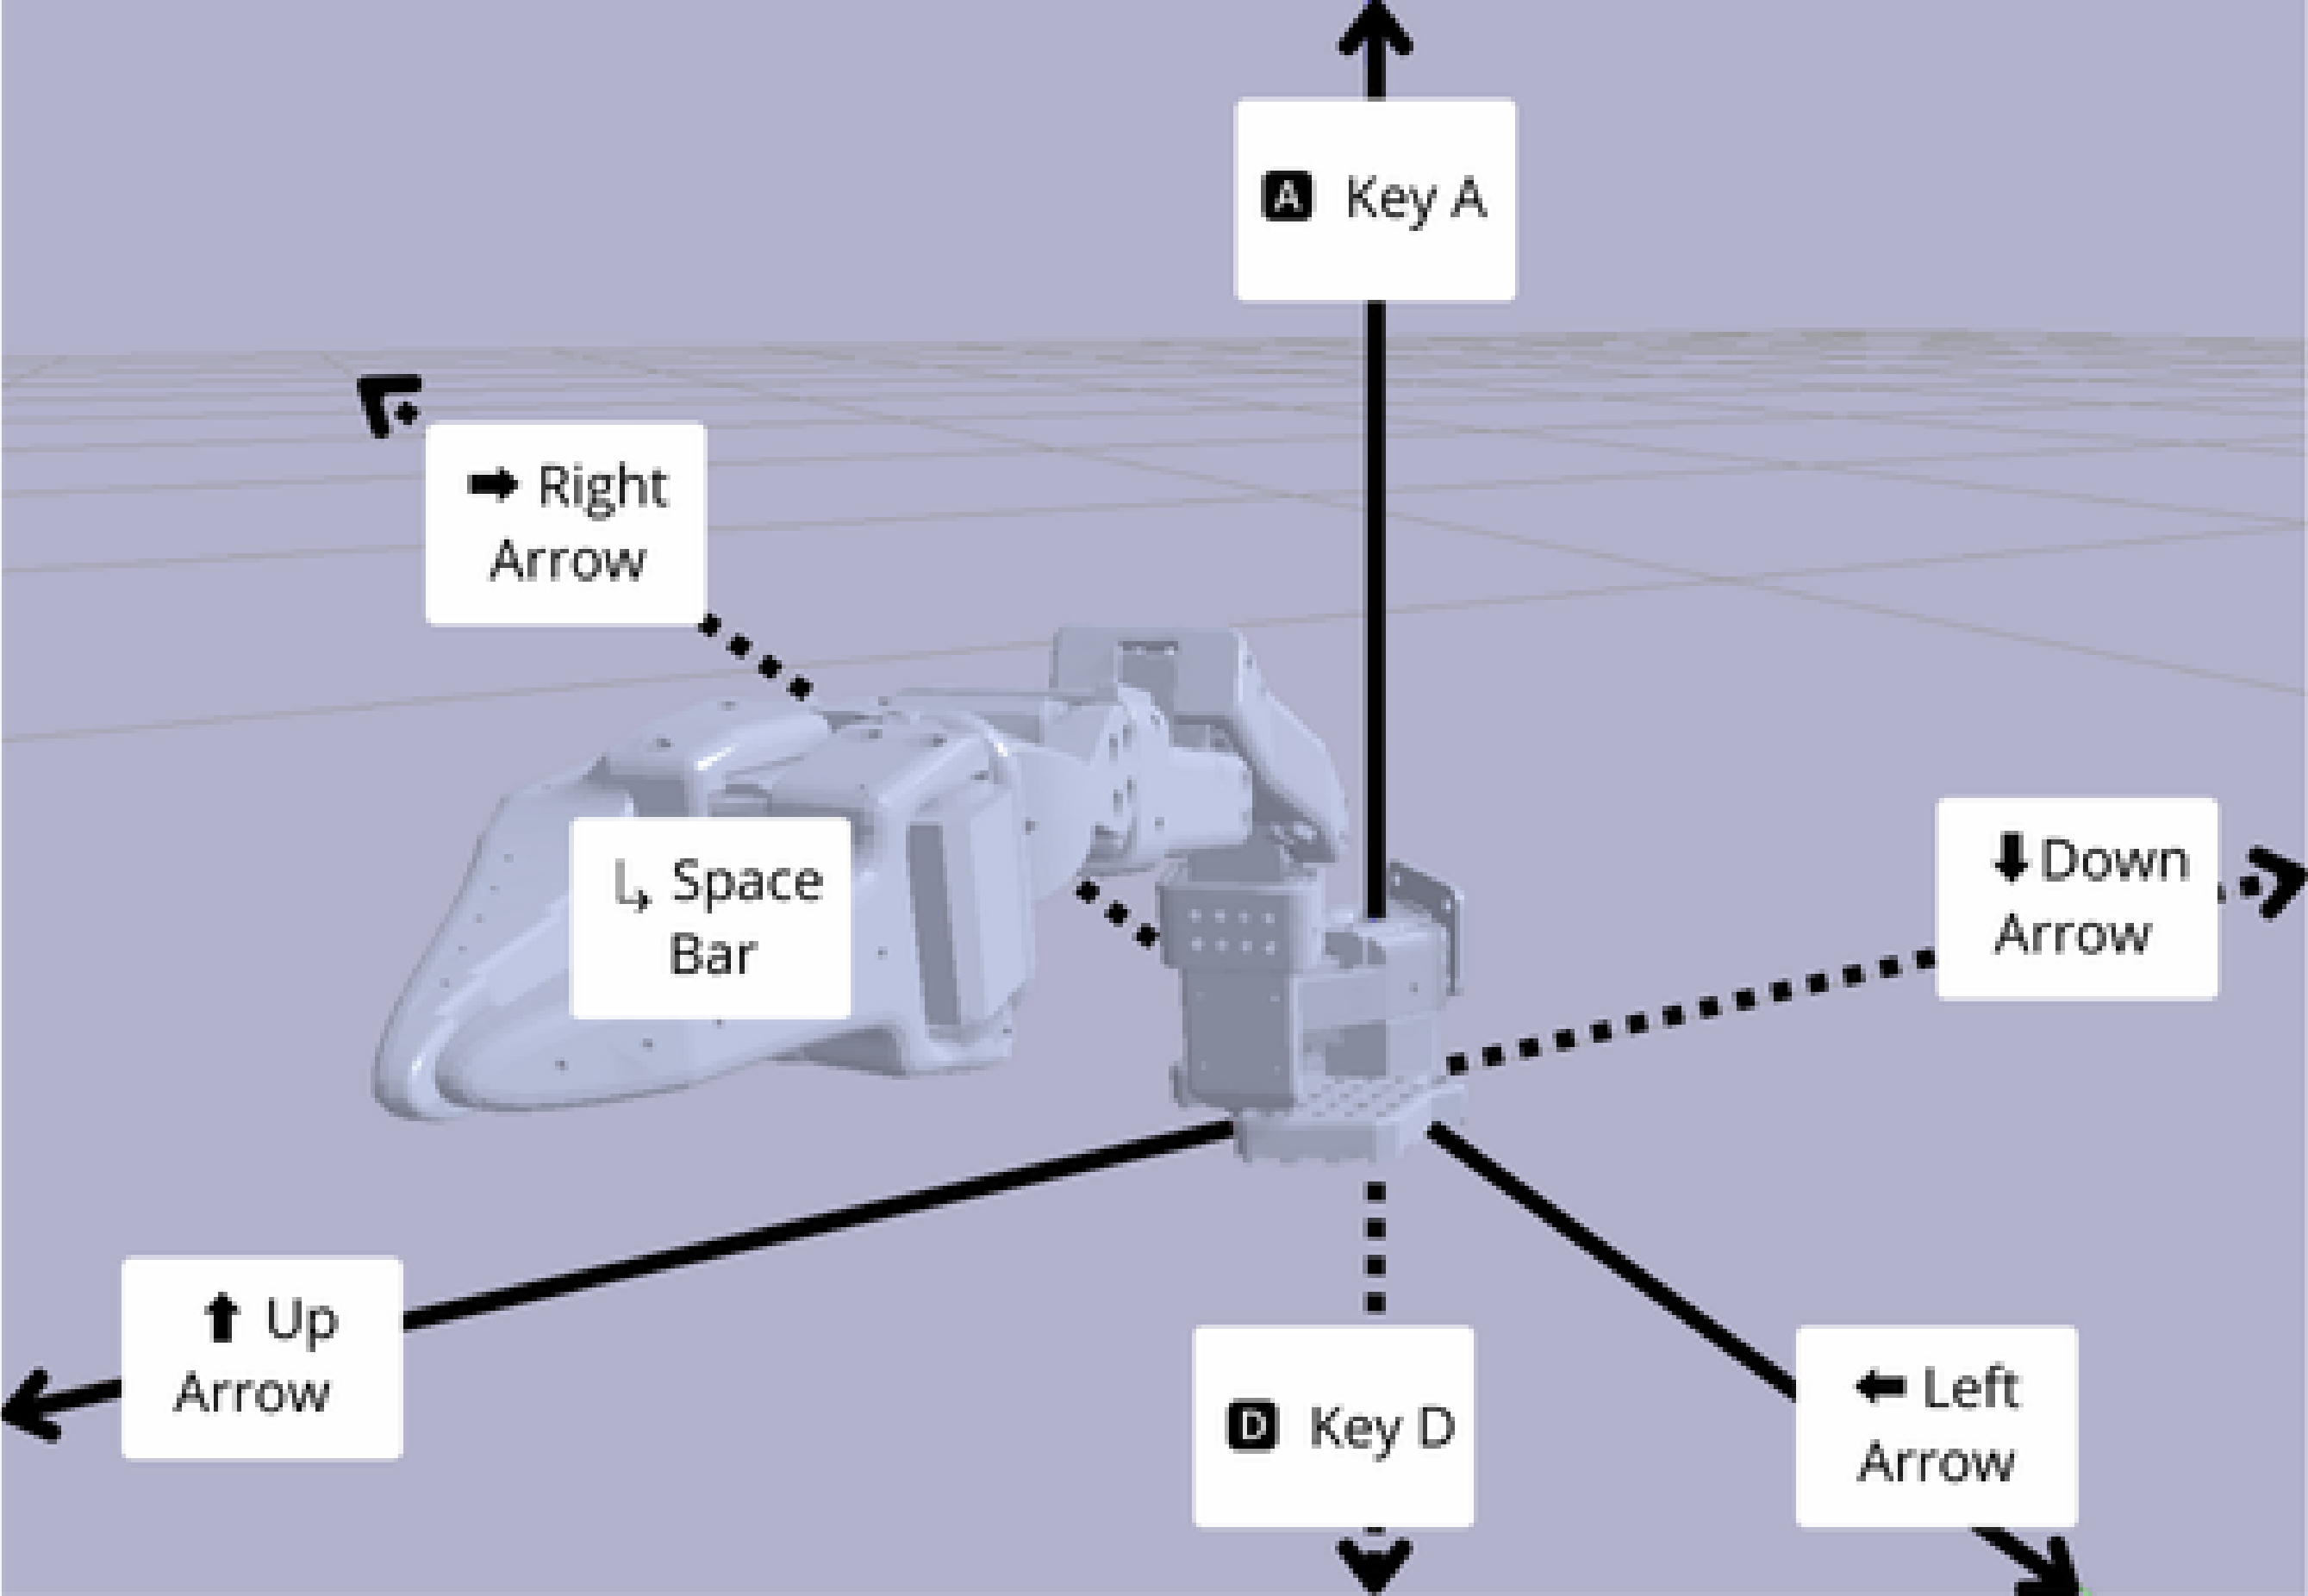 # Next steps
You can now [control your robot](/basic-usage/teleop), [record your first dataset](/basic-usage/dataset-recording) and [train an AI model](/basic-usage/training) to make the robot move by itself.
# Next steps
You can now [control your robot](/basic-usage/teleop), [record your first dataset](/basic-usage/dataset-recording) and [train an AI model](/basic-usage/training) to make the robot move by itself.
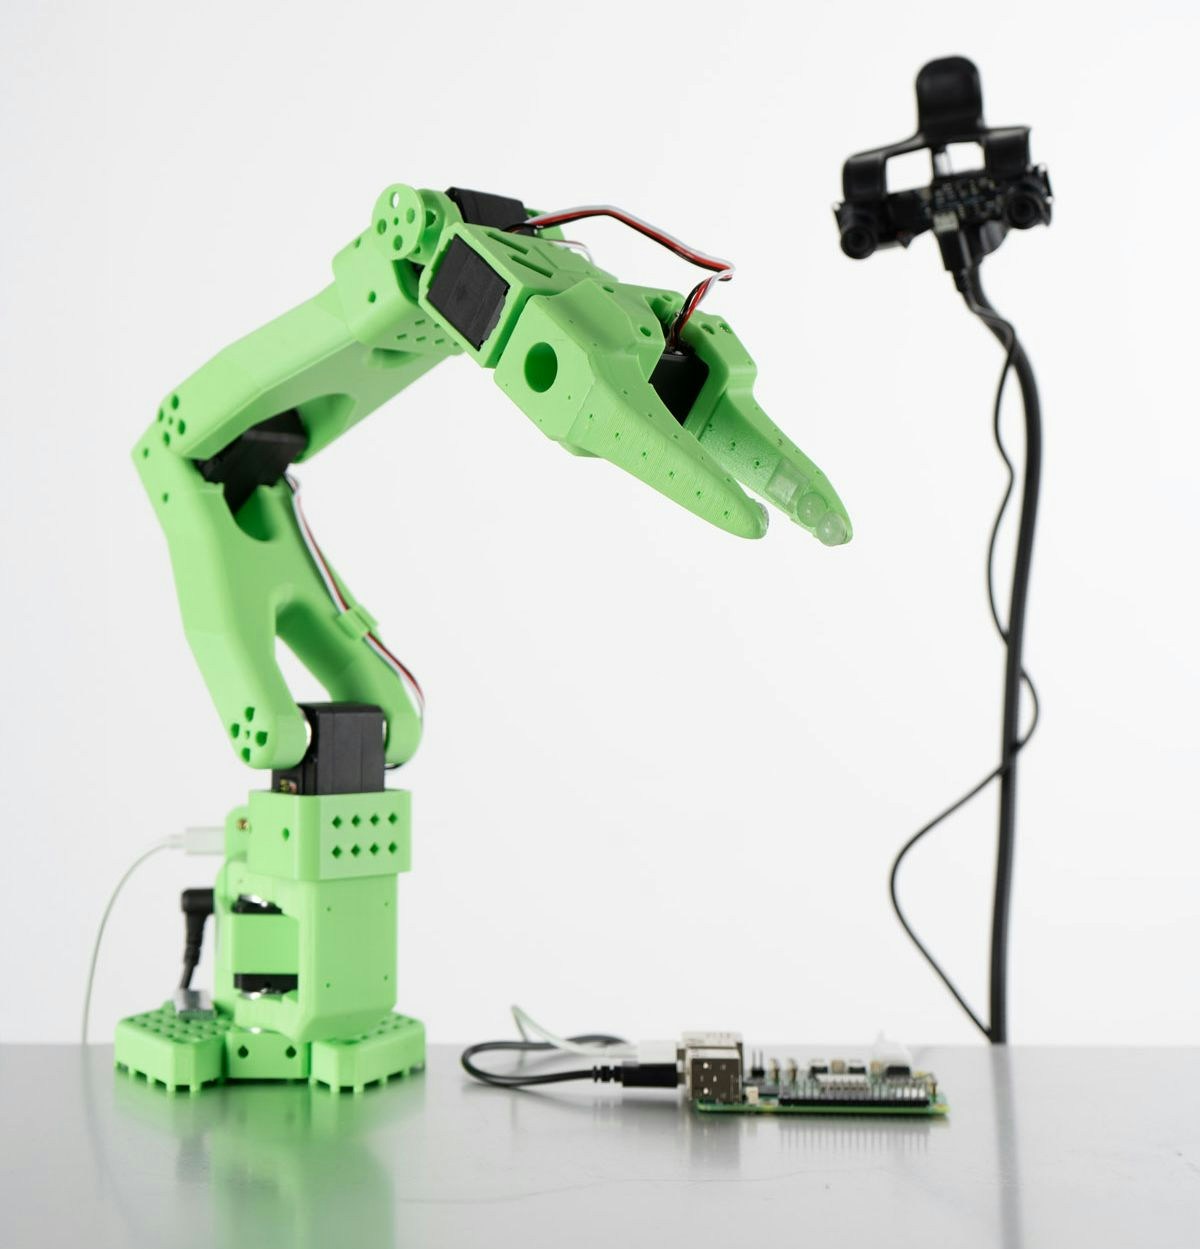 ## What's in the box?
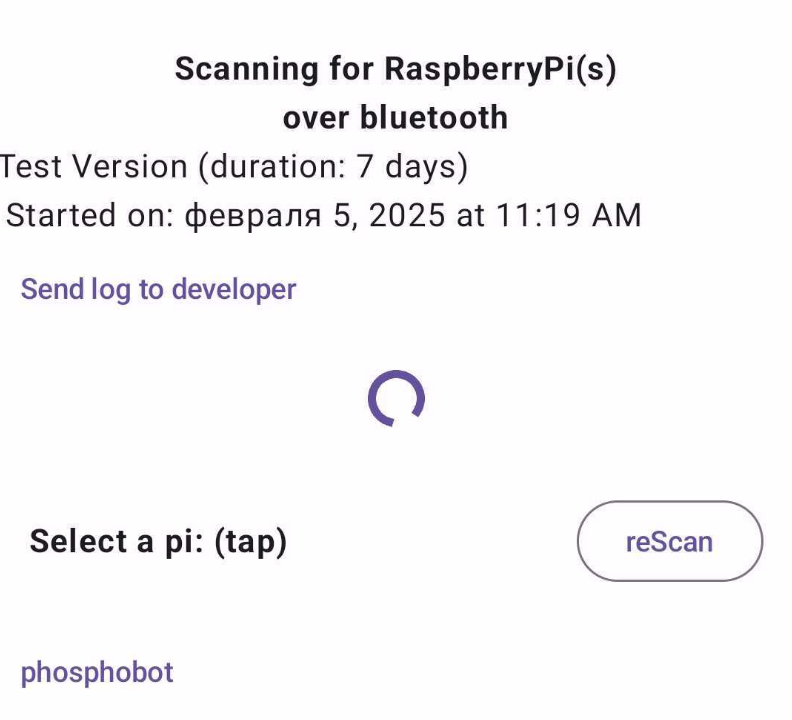 If no device shows up: close the app, turn Bluetooth off and on on your smartphone, and reboot the control module. Then start again.
3. Wait for your smartphone to pair with the control module, then for the WiFi access points to appear. This can take up to a minute.
If no device shows up: close the app, turn Bluetooth off and on on your smartphone, and reboot the control module. Then start again.
3. Wait for your smartphone to pair with the control module, then for the WiFi access points to appear. This can take up to a minute.
 If you stay stuck on this screen for longer than 2 minutes, close the app, turn Bluetooth off and on on your smartphone, and reboot the control module. Then start again.
4. Select your home WiFi in the list. Then, enter the WiFi password. This will connect the control module to the WiFi network.
If you stay stuck on this screen for longer than 2 minutes, close the app, turn Bluetooth off and on on your smartphone, and reboot the control module. Then start again.
4. Select your home WiFi in the list. Then, enter the WiFi password. This will connect the control module to the WiFi network.
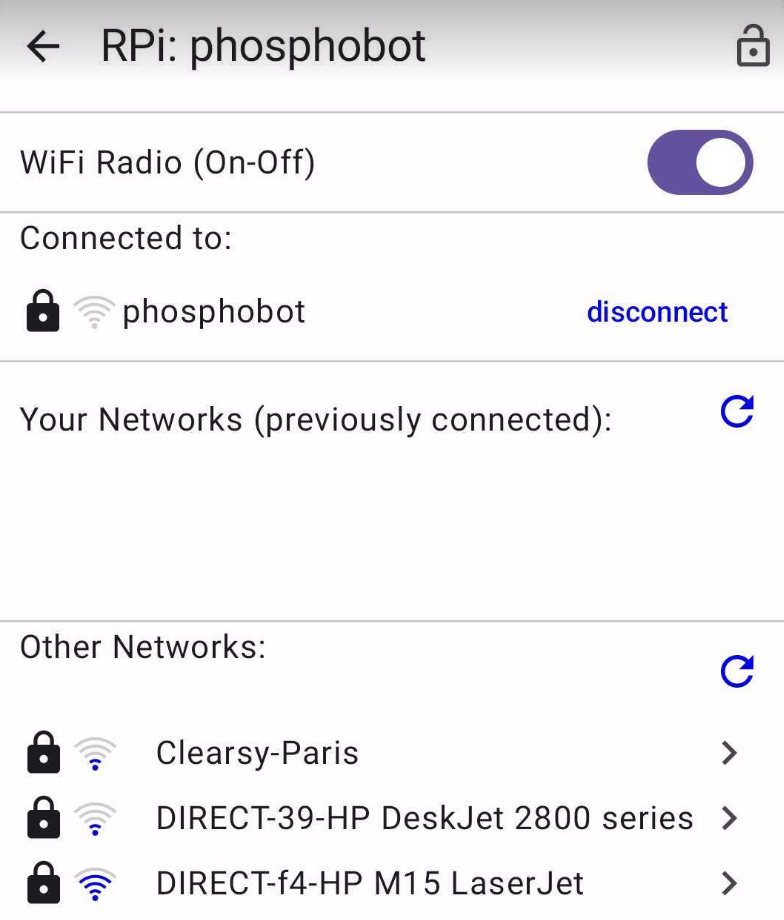 Then enter the WiFi password and press connect.
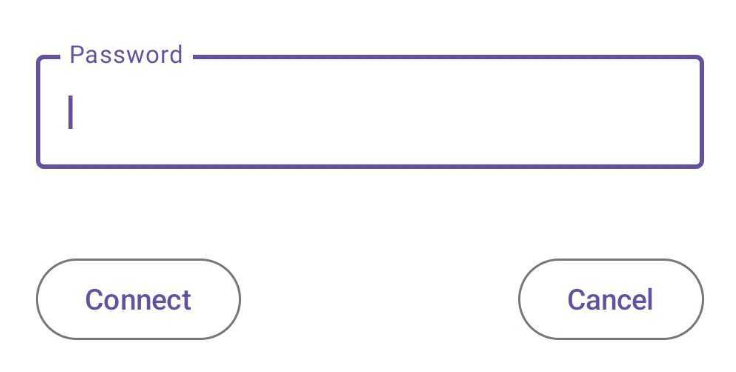
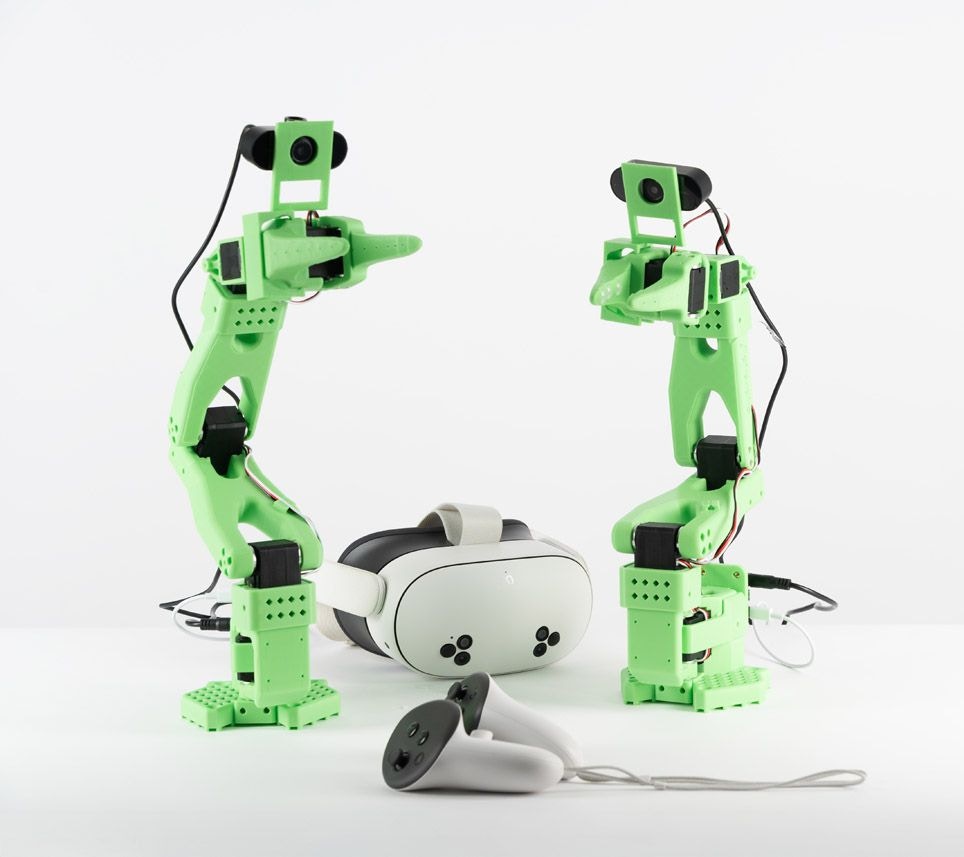 ## What's in the box?