> ## Documentation Index
> Fetch the complete documentation index at: https://docs.phospho.ai/llms.txt
> Use this file to discover all available pages before exploring further.
# SO-100 quickstart guide
> How to set up phosphobot and control your SO-100 robot arm
## Get your SO-100 robot arm
The SO-100 robot arm is a 5-DOF robotic arm with a 1-DOF gripper. It's a popular robot arm for AI robotics, with many users.
The SO-100 robot arm is [open source](https://github.com/TheRobotStudio/SO-ARM100) and can be built using off-the-shelf components and 3D printed parts.
If you're looking to buy SO-100 robot arms already assembled, with cameras and software, you can get a starter pack [on our shop](https://robots.phospho.ai).
## How to build the SO-100 leader arm? Step by step assembly guide
Here is a step-by-step video guide to build the SO-100 robot arm:
* [Parts list](https://github.com/TheRobotStudio/SO-ARM100)
* [Configure the motors](https://github.com/phospho-app/phosphobot/tree/main/scripts/feetech)
## Attach the SO-100 arm
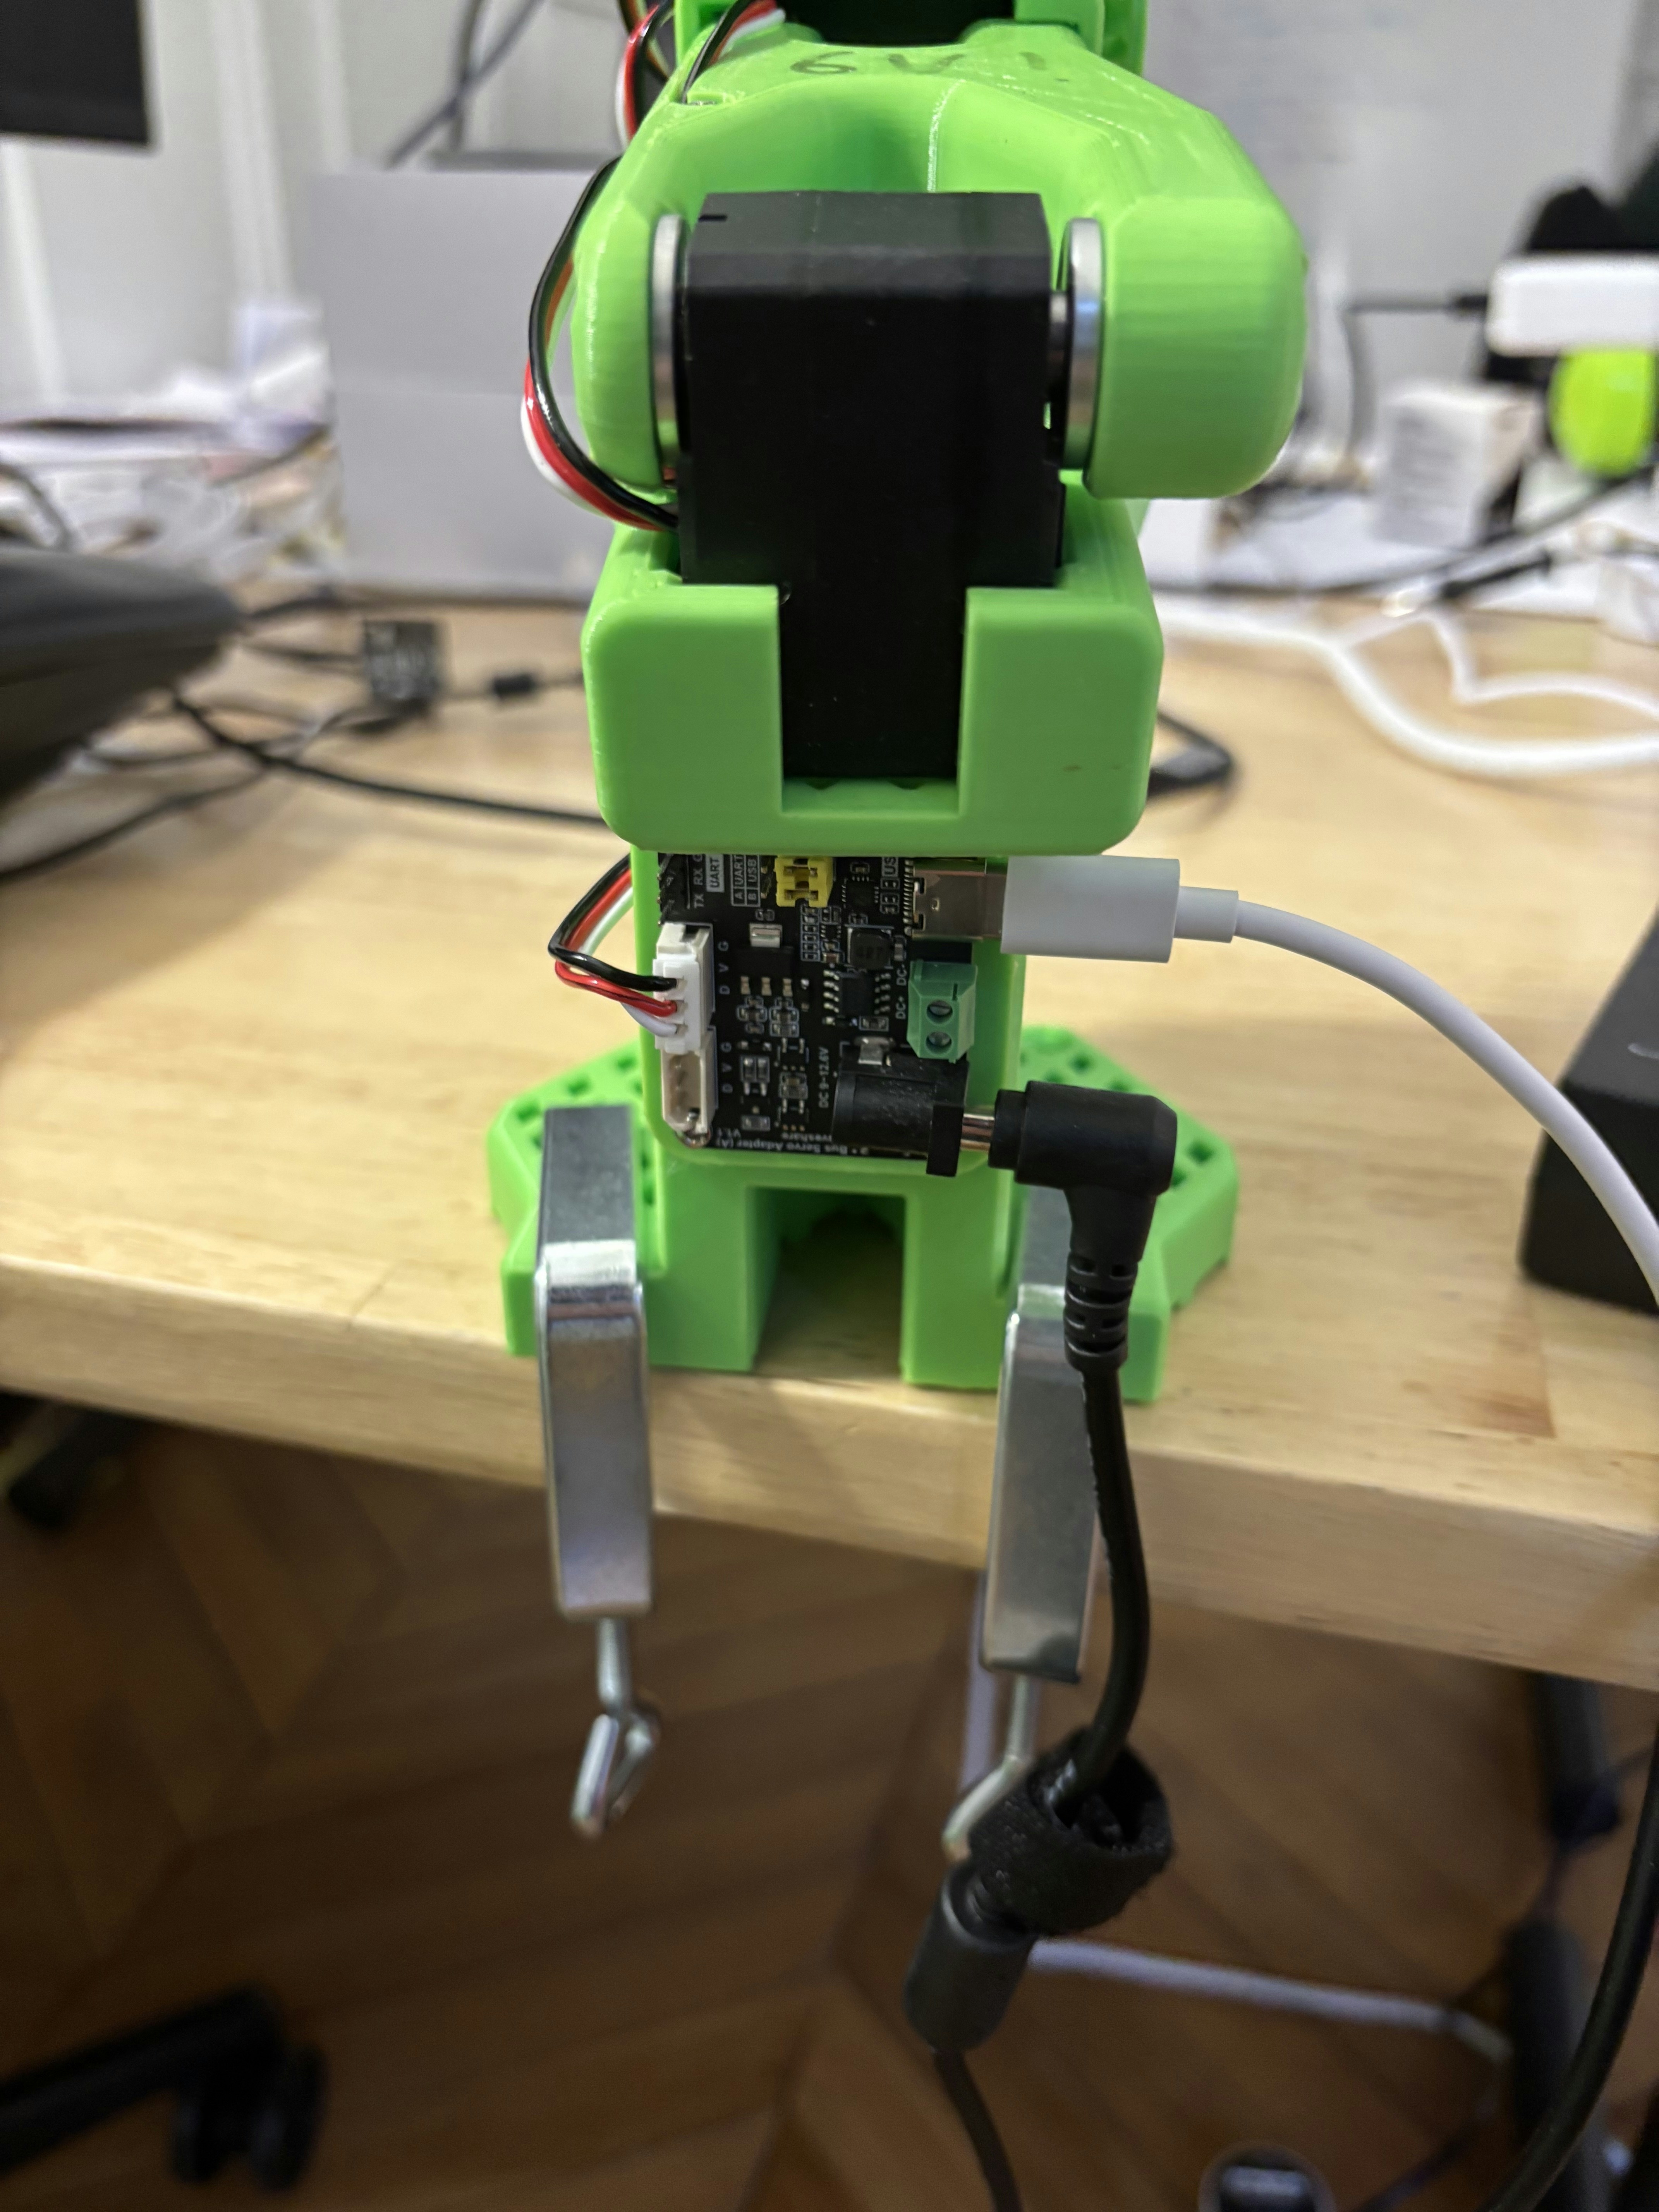
Find a table and fix the SO-100 robot arm using the 2 table clamps in the kit (see image below).
Make sure the arm is securely fastened and won't move. Clear away any clutter that could get in the way of the arm's movement.
## Plug everything together
In this order:
1. Plug the *SO-100 robot arm* into the power supply using the **black** 12V power supply.
2. Plug one end of the **USB-C cable** into the *SO-100 robot arm* and the other into your computer (laptop, raspberry pi, etc).
3. If you have additional cameras, plug them into your computer
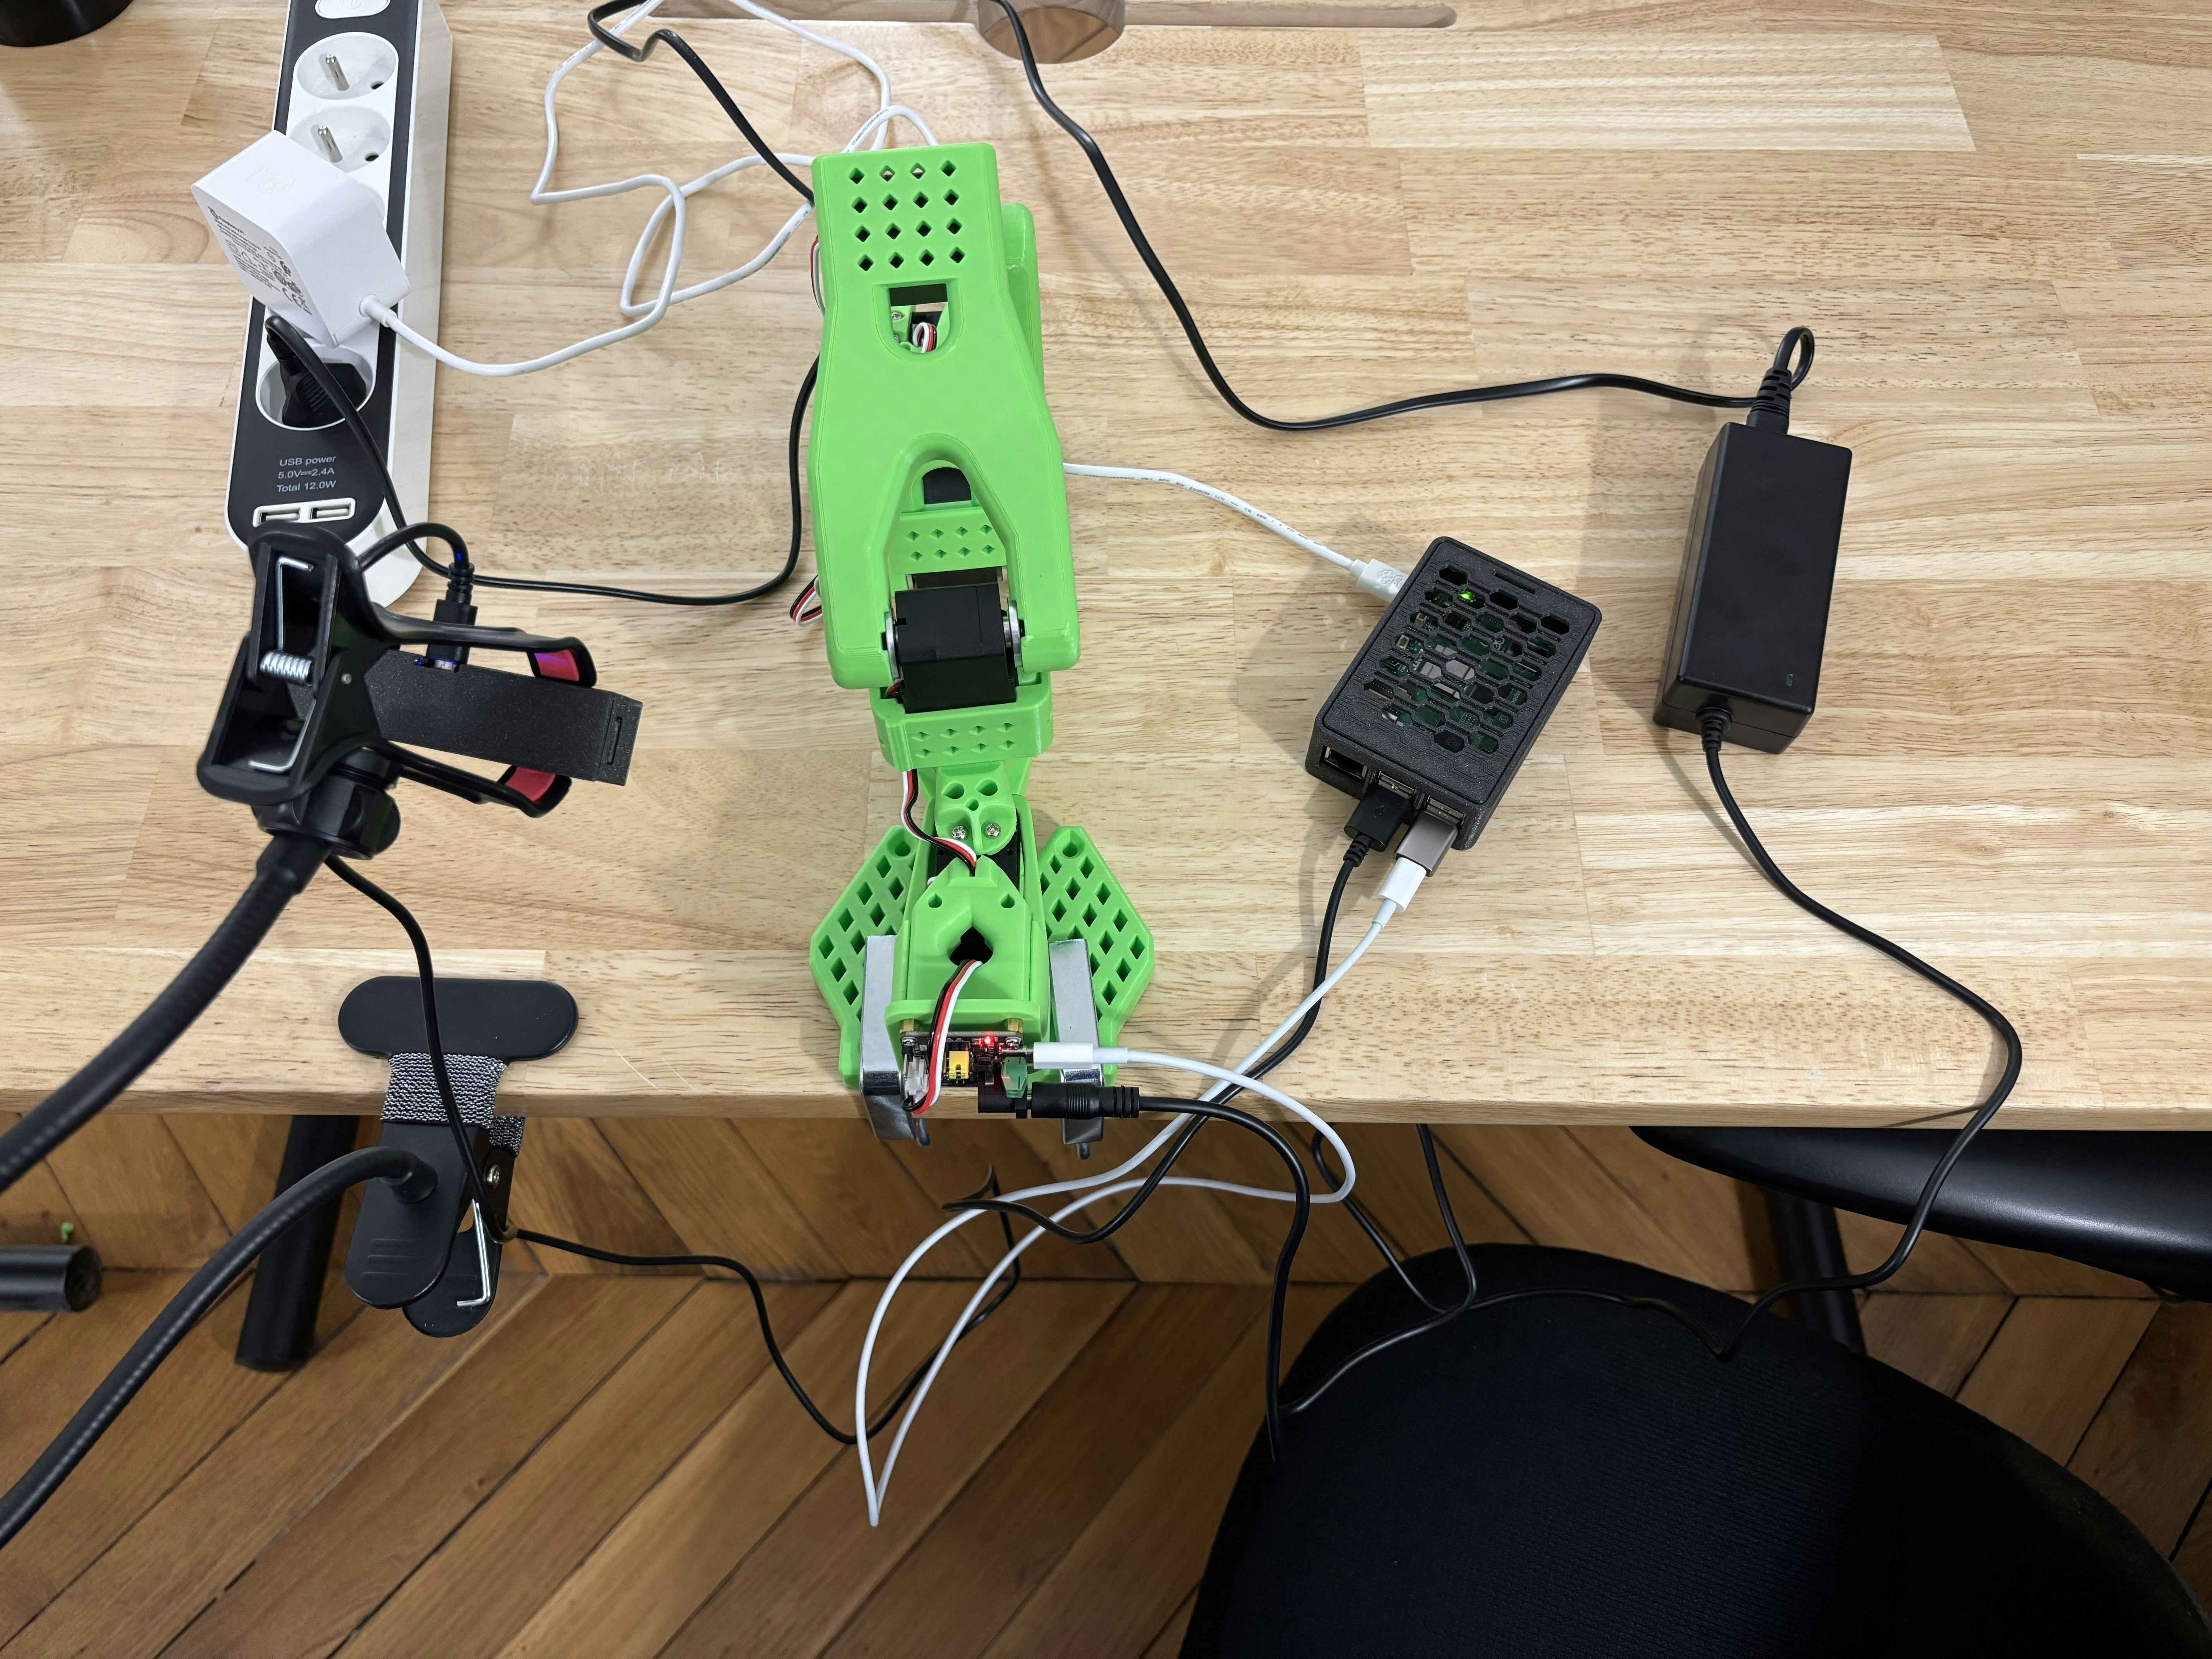
Below is an example of a full setup with a SO-100 arm, a stereoscopic camera plugged on a Raspberry Pi.
## Start phosphobot
Once everything is connected and powered on, run the following command in a terminal to install the phosphobot software:
```bash macOS theme={null}
curl -fsSL https://raw.githubusercontent.com/phospho-app/phosphobot/main/install.sh | bash
```
```bash Linux theme={null}
curl -fsSL https://raw.githubusercontent.com/phospho-app/phosphobot/main/install.sh | sudo bash
```
```powershell Windows theme={null}
powershell -ExecutionPolicy ByPass -Command "irm https://raw.githubusercontent.com/phospho-app/phosphobot/main/install.ps1 | iex"
```
```bash uv (Linux and macOS) theme={null}
# Install uv: https://docs.astral.sh/uv/
curl -LsSf https://astral.sh/uv/install.sh | sh
# Run phosphobot
uvx phosphobot@latest run
```
```powershell uv (Windows) theme={null}
# Install uv: https://docs.astral.sh/uv/
powershell -ExecutionPolicy ByPass -c "irm https://astral.sh/uv/install.ps1 | iex"
# Run phosphobot
uvx phosphobot@latest run
```
Then, fire up the the server:
```bash theme={null}
phosphobot run
```
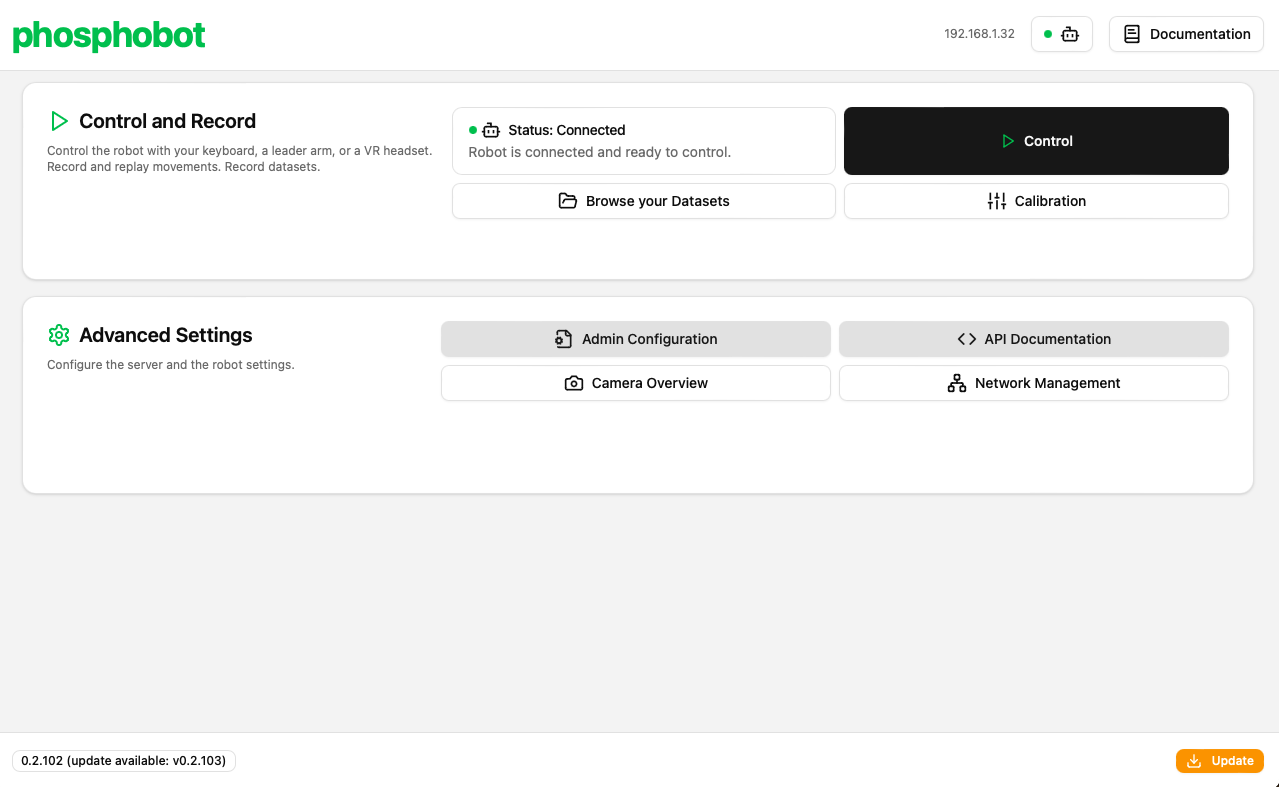
Go to `localhost` in your web browser to access the phosphobot dashboard. Go to **Control** to control your robot using only your keyboard!
## Calibrate the robot
This step is only relevant if you built your own robot arm: the [assembled robots](https://robots.phospho.ai) that we ship are **already calibrated**.
Your SO-100 robot should be automatically detected by the phosphobot software. However, you still need to **calibrate** the robot to make it work properly.
Follow this video guide to calibrate your robot:
Here are detailed written instructions to calibrate your SO-100 robot arm:
1. Go to the page **Calibration** in the dashboard.
2. Make sure to be able to securely catch your robot, as calibration disable torque. This can make your robot fall.
3. Follow the instructions on the screen to calibrate your robot.
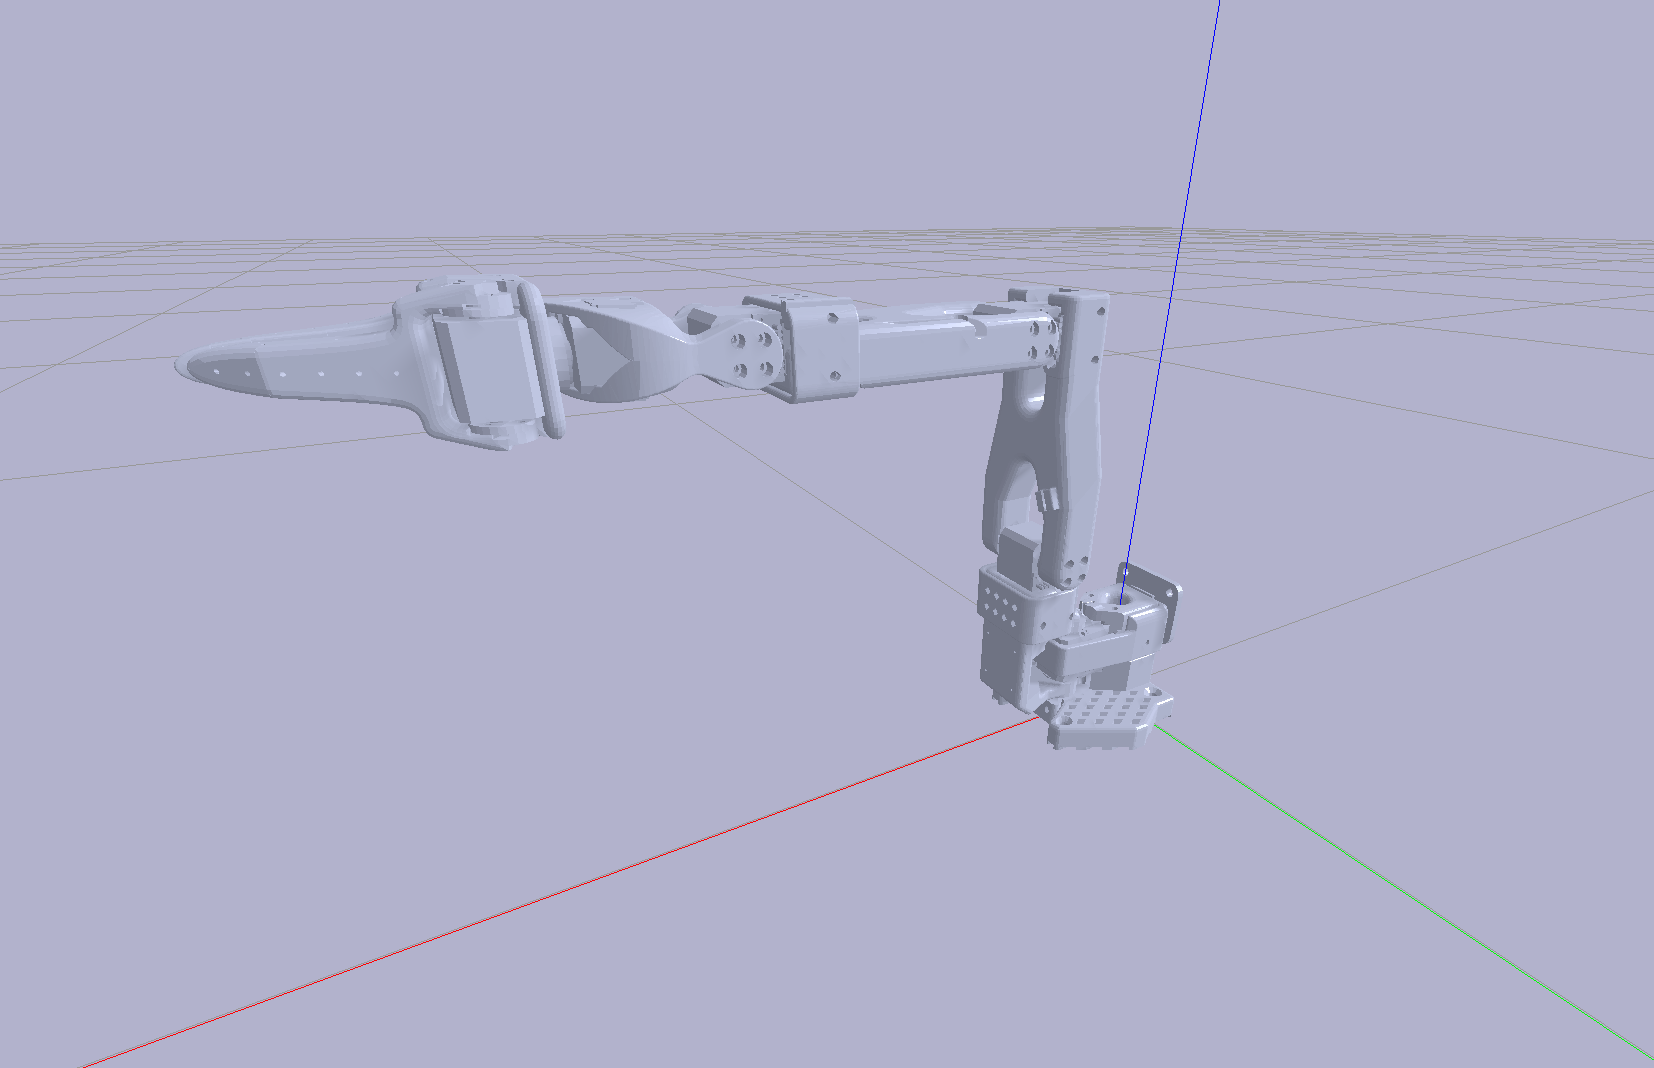
**Position 1:** Arm is facing **forward**. Gripper is fully **closed**.
red is x, green is y, blue is z
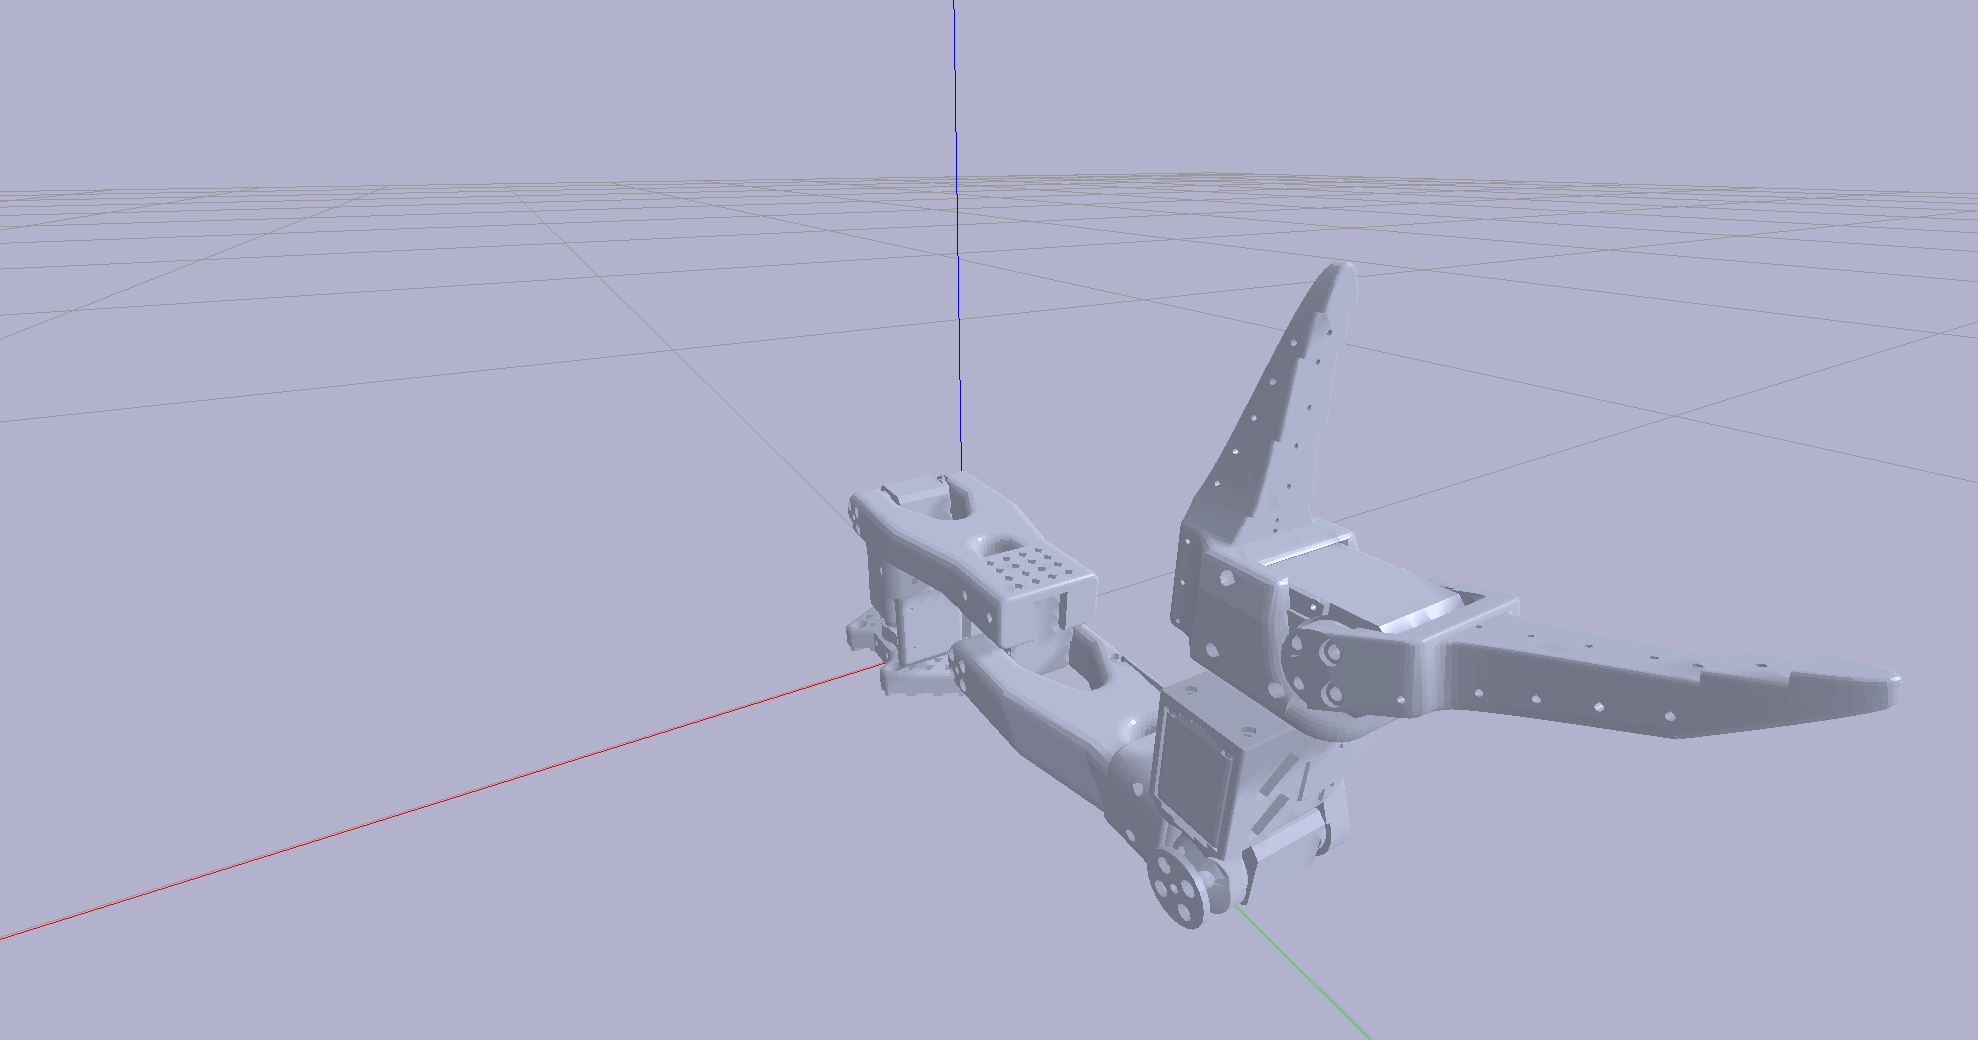
**Position 2:** Arm is twisted to its **left**. Gripper is fully **open**.
red is x, green is y, blue is z
After moving to position 2, **finish** the calibration sequence by clicking the button.
Your calibration is saved in the `~/phosphobot/calibration` folder of your home directory. You can edit this file in a text editor to further refine the calibration. For example, to tune the PID.
### About LeRobot calibration
If you're using LeRobot framework for training, you'll need to calibrate the robot with LeRobot after this phosphobot calibration.
You need first to calibrate with phosphobot, then with LeRobot. The LeRobot calibration process is compatible with phosphobot, but independent. This only needs to be done once.
# Start controlling the robot
Your robot is now ready to receive commands!
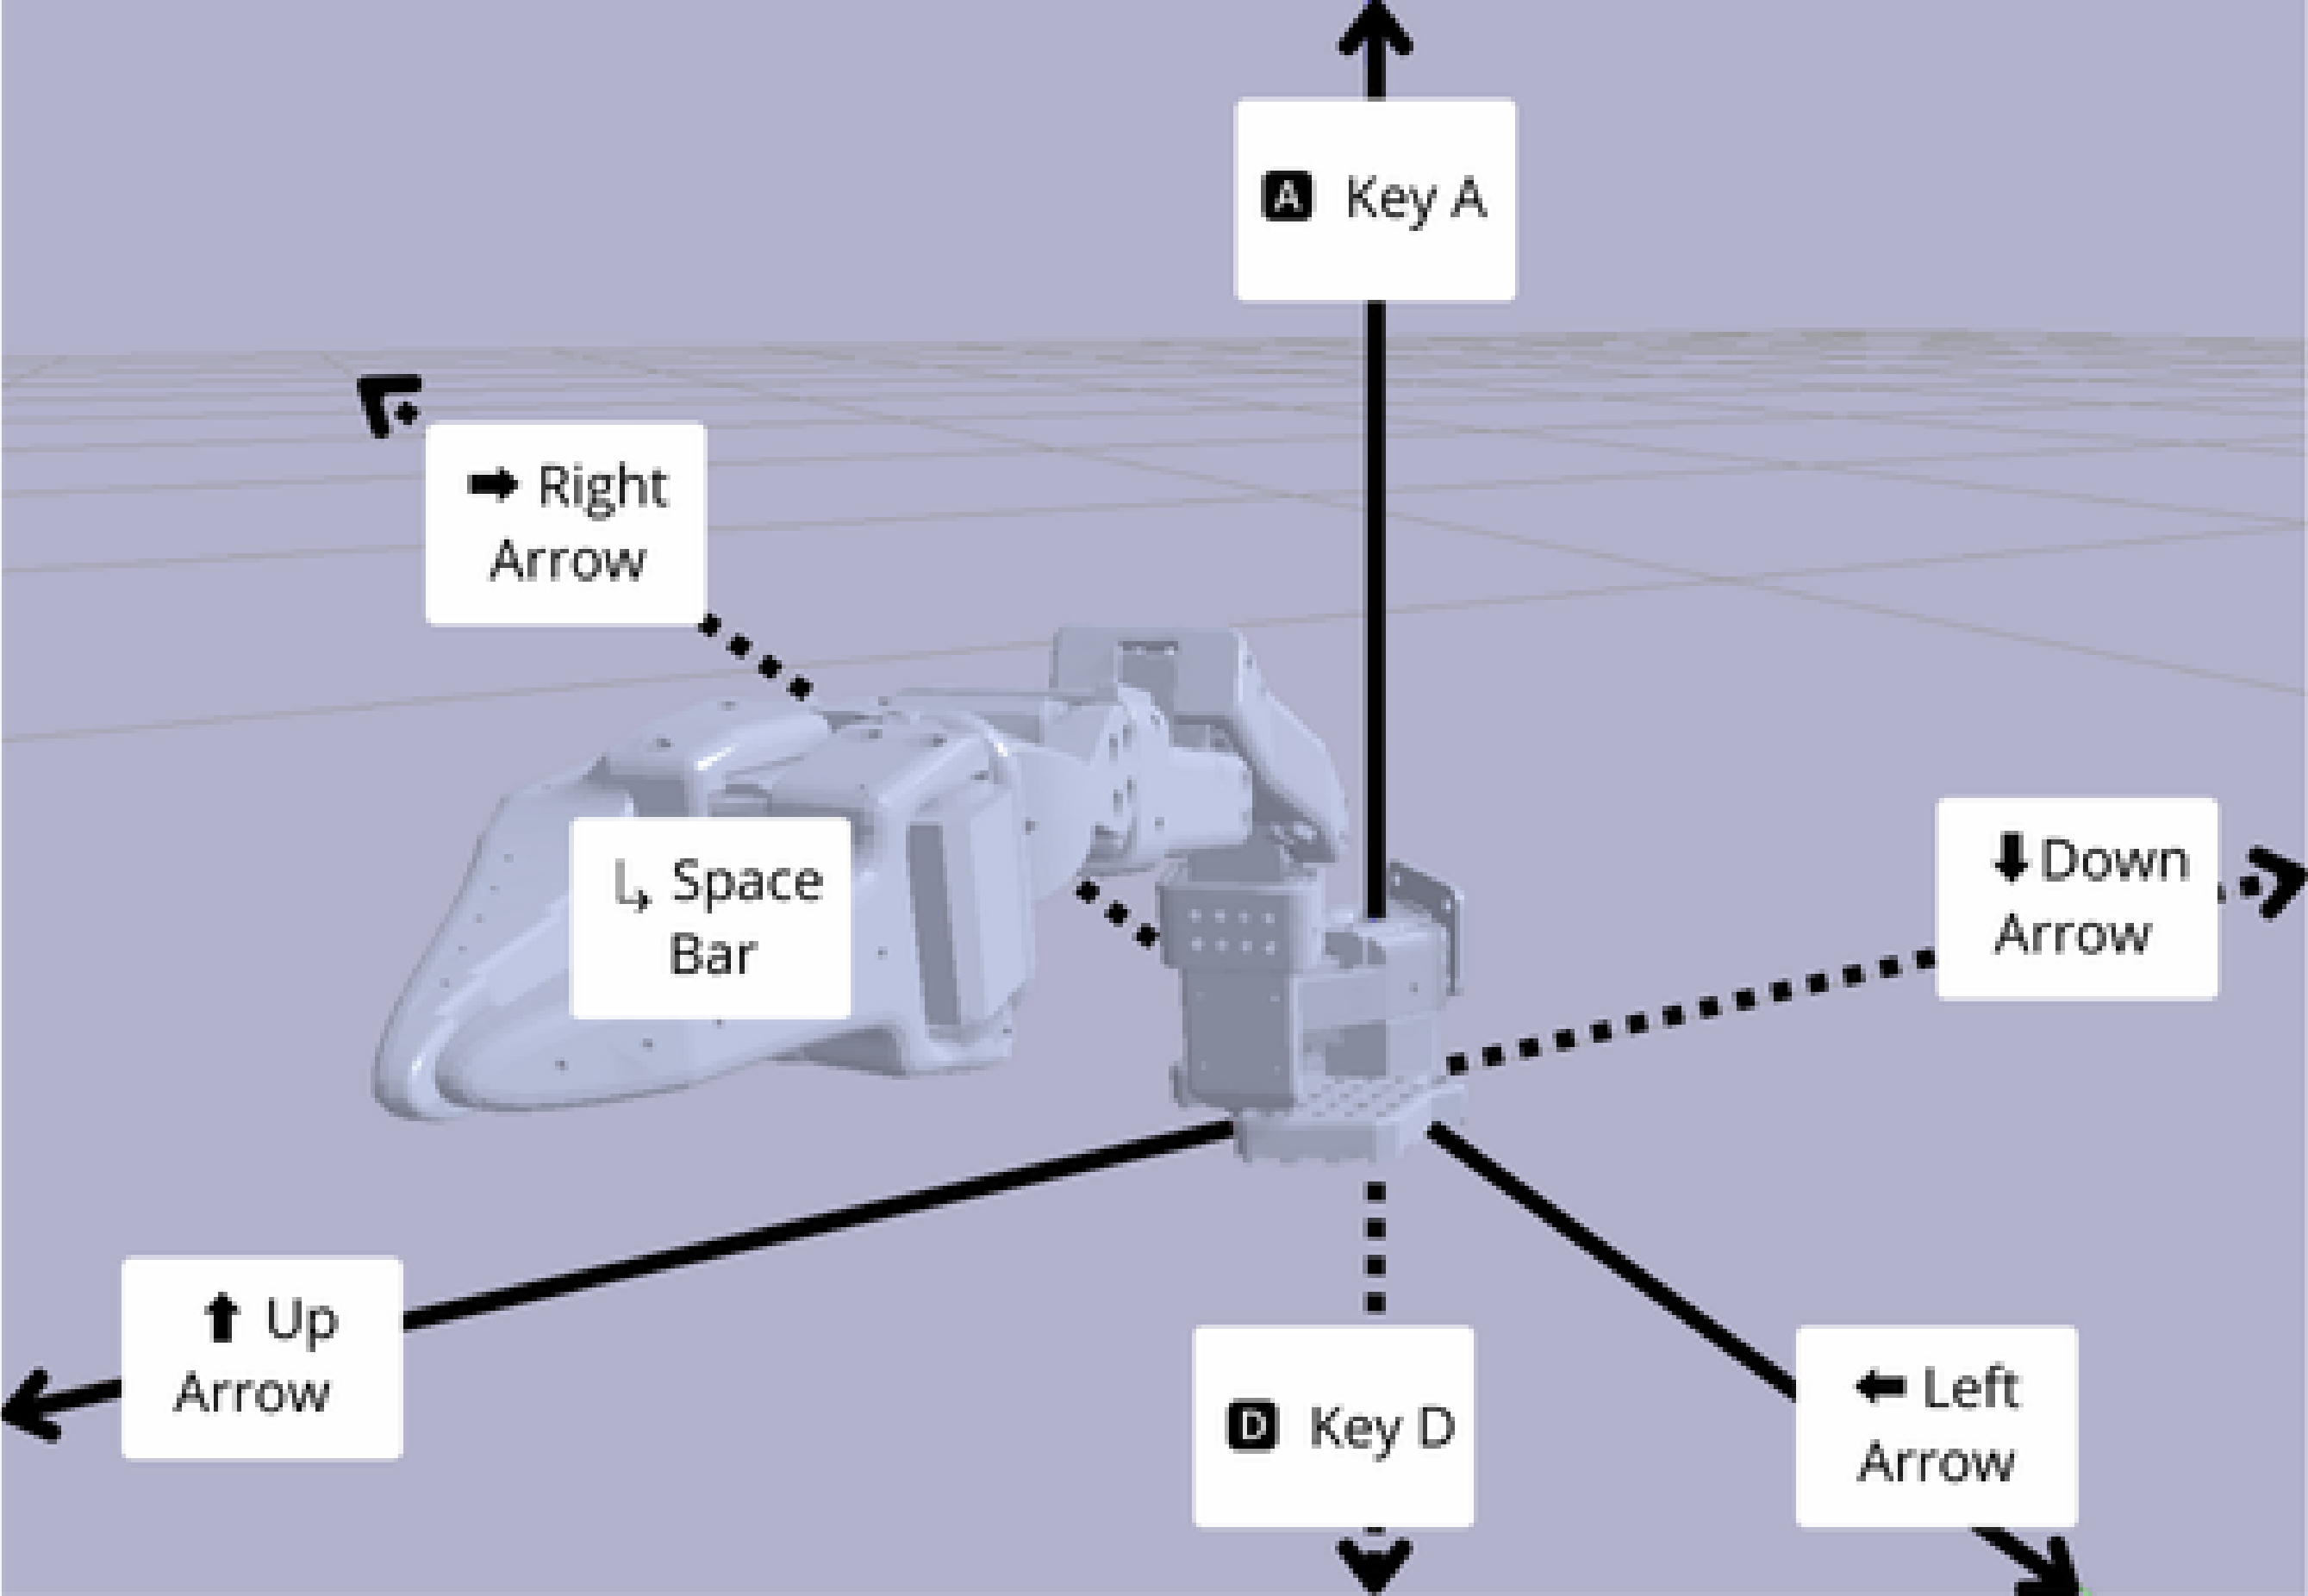
In the dashboard, click the **Control** button to control the robot arm. In the first tab, you can control the robot with the keyboard.
You can also use leader arm control, a gamepad, or a Meta Quest VR headset. [Learn more.](/basic-usage/teleop")
# Next steps
You can now [control your robot](/basic-usage/teleop), [record your first dataset](/basic-usage/dataset-recording) and [train an AI model](/basic-usage/training) to make the robot move by itself.
Teleoperate a real robot
How to record a dataset with your robot
How to train an AI model from a dataset you recorded
 red is x, green is y, blue is z
**Position 2:** Arm is twisted to its **left**. Gripper is fully **open**.
red is x, green is y, blue is z
**Position 2:** Arm is twisted to its **left**. Gripper is fully **open**.
 red is x, green is y, blue is z
After moving to position 2, **finish** the calibration sequence by clicking the button.
red is x, green is y, blue is z
After moving to position 2, **finish** the calibration sequence by clicking the button.
 ## Plug everything together
In this order:
1. Plug the *SO-100 robot arm* into the power supply using the **black** 12V power supply.
2. Plug one end of the **USB-C cable** into the *SO-100 robot arm* and the other into your computer (laptop, raspberry pi, etc).
3. If you have additional cameras, plug them into your computer
Below is an example of a full setup with a SO-100 arm, a stereoscopic camera plugged on a Raspberry Pi.
## Plug everything together
In this order:
1. Plug the *SO-100 robot arm* into the power supply using the **black** 12V power supply.
2. Plug one end of the **USB-C cable** into the *SO-100 robot arm* and the other into your computer (laptop, raspberry pi, etc).
3. If you have additional cameras, plug them into your computer
Below is an example of a full setup with a SO-100 arm, a stereoscopic camera plugged on a Raspberry Pi.
 ## Start phosphobot
Once everything is connected and powered on, run the following command in a terminal to install the phosphobot software:
## Start phosphobot
Once everything is connected and powered on, run the following command in a terminal to install the phosphobot software:
 ## Calibrate the robot
 # Next steps
You can now [control your robot](/basic-usage/teleop), [record your first dataset](/basic-usage/dataset-recording) and [train an AI model](/basic-usage/training) to make the robot move by itself.
# Next steps
You can now [control your robot](/basic-usage/teleop), [record your first dataset](/basic-usage/dataset-recording) and [train an AI model](/basic-usage/training) to make the robot move by itself.