> ## Documentation Index
> Fetch the complete documentation index at: https://docs.phospho.ai/llms.txt
> Use this file to discover all available pages before exploring further.
# Starter pack unboxing (DK2)
> Unbox and set up your phospho starter pack.
In this guide, we will unbox and set up the **phospho starter pack** (DK2).
We are currently taking orders [here](https://robots.phospho.ai).
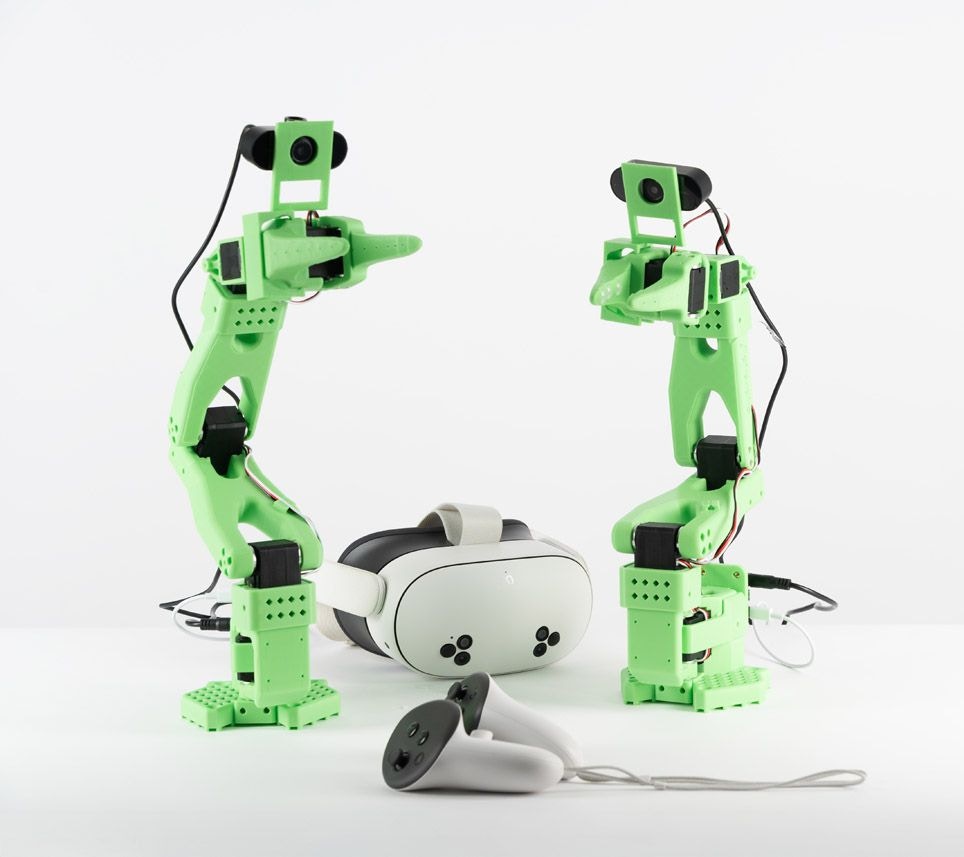
## What's in the box?
phospho dev kits come with EU power plugs.
* **2 Robot arm**
* 2x SO-100 robot arm
* 2x 12V power source (for the arms)
* 2x USB-C to USB-C cable
* 4x Table clamps
* **2 Wrist Cameras**
* 2x Wrist cameras
* 2x Camera cables (USB)
* **Access to the [Meta Quest app](../examples/teleop)** for VR control
## 1. Attach the SO-100 arms
Find a table and fix each SO-100 robot arm using the table clamps in the kit (see image below).
Make sure the arm is securely fastened and won't move. Clear away any clutter that could get in the way of the arm's movement.
## 2. Install the wrist cameras
For safe transport, the wrist cameras are not installed on the robot arms. You don't need screws or special tools to install them, just pop them in the holes on the robot arms.
Please refer to the video below to see how to install the wrist cameras.
If you need to transport the robot arms, you can remove the wrist cameras by pulling them out of the holes.
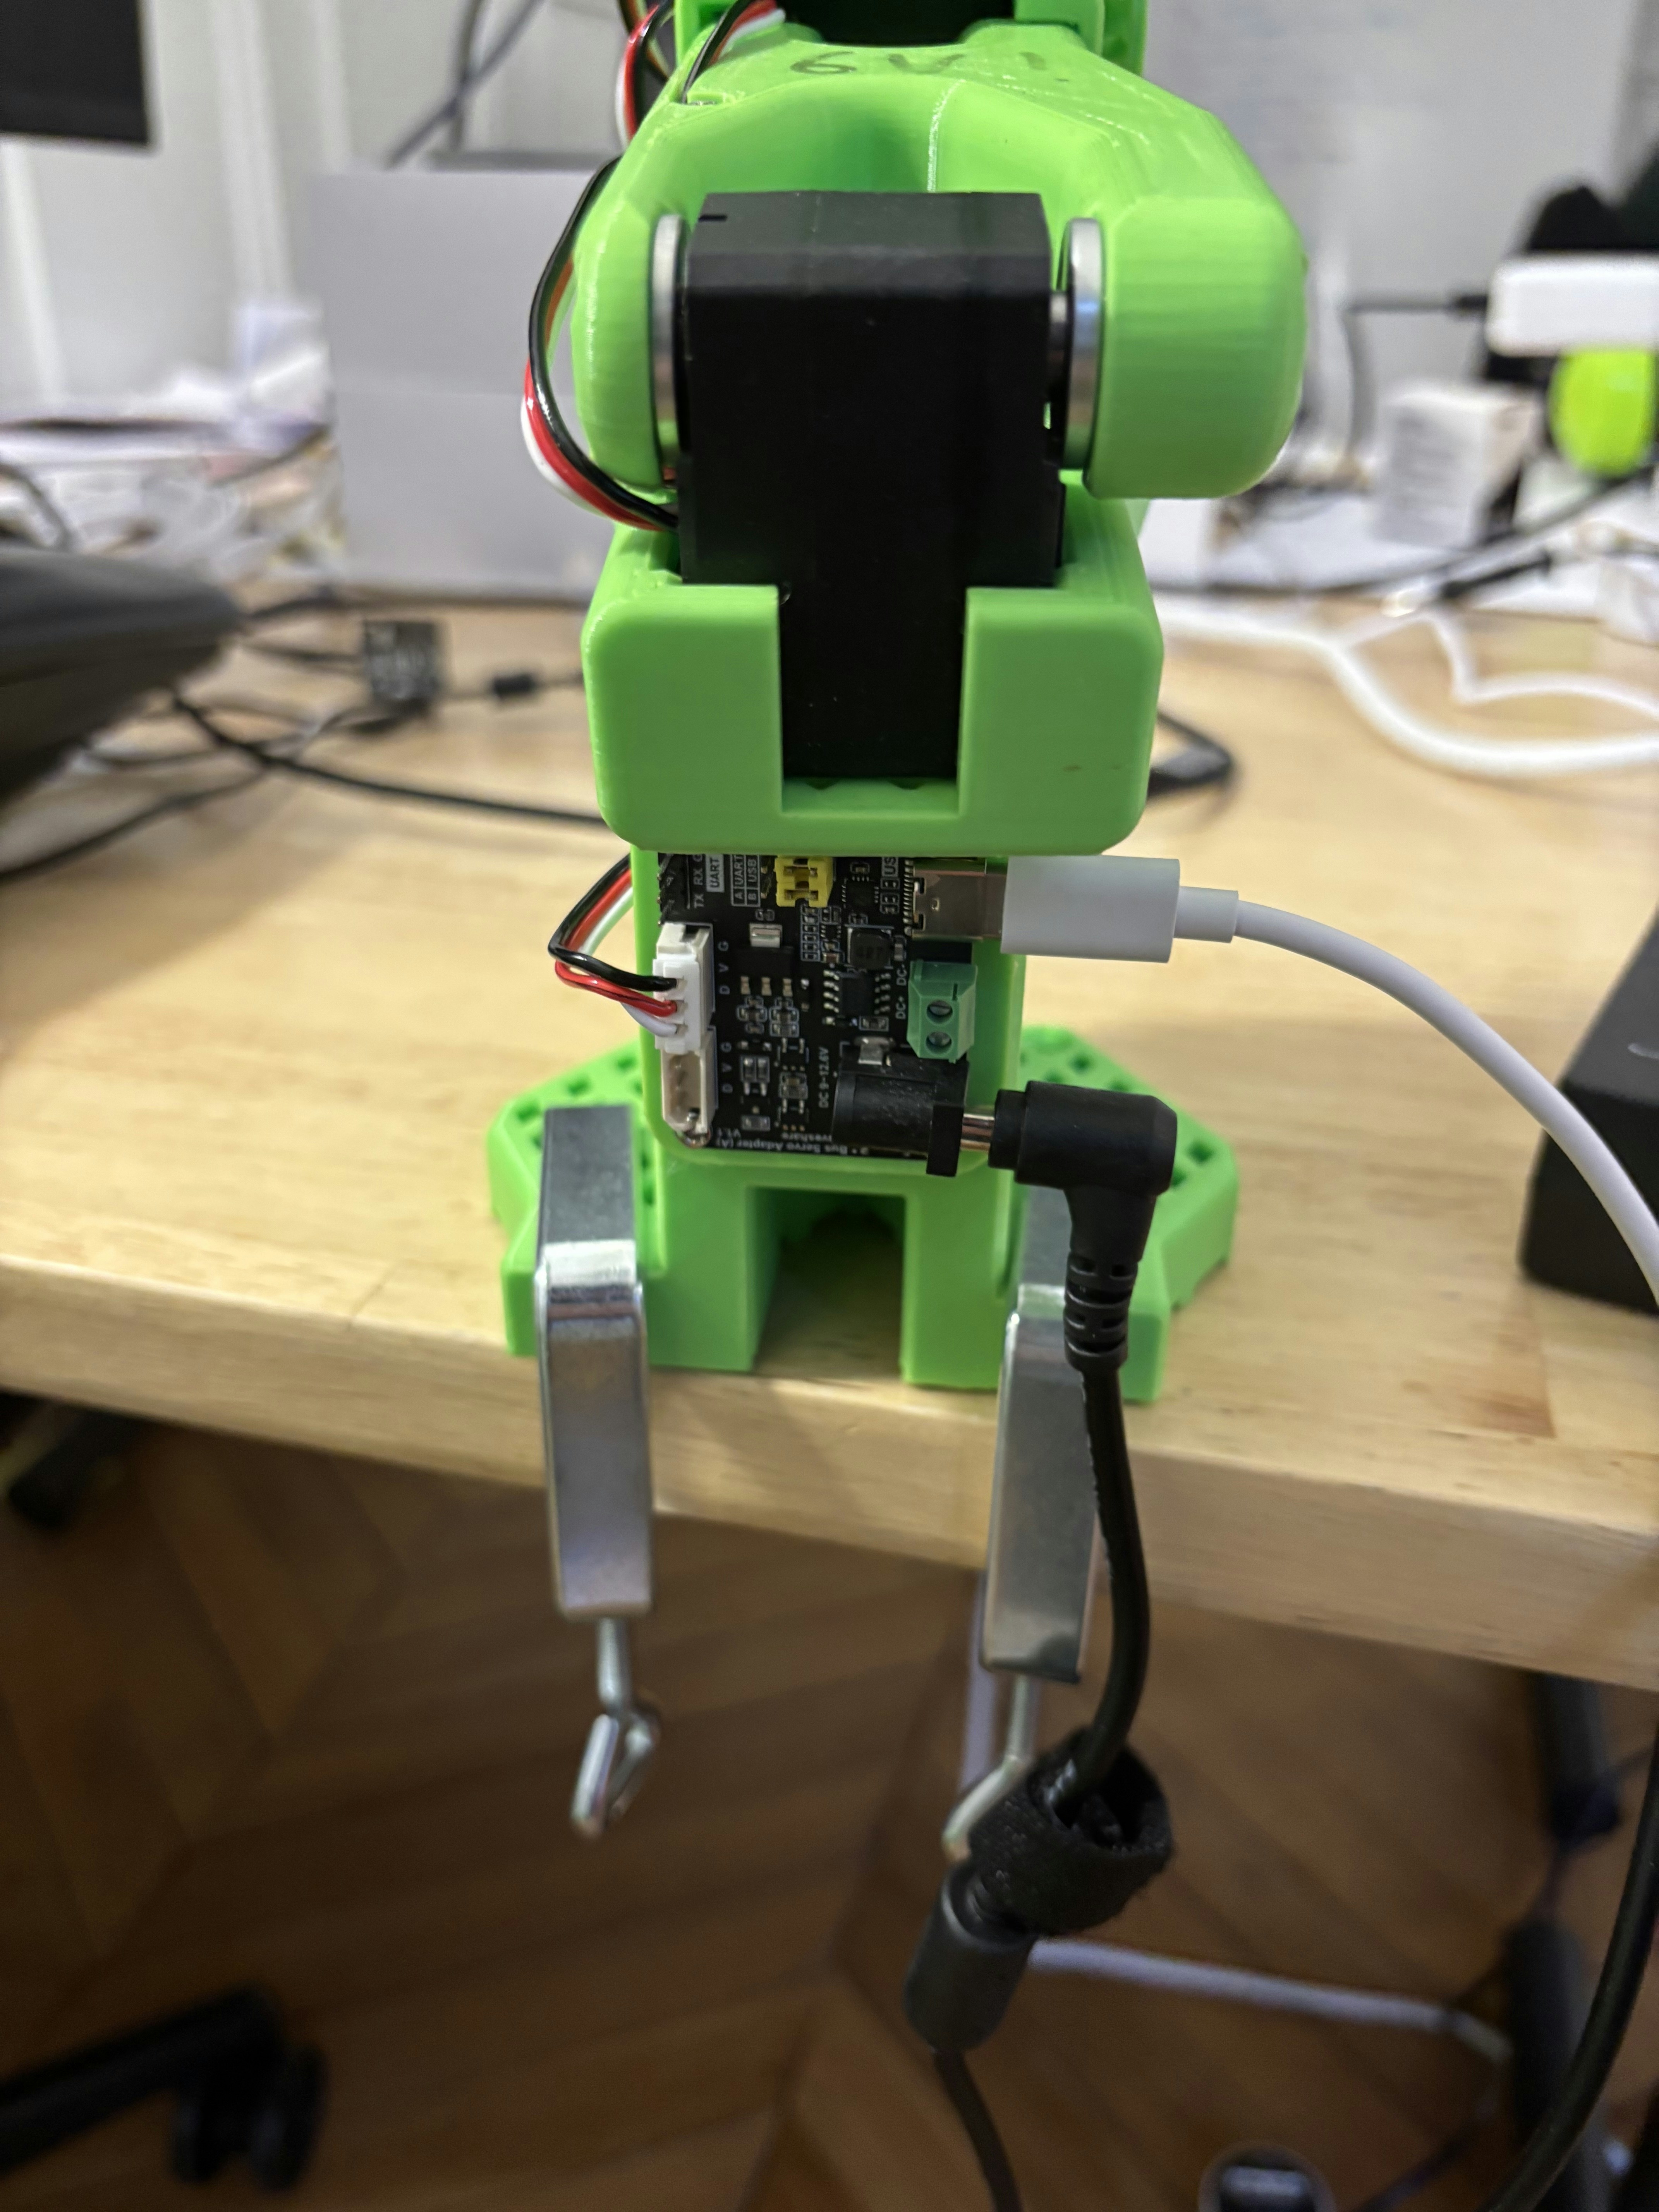
## 3. Plug everything together
In this order:
1. Plug each *SO-100 robot arm* into the power supply using the **black** 12V power supply.
2. Plug each of the **USB-C cable** into the *SO-100 robot arm* and the other into your computer.
3. Plug the cable to the **wrist cameras** and into your computer.
## 4. Install and run the phosphobot software
Once everything is connected and powered on, run the following command in a terminal to install the phosphobot software:
```bash macOS theme={null}
curl -fsSL https://raw.githubusercontent.com/phospho-app/phosphobot/main/install.sh | bash
```
```bash Linux theme={null}
curl -fsSL https://raw.githubusercontent.com/phospho-app/phosphobot/main/install.sh | sudo bash
```
```powershell Windows theme={null}
powershell -ExecutionPolicy ByPass -Command "irm https://raw.githubusercontent.com/phospho-app/phosphobot/main/install.ps1 | iex"
```
```bash uv (Linux and macOS) theme={null}
# Install uv: https://docs.astral.sh/uv/
curl -LsSf https://astral.sh/uv/install.sh | sh
# Run phosphobot
uvx phosphobot@latest run
```
```powershell uv (Windows) theme={null}
# Install uv: https://docs.astral.sh/uv/
powershell -ExecutionPolicy ByPass -c "irm https://astral.sh/uv/install.ps1 | iex"
# Run phosphobot
uvx phosphobot@latest run
```
Then, fire up the the server:
```bash theme={null}
phosphobot run
```
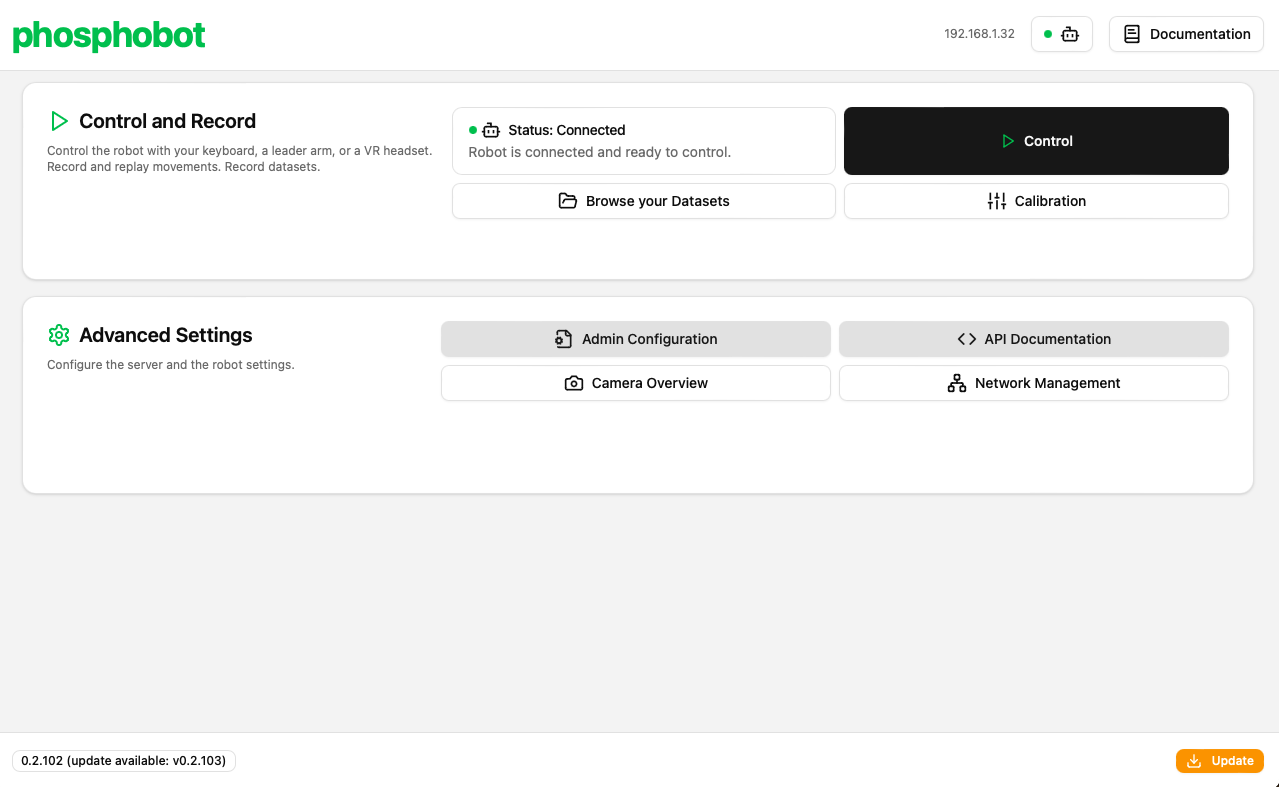
Go to `localhost` in your web browser to access the phosphobot dashboard. Go to **Control** to control your robot using only your keyboard!
## What's next?
Teleoperate a real robot
How to record a dataset with your robot
How to train an AI model from a dataset you recorded
Join the Discord to ask questions, get help from others and get updates
 ## What's in the box?
 ## 2. Install the wrist cameras
For safe transport, the wrist cameras are not installed on the robot arms. You don't need screws or special tools to install them, just pop them in the holes on the robot arms.
Please refer to the video below to see how to install the wrist cameras.
If you need to transport the robot arms, you can remove the wrist cameras by pulling them out of the holes.
## 3. Plug everything together
In this order:
1. Plug each *SO-100 robot arm* into the power supply using the **black** 12V power supply.
2. Plug each of the **USB-C cable** into the *SO-100 robot arm* and the other into your computer.
3. Plug the cable to the **wrist cameras** and into your computer.
## 4. Install and run the phosphobot software
Once everything is connected and powered on, run the following command in a terminal to install the phosphobot software:
## 2. Install the wrist cameras
For safe transport, the wrist cameras are not installed on the robot arms. You don't need screws or special tools to install them, just pop them in the holes on the robot arms.
Please refer to the video below to see how to install the wrist cameras.
If you need to transport the robot arms, you can remove the wrist cameras by pulling them out of the holes.
## 3. Plug everything together
In this order:
1. Plug each *SO-100 robot arm* into the power supply using the **black** 12V power supply.
2. Plug each of the **USB-C cable** into the *SO-100 robot arm* and the other into your computer.
3. Plug the cable to the **wrist cameras** and into your computer.
## 4. Install and run the phosphobot software
Once everything is connected and powered on, run the following command in a terminal to install the phosphobot software:
 ## What's next?