Don’t have a dataset? Use one of ours:
phospho-ai/so100-tictactoeTrain GR00T-N1-2B in one click from the phosphobot dashboard
You can fine-tune Nvidia GR00T-N1-2B on your dataset right from the phosphobot dashboard. This is the easiest way to train a AI robotics model.- Launch the phosphobot server and go to the phosphobot dashboard in your browser: http://localhost
- Create a phospho account or log in by clicking on the Sign in button in the top right corner.
- (If not already done) Add your Hugging Face token in the Admin Settings tab with Write authorization. This will sync your datasets to Hugging Face. Then, record a dataset using teleoperation. Read the full guide here.
Garbage in, garbage out. Our tests show that training works with about 30
episodes. It’s better for the task to be specific. Have good lighting and
similar setup.
- In the AI Training and Control section, enter the the name of your dataset on Hugging Face (example:
PLB/simple-lego-pickup-mono-2).
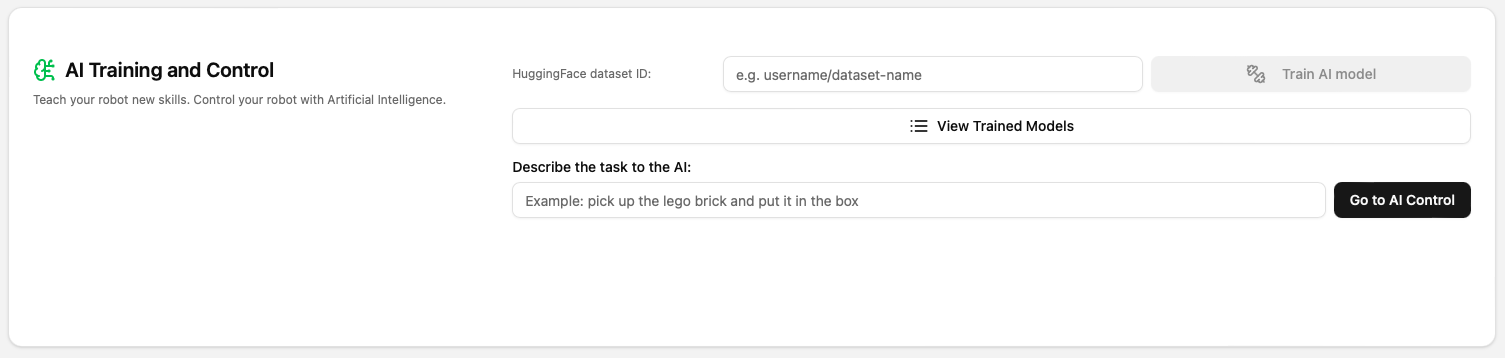
- Hit the Train AI Model button. Your model starts training. Training can take up to 3 hours. Follow the training using the button View trained models.
phospho-app/YOUR_DATASET_NAME-A_RANDOM_ID.
Next up, you can start controlling your robot with the trained model.
Advanced training options
Advanced training options
You can add you Weights & Biases token to track your training metrics. Go to the Admin Settings tab and add your WandB token (get your token here).You can also tweak the training parameters. To do so, you must have your phosphobot server running and being logged in in your dashboard.
Then, use the /training/start-training endpoint to pass more training parameters.
How to train the ACT (Action Chunking Transformer) model with LeRobot?
The ACT model is a transformer-based model that learns to chunk actions in a sequence. It is trained on a dataset of action sequences and their corresponding chunked actions. LeRobot is a research-oriented library by Hugging Face that provides a simple interface to train AI models. It is still a work in progress, but it is already very powerful. Follow our guide to train the ACT model on your dataset.Train your ACT model with LeRobot
Train your ACT model with LeRobot
How to train Pi0.5 (Pi-Zero point five) model with the SO-100 robot arm?
Pi0.5 is a powerful VLA (Vision Language Action model) by Physical Intelligence. They released an open weight model that can be trained on your own datasets. This VLA promises open world generalization and requires lots of data to properly train, think datasets of several hours. You can still use phosphobot to fine-tune the Pi0.5 model on your own dataset. We will use the phosphobot cloud for this. Just head over to the AI training tab on phosphobot. It should look a little something like this.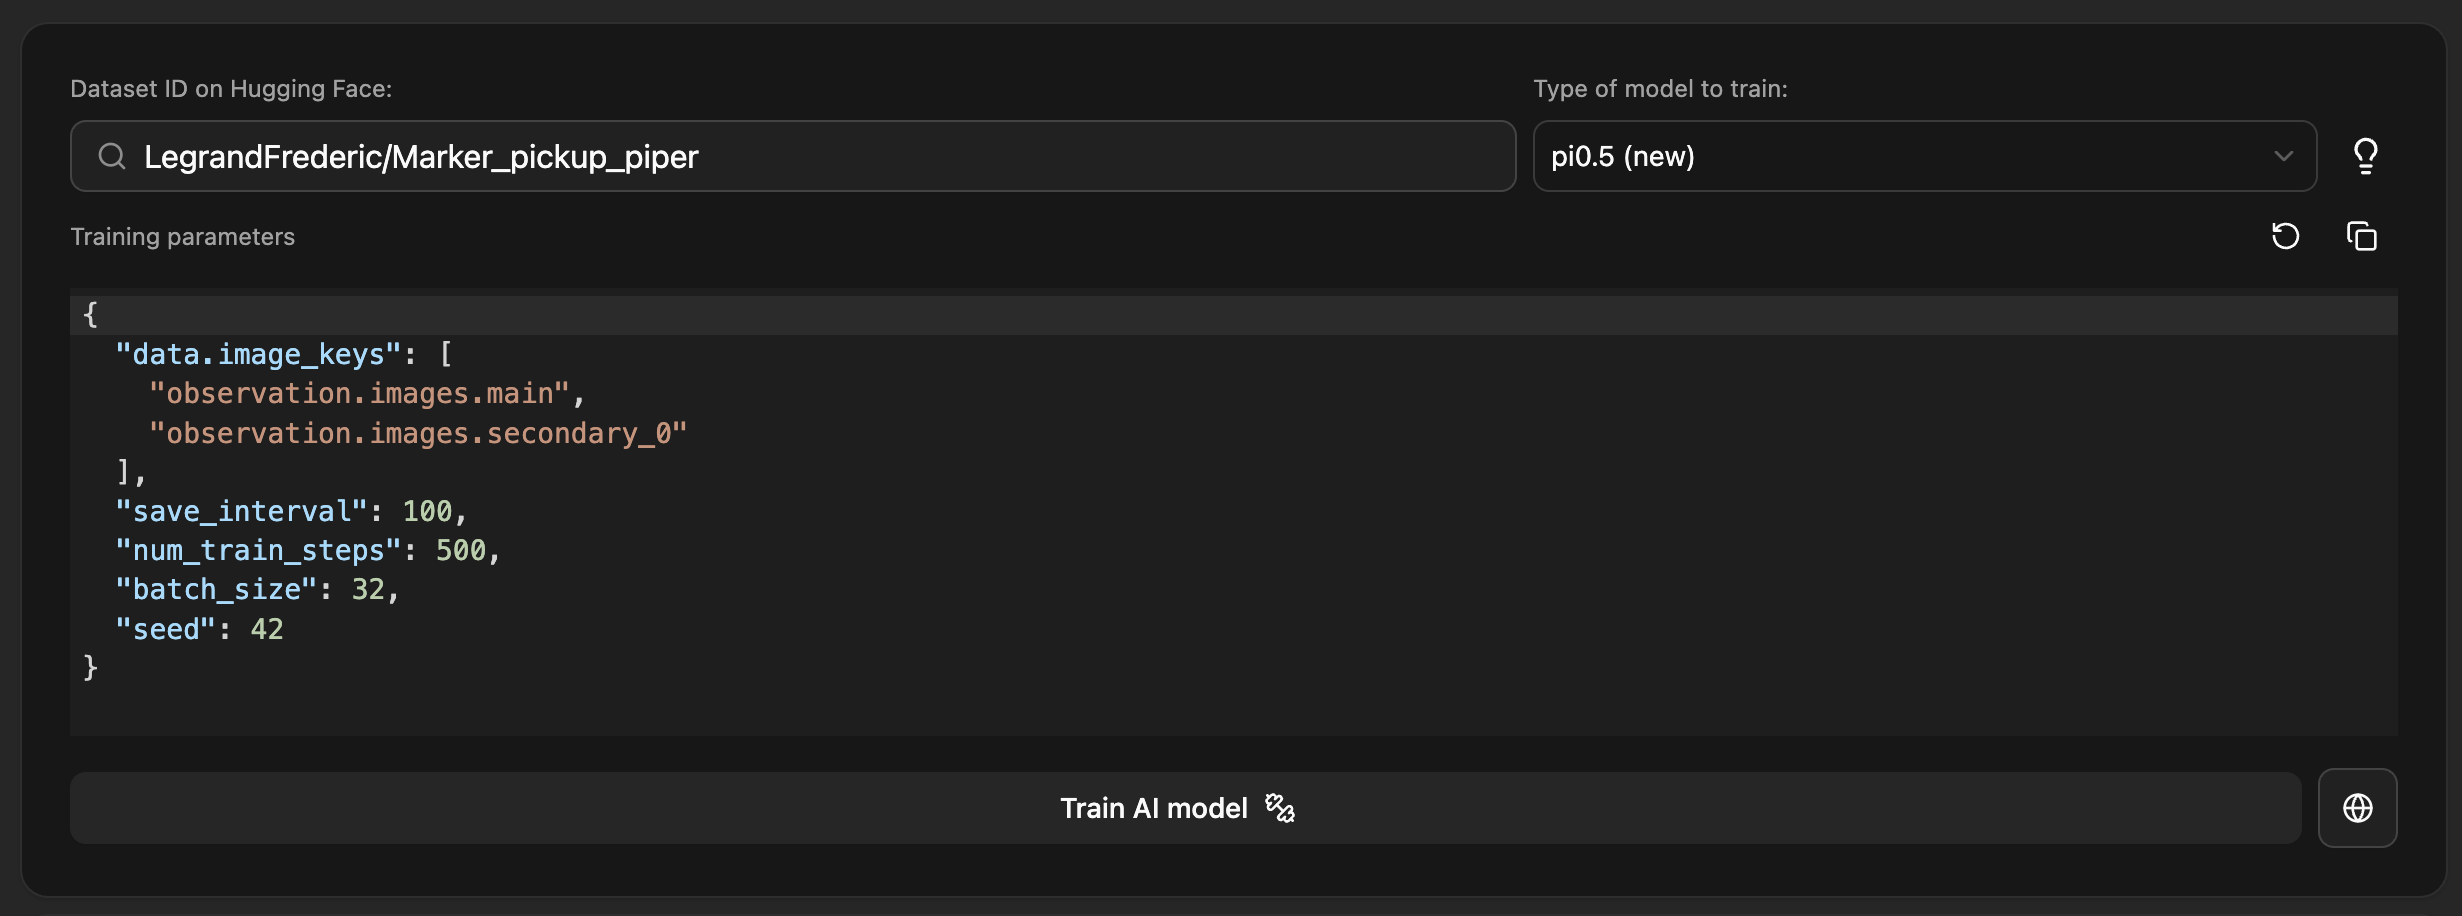
LegrandFrederic/Marker_pickup_piper.
Then, select the Pi0.5 model from the dropdown menu in the upper right.
Change the training parameters such as the image keys to match your dataset. If your dataset only contains one camera, you should set the image keys to ["image.name.in.the.dataset"], most likely ["observation.images.main"] if you recorded it with phosphobot.
Pro tips:
- Set your wandb token in the admin panel to track your training metrics.
- Use a dataset with at least 15 minutes of data.
- Make sure to set a prompt when recording your dataset.
Next steps
Test the model you just trained on your robot. See the Use AI models page for more information.Use a robotics AI model
Let a trained AI model control your robot