Get Your SO-101 Robot Arms
The SO-101 is a robot setup consisting of two 6-DOF arms (5 DOF body, 1 DOF gripper). One of the robot arms is the “leader” arm, and the other is the “follower” arm. The operator moves the leader arm, and the follower arm mimics the movements. It’s a popular setup for teleoperation and imitation learning in AI robotics. The SO-101 robot arms are open source, and you can build them using off-the-shelf components and 3D-printed parts. If you’re looking to buy pre-assembled SO-101 robot arms, with cameras and software, you can get a starter pack on our shop.SO-100 vs. SO-101
The differences between the SO-100 and SO-101 are subtle. Software compatible with the SO-100 will work with the SO-101, but there are some improvements in the SO-101.- SO-101 3D printed parts are easier to assemble. The base part no longer requires a small screwdriver, the wrist is easier to 3D print, you can’t rotate the wrist more than 360 degrees, and the wires are outside. This makes maintenance easier and assembly faster.
- To assemble the SO-101 leader arm, it is now recommended to keep the gears in the motors. The gears of the leader arm have different gear ratios.
Assembly Guide for the SO-101
A video tutorial is available to guide you through the assembly of the SO-101 follower arm. The assembly for the leader arm is similar. Note that the leader and follower arms use motors with different gear ratios to ensure the leader is easy to move while still supporting its weight.- Parts List & 3D Models: https://github.com/TheRobotStudio/SO-ARM100
- Motor Configuration: https://github.com/phospho-app/phosphobot/tree/main/scripts/feetech
Secure the SO-101 Arms
Choose a stable surface and firmly attach both the leader and follower SO-101 robot arms using the provided table clamps. Separate them by about 50cm to ensure they can move freely without colliding.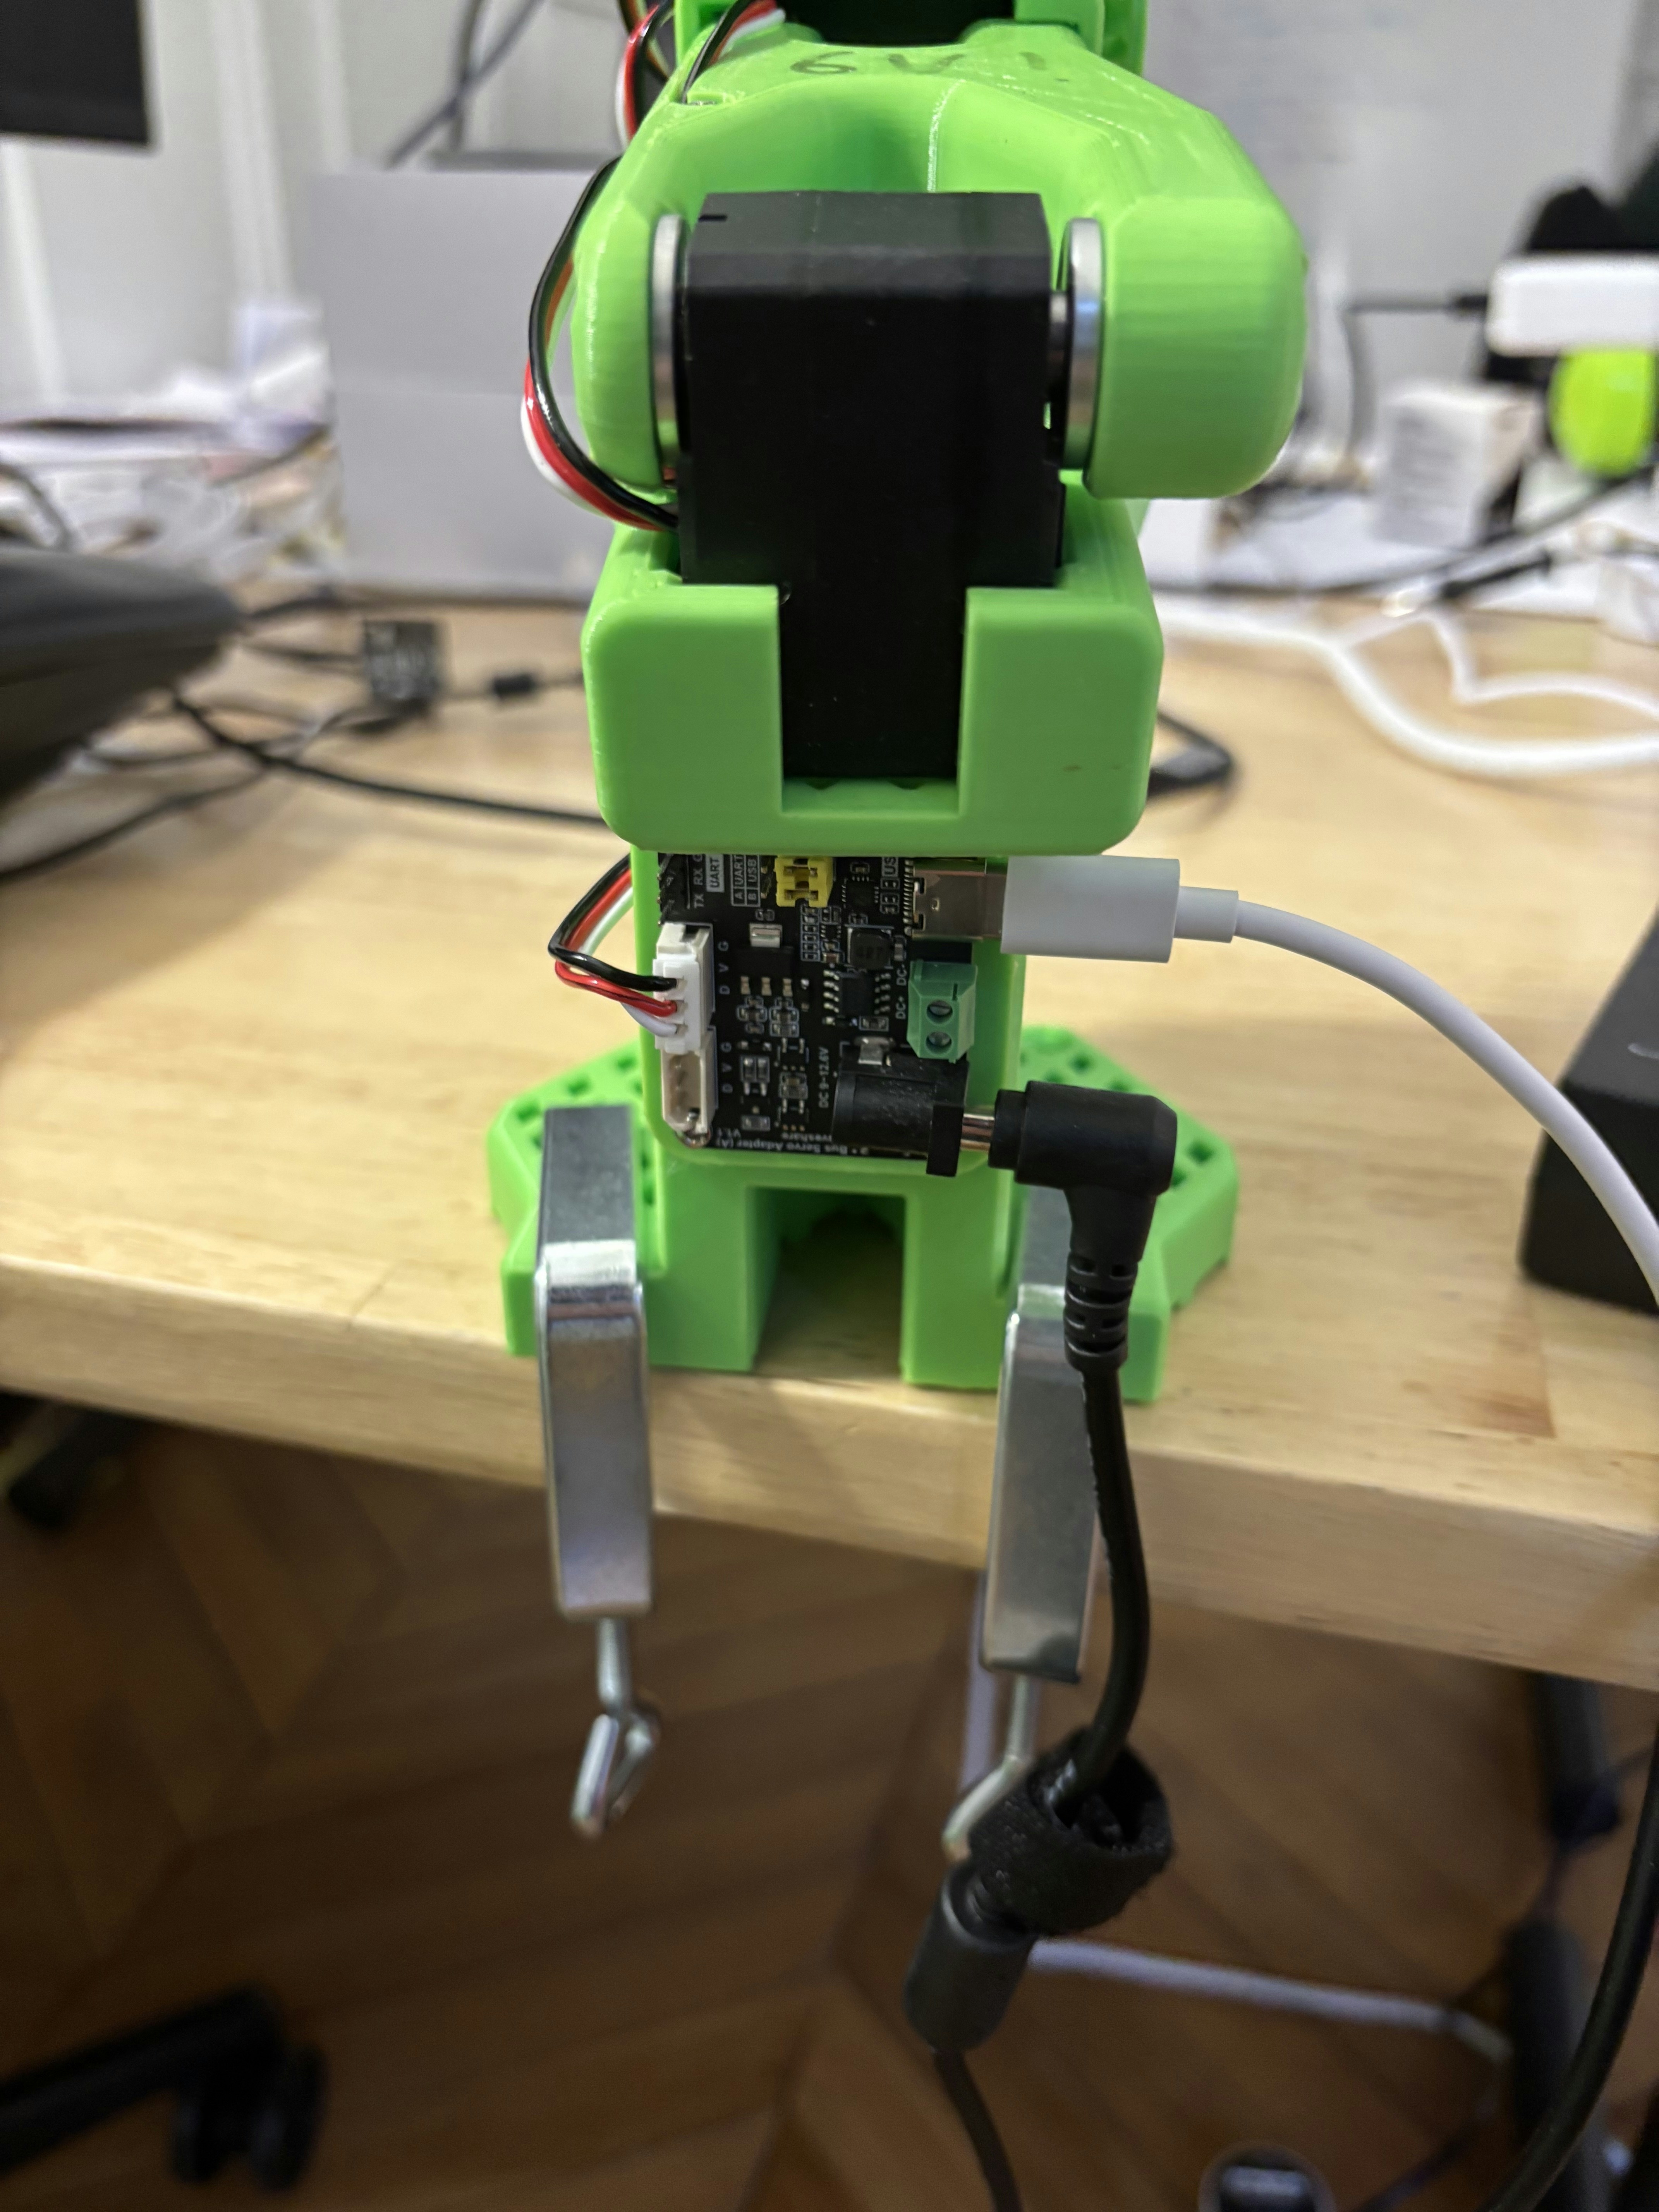
Connecting the Components
Follow this sequence to connect your setup:- Connect both the leader and follower arms to their power supplies. Make sure the voltage matches the specifications of the motors (6V or 12V depending on the motors you use).
- For each arm, plug one end of a USB-C cable into the arm’s controller and the other end into your computer (e.g., laptop, Raspberry Pi).
- Connect any additional cameras to your computer.

Start phosphobot
With all components connected and powered on, open a terminal and run the following command to install the phosphobot software:localhost in your web browser to access the phosphobot dashboard, where you can find the Control section to operate your robot with the leader arm.
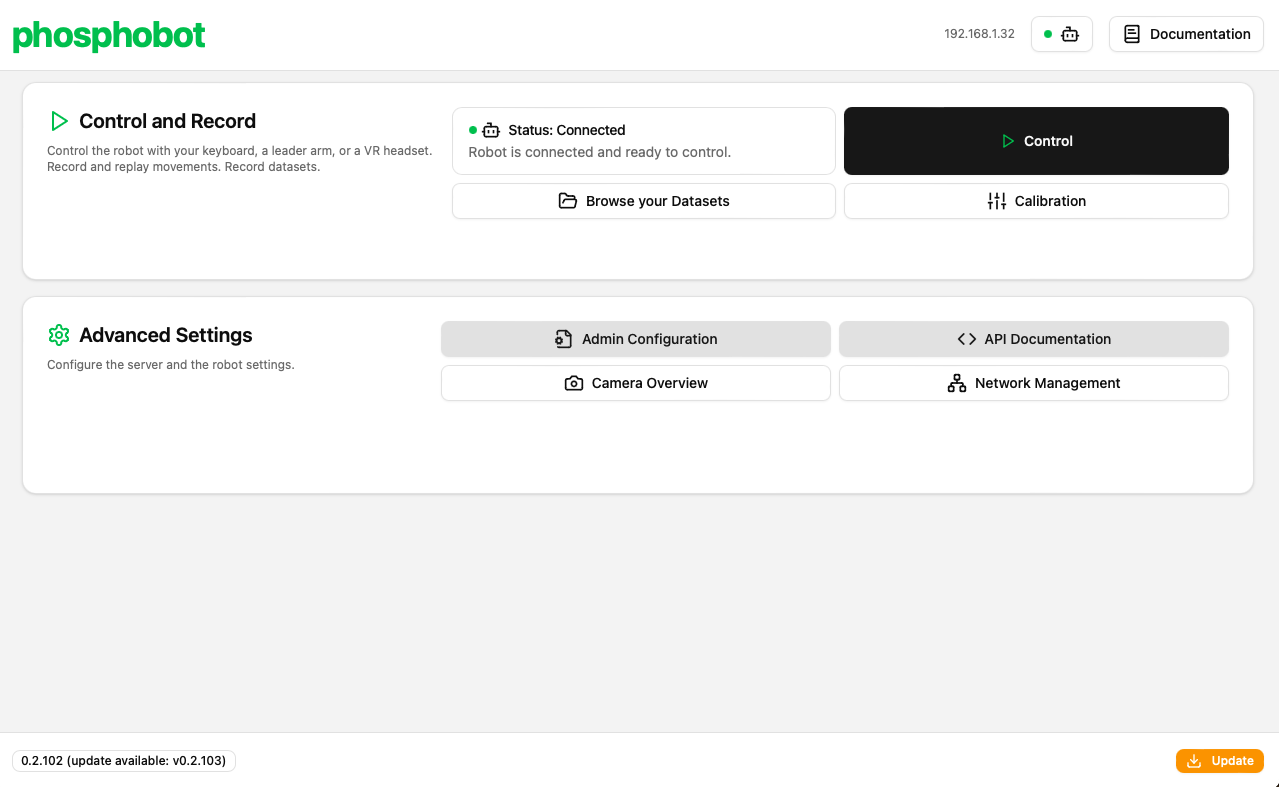
Calibrating the Robot Arms
If you purchased pre-assembled robots, they should already be calibrated. This step is for those who have built their own arms.
- You will need to calibrate each arm separately.
- Navigate to the Calibration page in the dashboard.
- Be prepared to securely hold the arm you are calibrating, as the process will disable motor torque, which could cause it to fall.
- Follow the positions in the video to calibrate each robot arm one by one.
~/phosphobot/calibration folder in your home directory, where you can manually edit the file for finer adjustments.
About LeRobot calibration
If you’re using the LeRobot framework for training, you’ll need to calibrate the robot with LeRobot after this phosphobot calibration. You need to first calibrate with phosphobot, then with LeRobot. The LeRobot calibration process is compatible with phosphobot, but independent. This only needs to be done once.Why is this the case?This is because LeRobot calibrates a SO-101 by moving the arm to the maximum and minimum positions of each joint. Then, LeRobot saves the min and max limits inside the servomotors. The servos can’t move outside these limits.phosphobot, on the other hand, sets the “first calibration position” as the position zero of each servo. The min and max limits are not updated. Because of this, the LeRobot’s min and max limits keep their old values, and the servos can’t move outside of these stale ranges.To solve this, you need to re-calibrate the robot with LeRobot after calibrating with phosphobot to ensure that the min and max limits are correct. The calibrations are compatible, but independent.
Controlling the Robot
Your robot is now ready for operation! From the dashboard, select Control then the Leader arm tab to control the follower arm by moving the leader arm. Y You can also use Keyboard Control to manipulate the robot arm using your keyboard, a gamepad, or a Meta Quest VR headset. Learn more.
Next Steps
You are now set to explore more advanced functionalities:Control your robot
Teleoperate a real robot
Record a dataset
How to record a dataset with your robot
Train an AI model
How to train an AI model from a dataset you recorded